Temperature Controller
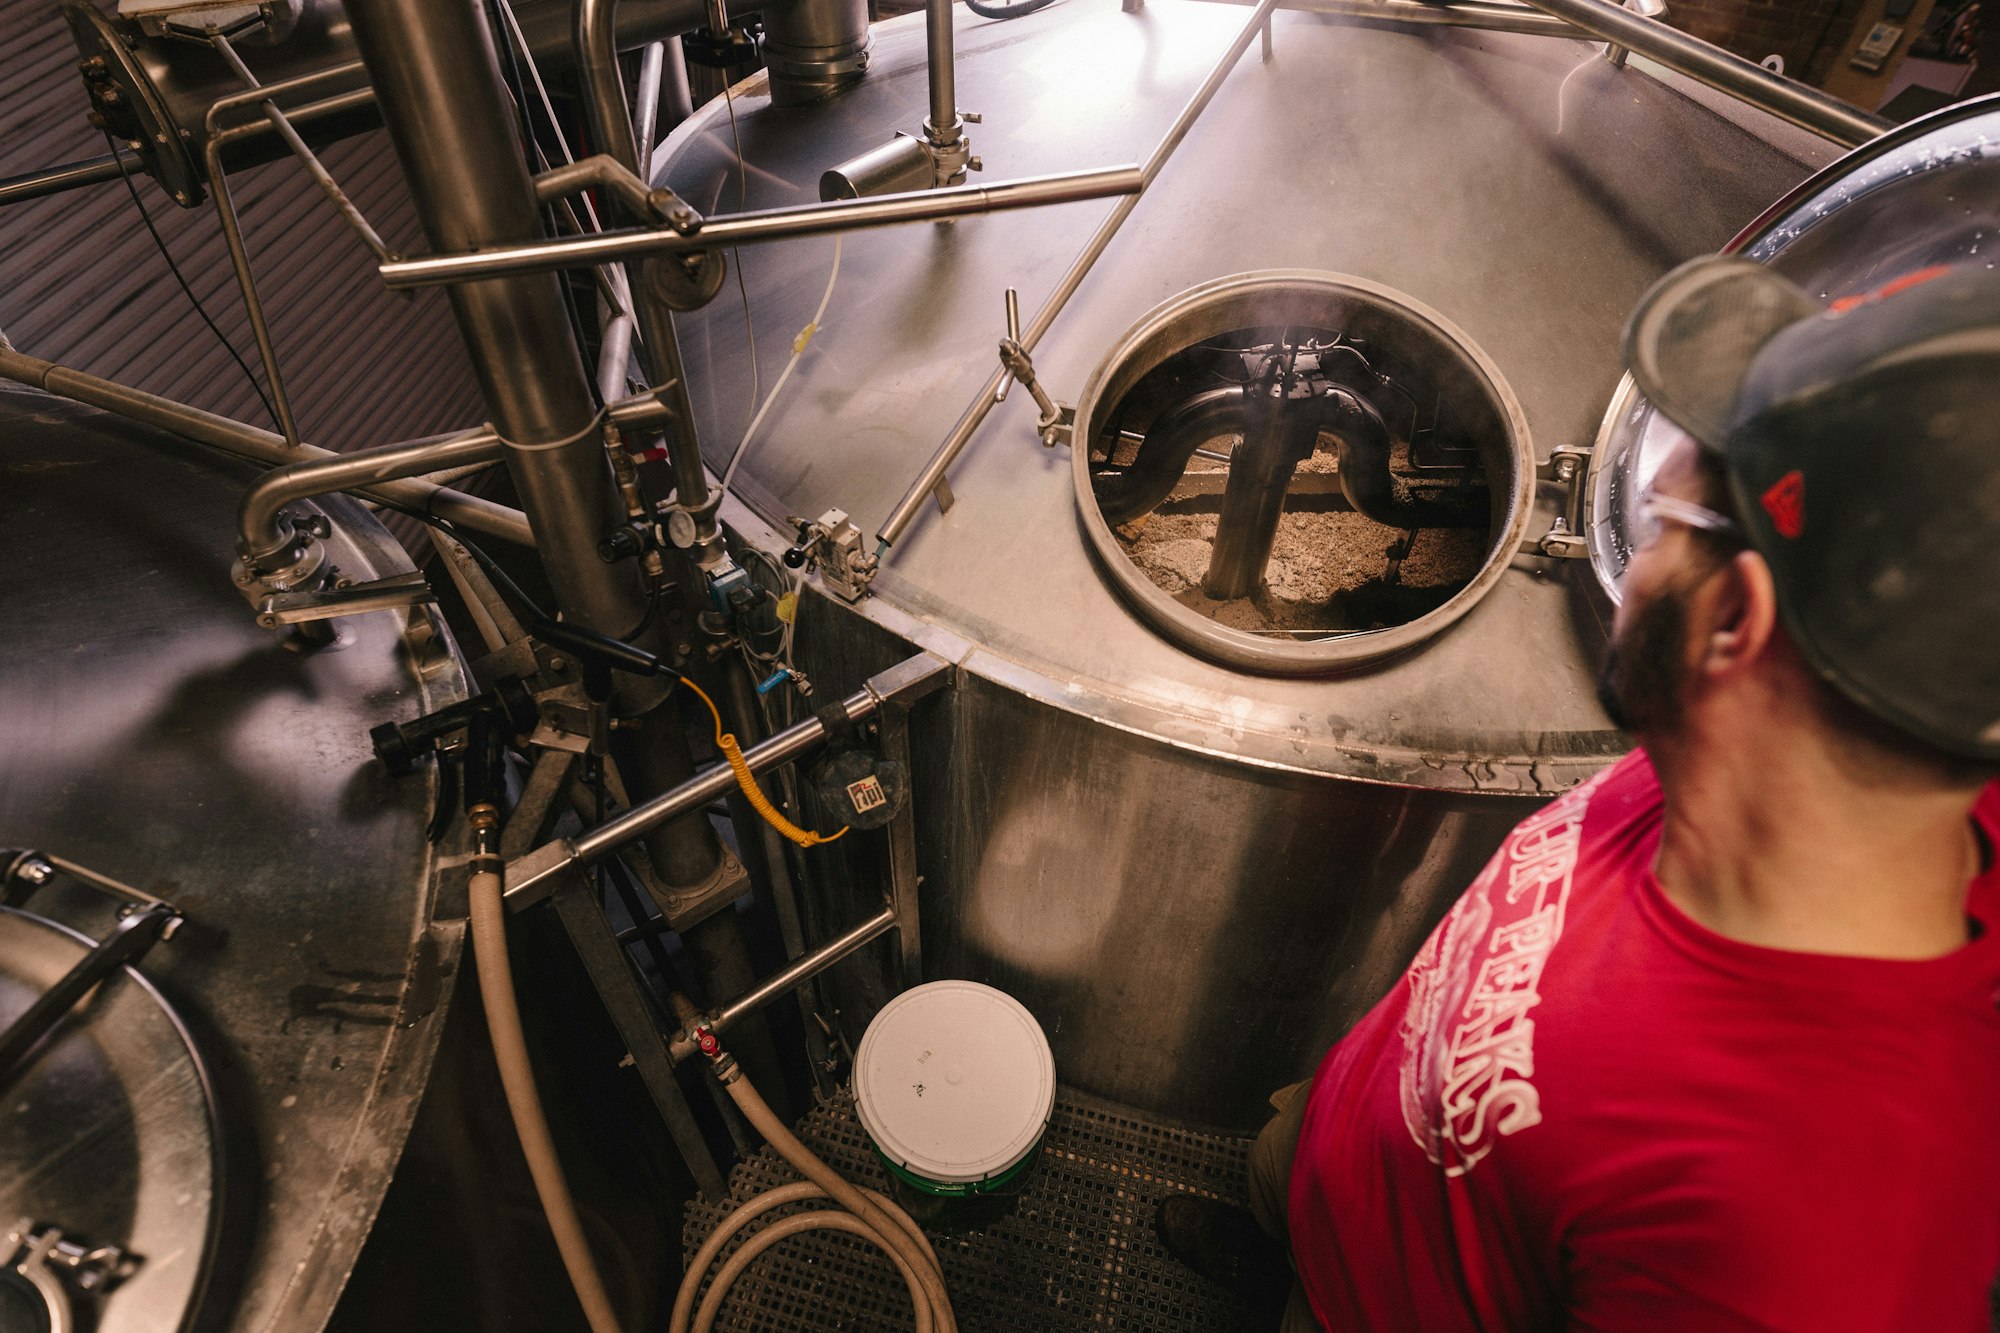
I used to brew at my neighbor's place and we'd ferment in his unfinished basement. We'd have trouble keeping the fermentation temperature up when it was cold out and we ended up putting a shop light underneath the fermenter to try warming things up. Obviously that wasn't a great solution and I ended up using an ESP8266, relay, and temperature probe to control the shop light. That was years ago and I thought it could use a refresh. Out with the shop light and in with a heating belt. I've added a separate relay for controlling a cooling system, support for fermentation temp schedules, adjustable temp differential, compressor delay, and all the fun data is available via MQTT. A controller with similar features goes for $75 and has no network connectivity.
This project requires dealing with AC wiring which is dangerous if you're not careful.
Supplies
- ESP32 development board, ESP32 Mini, or whatever ESP32 you prefer
- 2x Single channel relay - I like these since they trigger high
- Waterproof thermal probe - this kit comes with the 4.7k resistors you'll need
- Thermowell - maybe something like that depending on what works for your fermenter
- Fermentation heater - or something similar
- Fermentation cooler - I figure a cooler full of ice water and a pump to circulate through the coil. Another option is a fridge
- AC wall outlet and cover
- 14 gauge extension cord (or the cord from a power strip or dead UPS you might have lying around) 16 gauge would also work as long as you're not heating or cooling with something that uses lots of watts. Just don't forget later on when you decide a blow dryer might work really well...:)
- Wire nuts
When you purchase through links on this site, I may earn an affiliate commission.
Wiring
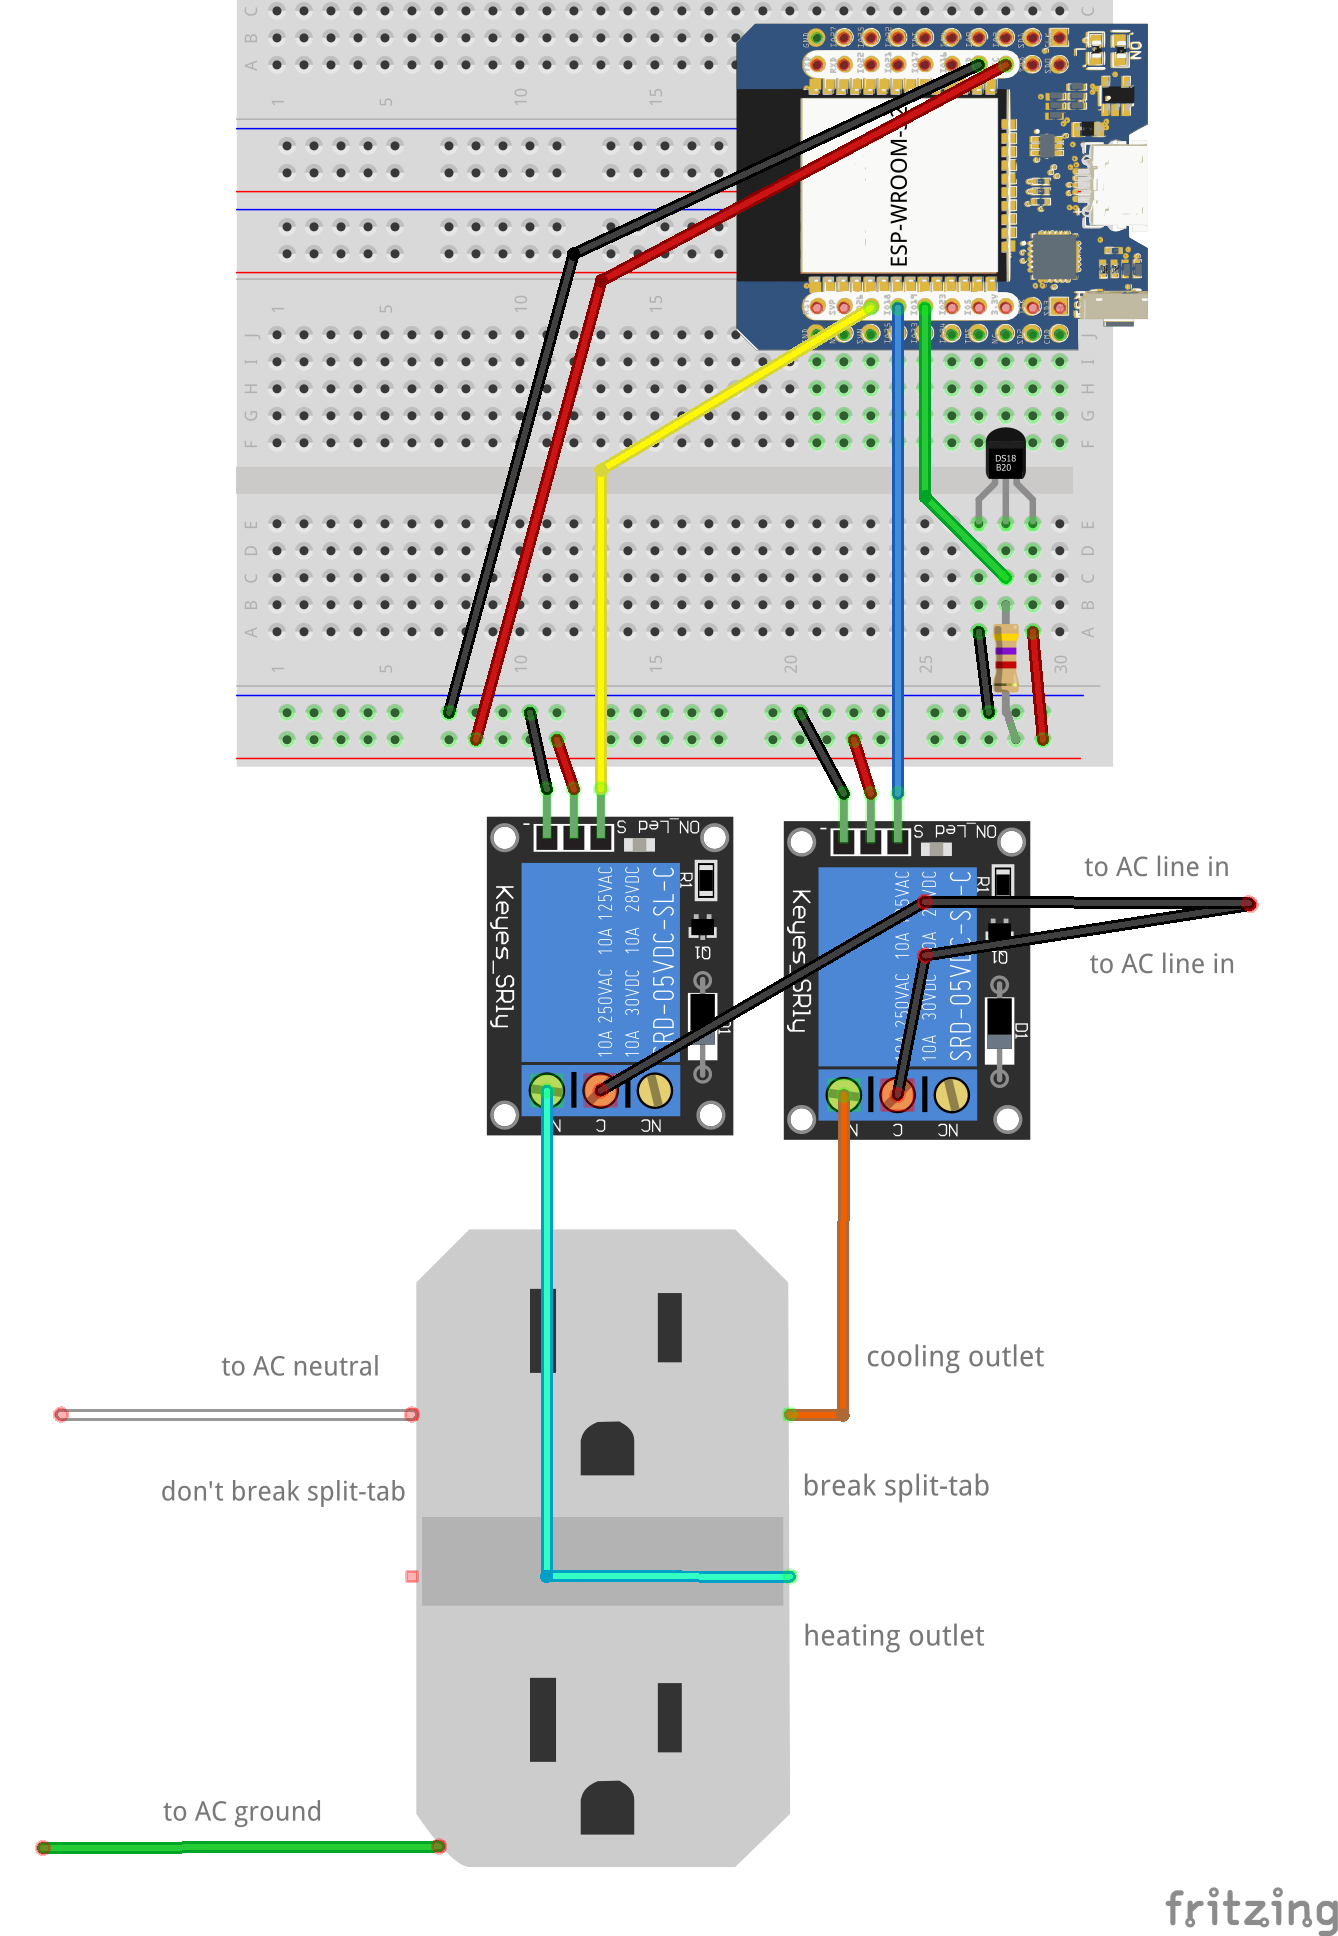
Assembly
A double gang old work box works well, provides strain relief, and has plenty of room for the ESP32, relays, and outlet. Take the 14 gauge extension cord and cut off the female end. You'll be left with the male end and the cut end with 3 wires, hot, neutral and ground. If you don't have any spare 14 gauge wire to use for pigtails you can cut some out of the extension cord. You'll need 4 short pieces (2 to split the hot so they can go to the C terminals on the relays, and 2 out of the relay NO to the outlet). A wire nut is a good way to connect the hot wire to the 2 pigtails. Strip about 6" of the outer insulation and push the 3 wires through a strain relief tab in the box until a little of the outer jacket enters the box. Wire the 3 wires to the outlet as show in the diagram above. Push the temp sensor wire through another strain relief tab on the opposite side of the box and connect it to the ESP32. Connect the relays to the ESP32. I guess you could use an AC/DC converter to power the ESP32 but I just ran a USB cable into the box and power it separately.
Code
Getting Started With Micropython
micropython-mqtt
 peterhinch
Grab mqtt_as/mqtt_as.py and mqtt_as/mqtt_local.py and upload them to the root of the ESP32 without the subdirs. We'll need to tweak mqtt_local.py with your WiFi and MQTT broker settings.
Update 4/20/25: The latest version of micropython-mqtt has been restructured. Now grab mqtt_as/__init__.py and upload it to the same path on the ESP32. Tweak mqtt_local_example.py with your WiFi and MQTT broker settings and upload that as mqtt_local.py to the root of your ESP32.
datetime
Grab datetime.py and upload it to the root of the ESP32.
This project's code
scareyConfiguration
config.py contains a constant where you define the base topic name. I'm using "esp32/conical5g" for this example. If you want to have more than one controller you would just give them different base topics.
Publish your config (with retain) to the "esp32/conical5g/config" topic. "lowTempLimit" controls when the heat relay will active and "highTempLimit" does the same for cooling. Keep them at least 1 degree apart to keep the heating and cooling from fighting. Add 0 or more "tempChanges" if you'd like the temp limits to auto adjust based on how many days after the "startTimeUTC" it is. The code uses NTP to make sure it knows the correct date and time.
{
  "startTimeUTC": "2023-05-31T12:00:00",
  "lowTempLimit": 64,
  "highTempLimit": 66,
  "minimumOffMins": 3,
  "tempChanges": [
    {
      "daysLater": 2,
      "tempChange": 2
    },
    {
      "daysLater": 3,
      "tempChange": 4
    }
  ]
}
esp32/conical5g/config
You can also tweak the config and publish at any point and the changes will immediately apply.
Home Assistant
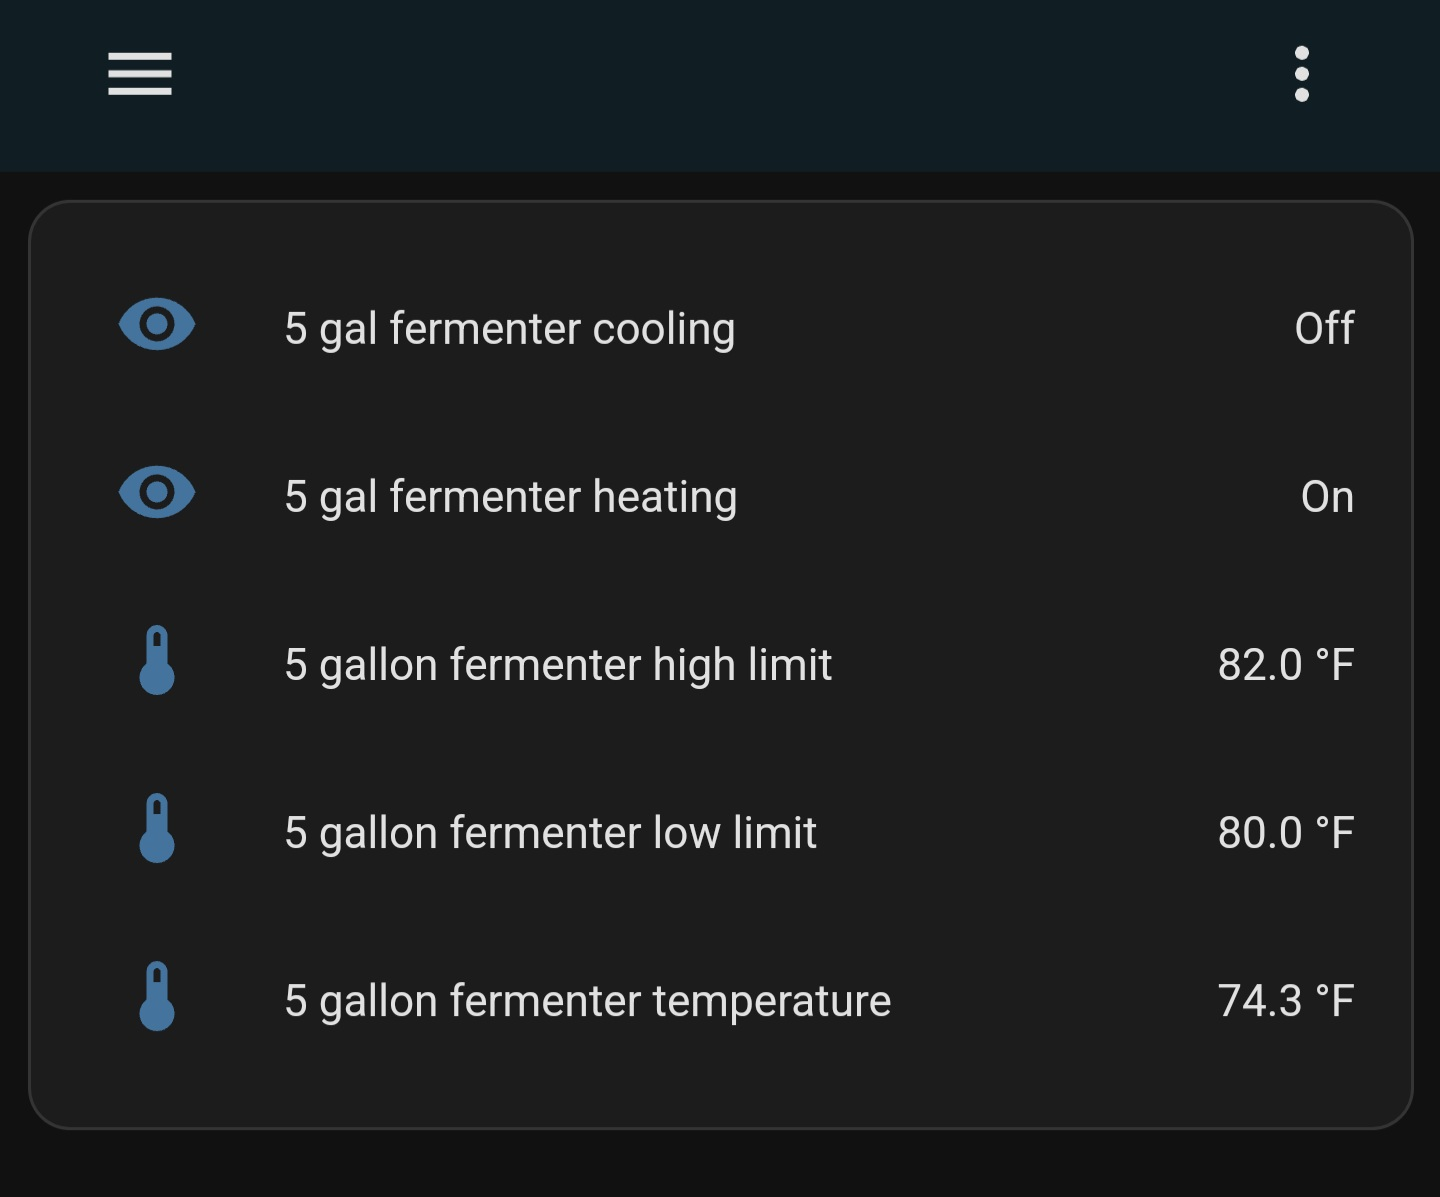
I use some simple MQTT config so HA can display the current data.
Configuration
mqtt:
  sensor:
  - unique_id: ferm0temp
    state_topic: 'esp32/conical5g/status'
    name: '5 gallon fermenter temperature'
    unit_of_measurement: '°F'
    value_template: "{{ value_json.currentTemp }}"
  - unique_id: 'ferm0heat'
    name: '5 gal fermenter heating'
    state_topic: 'esp32/conical5g/status'
    value_template: >-
      {% if value_json.heatOn == 0 %}Off
      {% elif value_json.heatOn == 1 %}On
      {% endif %}
  - unique_id: 'ferm0cool'
    name: '5 gal fermenter cooling'
    state_topic: 'esp32/conical5g/status'
    value_template: >-
      {% if value_json.coolOn == 0 %}Off
      {% elif value_json.coolOn == 1 %}On
      {% endif %}
  - unique_id: ferm0low
    state_topic: 'esp32/conical5g/status'
    name: '5 gallon fermenter low limit'
    unit_of_measurement: '°F'
    value_template: "{{ value_json.lowTempLimit }}"
  - unique_id: ferm0high
    state_topic: 'esp32/conical5g/status'
    name: '5 gallon fermenter high limit'
    unit_of_measurement: '°F'
    value_template: "{{ value_json.highTempLimit }}"
Notifications
There are lots of options here based on the 5 pieces of data that get published every minute. Whether the heating or cooling are active, the current limits, and the current temp are available.
- Current temp is a certain number of degrees outside the limits
- Heating and cooling are both on? That could be a bug in the code or messed up configuration.
- Controller went offline (esp32/conical5g/availability topic)
- Schedule changed the limits
- Large change in the current temp
Node-RED is my favorite way to set these up but HA automations will work too.
Historical Data
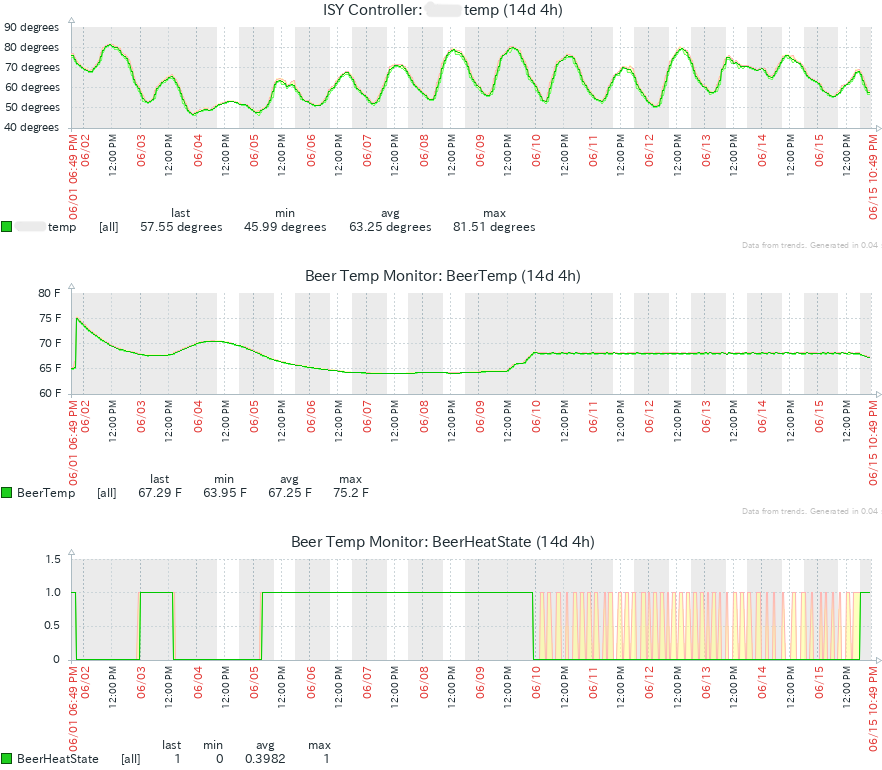
This was from my old heat only setup. The top graph is the outside temp, the middle is the beer temp, and the bottom is calling for heat. My neighbor forgot to turn the shop light on until 6/9. After that the temp was very stable.
InfluxDB
For the upgrade setup I'm using Telegraf to import the 5 pieces of data into InfluxDB. Here's the Telegraf config:
[[outputs.influxdb_v2]]
  urls = ["http://<host>:8086"]
  token = "<your token>"
  organization = "<your org>"
  bucket = "iot"

[[inputs.mqtt_consumer]]
  servers = ["mqtts://<host>:<port>"]
  topics = [
    "esp32/conical5g/status",
  ]
  qos = 0
  username = "telegraf"
  password = "<mqtt password>"
  insecure_skip_verify = false
  data_format = "value"
  data_type = "string"
  topic_tag = ""
  [[inputs.mqtt_consumer.topic_parsing]]
    topic = "esp32/conical5g/status"
    tags = "source/_/_"
    measurement = "_/what/_"

  [[processors.starlark]]
     namepass = ["conical5g"]
     script = "/scripts/tempcontrol.star"
Sample telegraf configuration
You'll also need the Starlark processor script that parses the JSON payload. Save it to the "script" path in the telegraf config ("/scripts/tempcontrol.star" for mine).
load("json.star", "json")

def apply(metric):
   j = json.decode(metric.fields.get("value"))
   metrics = []

   new_metric = Metric("conical5g")
   new_metric.fields["temp"] = float(j["currentTemp"])
   new_metric.fields["low"] = float(j["lowTempLimit"])
   new_metric.fields["high"] = float(j["highTempLimit"])
   new_metric.fields["heating"] = int(j["heatOn"])
   new_metric.fields["cooling"] = int(j["coolOn"])
   new_metric.tags["unit"] = j["tempUnit"]
   metrics.append(new_metric)

   return metrics
Telegraf converts the JSON payload to the line protocol that InfluxDB likes. It looks something like this (measurement, tags, fields, timestamp):
conical5g,unit=F temp=73.7375,low=80,high=82,heating=1i,cooling=0i 1686452040495794428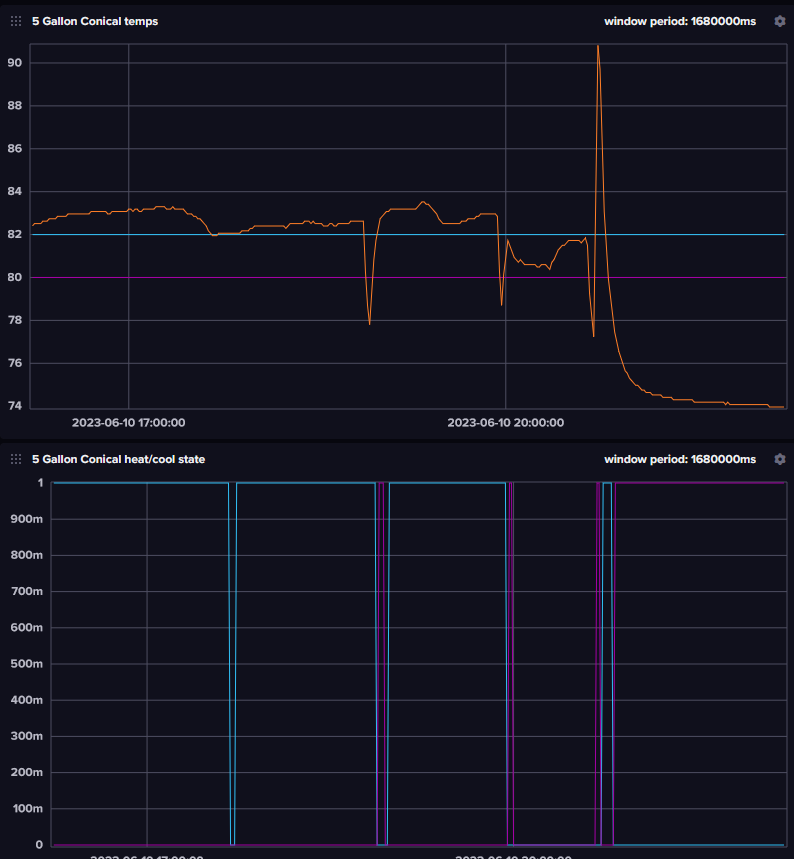
This was from the test setup on my couch and not connected to any heating/cooling. In the upper graph the orange is the current temp (my dog sat on the sensor and made that 90 degree spike) and the blue and purplish lines are the temp limits. The bottom graph shows when the cooling and heating are active.
Notes
Now I just need to do some brewing...