Hot Tub Monitor
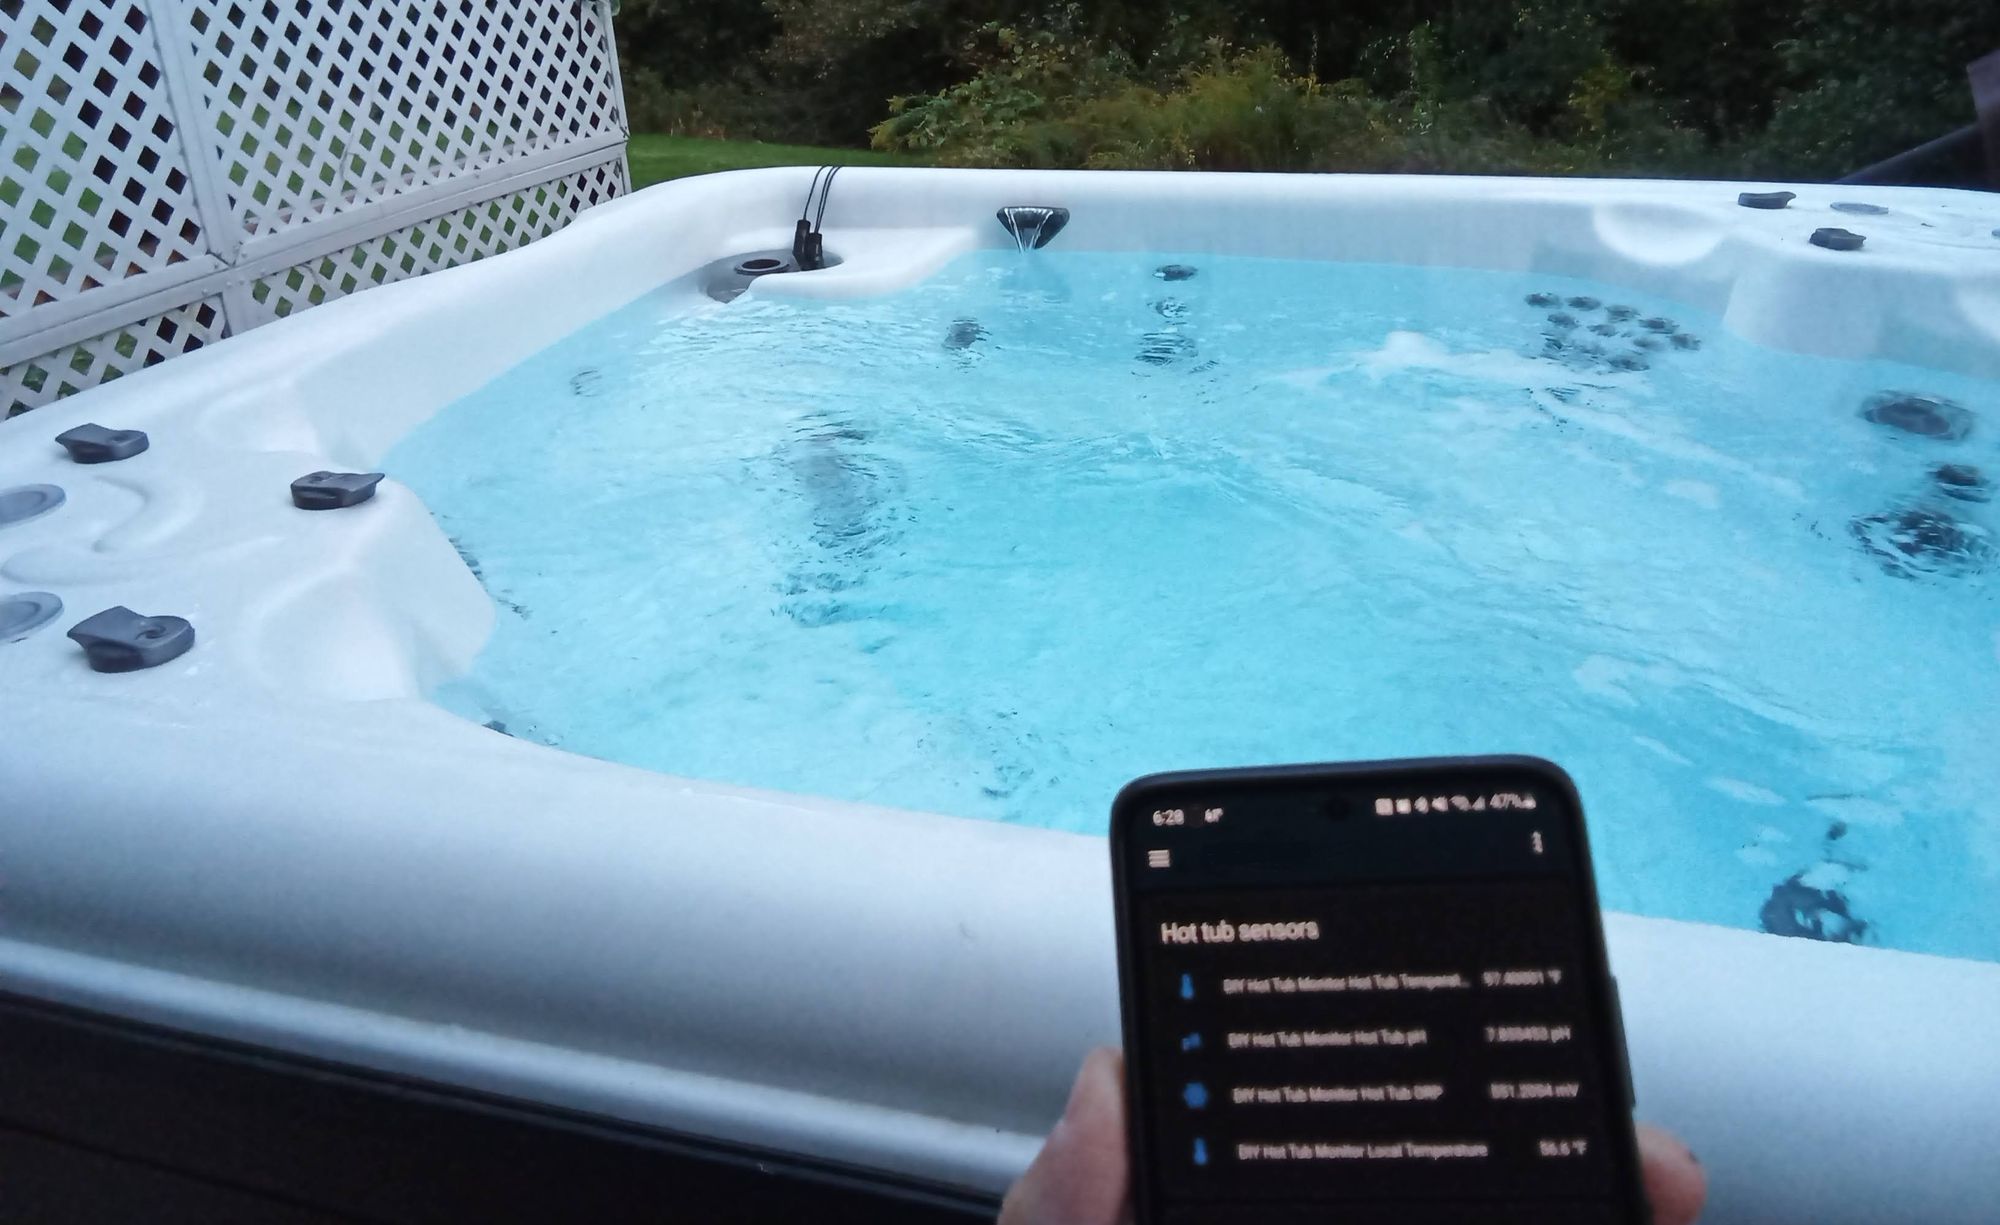
When I got my hot tub last year and was looking into remote monitoring and control I could only find an old Hackaday post from 2015 but the old microcontroller was hard to source. I figured I'd rework it using tech from this decade so I could read the temperature, PH, and ORP in Home Assistant and not have to deal as much with test strips.
This uses an ESP32 and industrial PH and ORP sensors that seem to last for a year or so. You can get cheap replacement sensors from Aliexpress.com to make that less painful. I just replaced my PH sensor and have a new ORP sensor on order.
It takes readings every minute so you can watch the battle between chlorine and filthy kids in real-time. It also has a two-point PH calibration mode to help make re-calibration easier, a display so you can check the sensor data locally and check calibration status, water and air temperature sensors, and an option to monitor the cover state (opened/closed).
Supplies
- ESP32 Mini, ESP32 development board, or whatever ESP32 you prefer
- OLED Display - 0.96" 128x64
- Assorted M2 and M4 nuts and bolts to mount box cover and display
- Display on/off switch
- Gravity: Analog Industrial pH Sensor / Meter Pro Kit V2
- ORP Adapter
- ORP Industrial Electrode or cheaper from Aliexpress.com (choose "ORP sensor BNC")
- 2x Temperature sensor
- 4.7k resistor
- 2x 0.5" grommets or similar for sealing around the temp sensor and power wires
- pH Calibration Solution
When you purchase through links on this site, I may earn an affiliate commission.
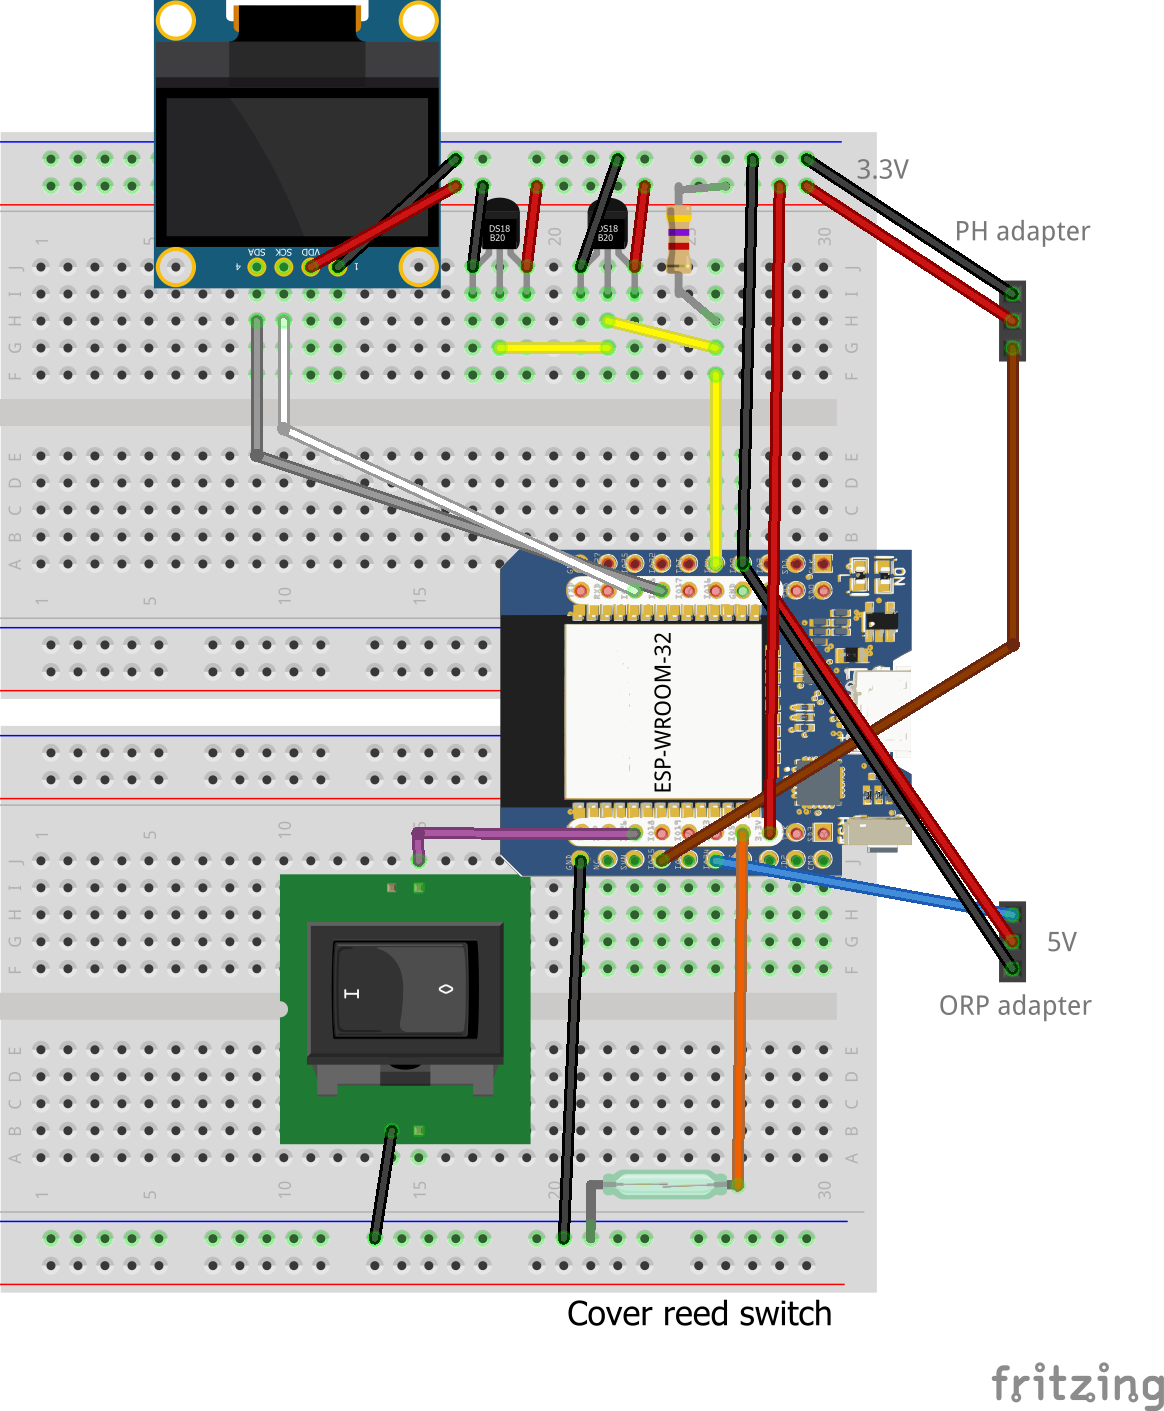
Wiring
The ESP32 and ORP Adapter need 5V, everything else is 3.3V.
Assembly
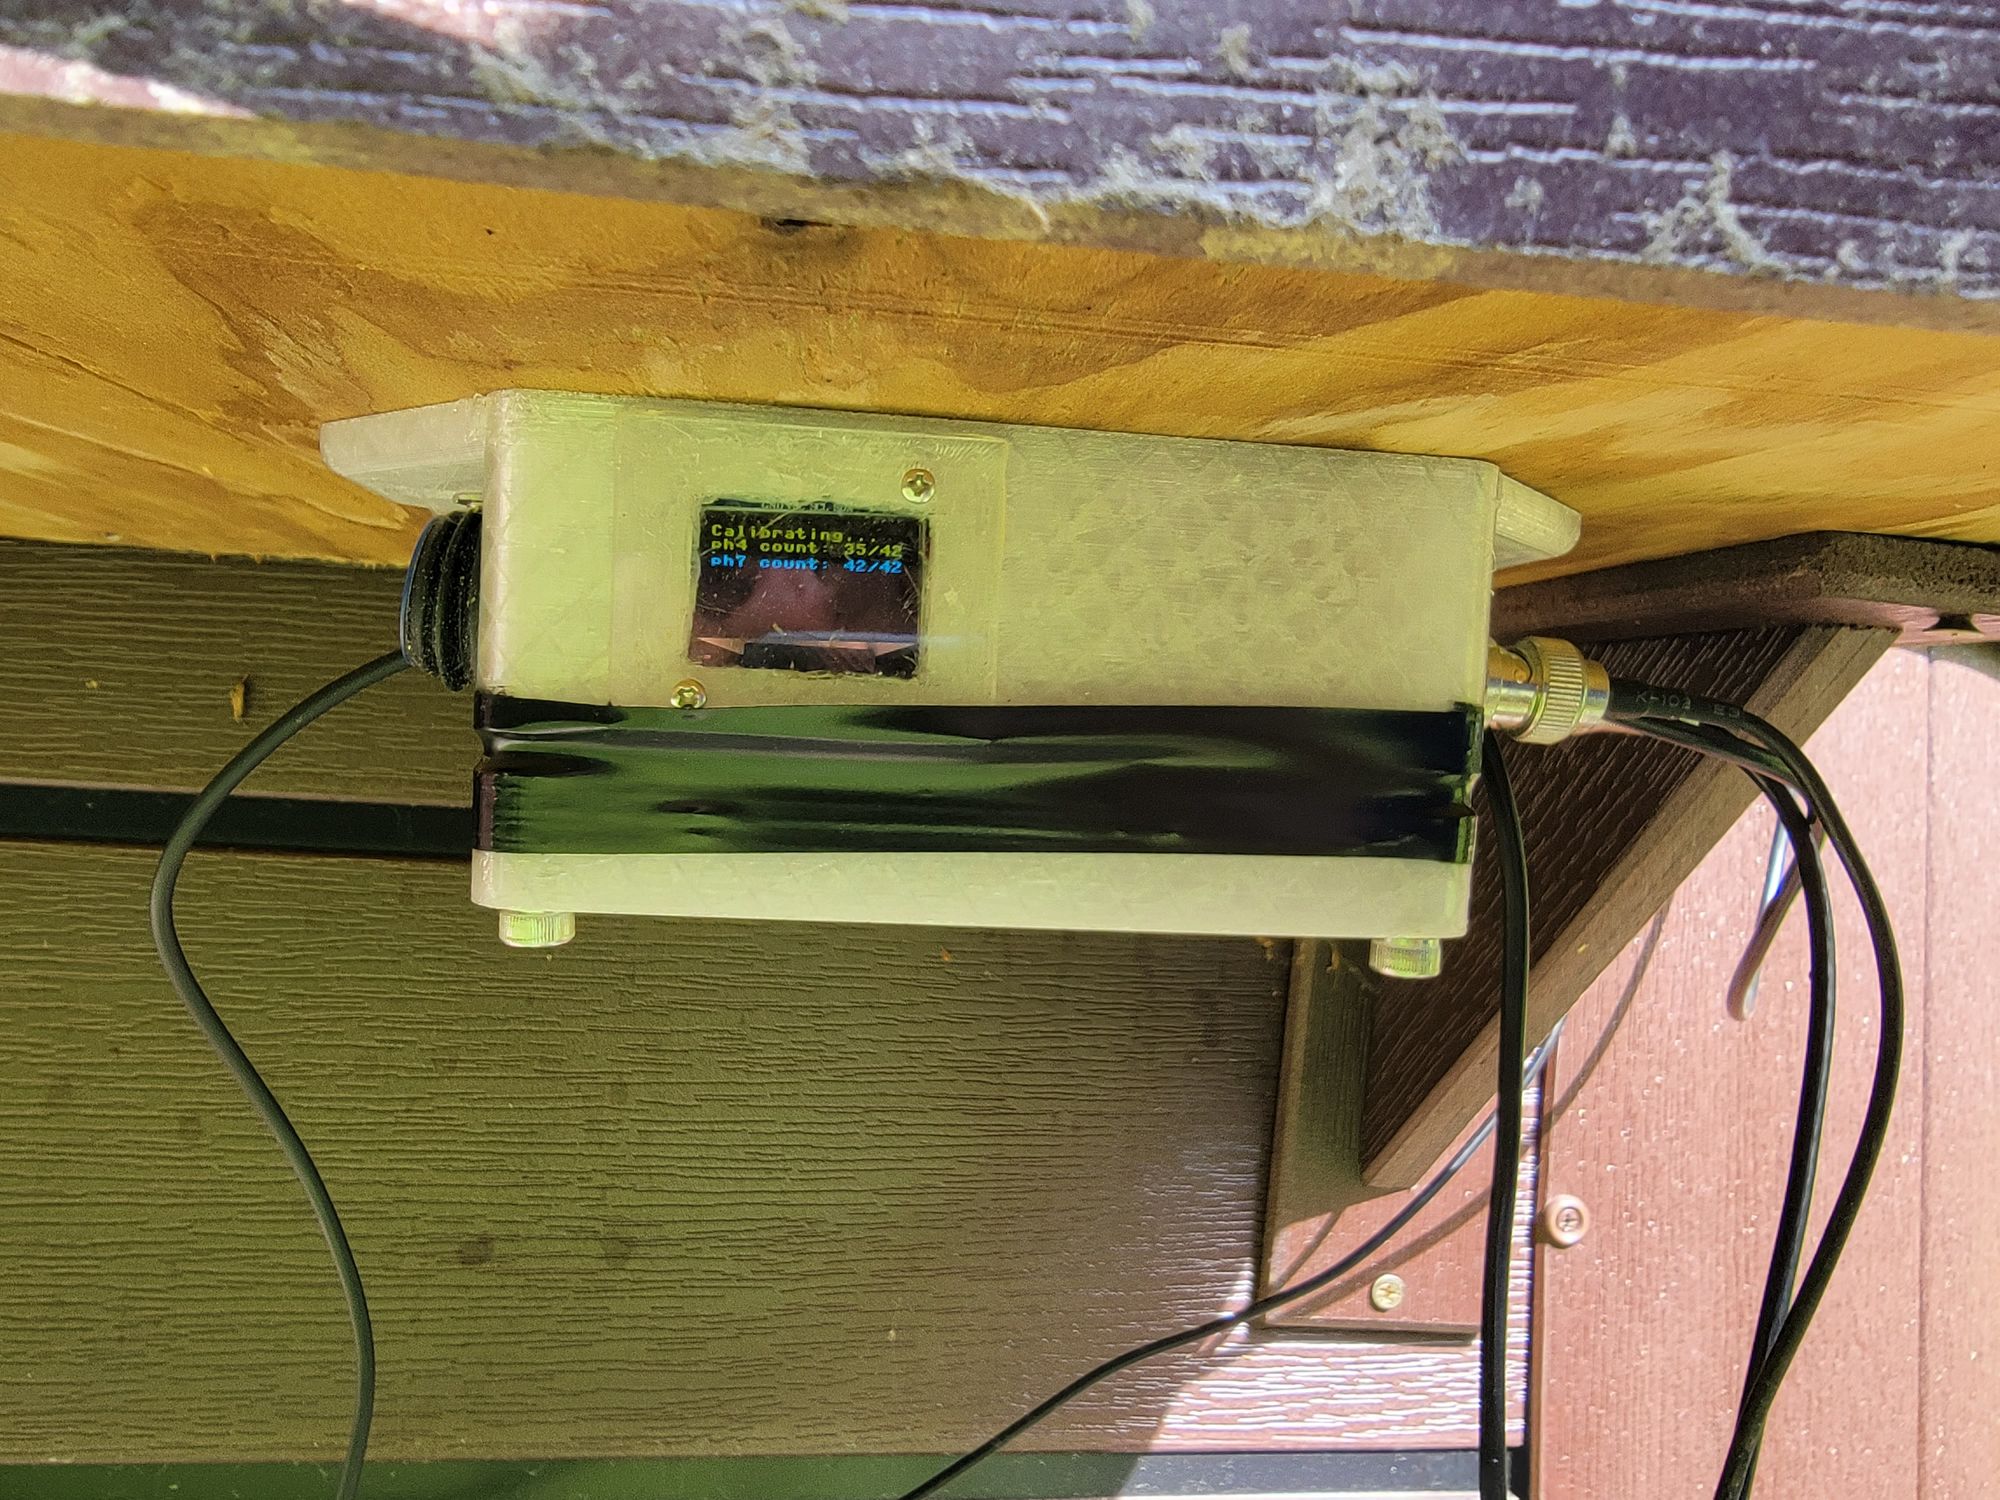
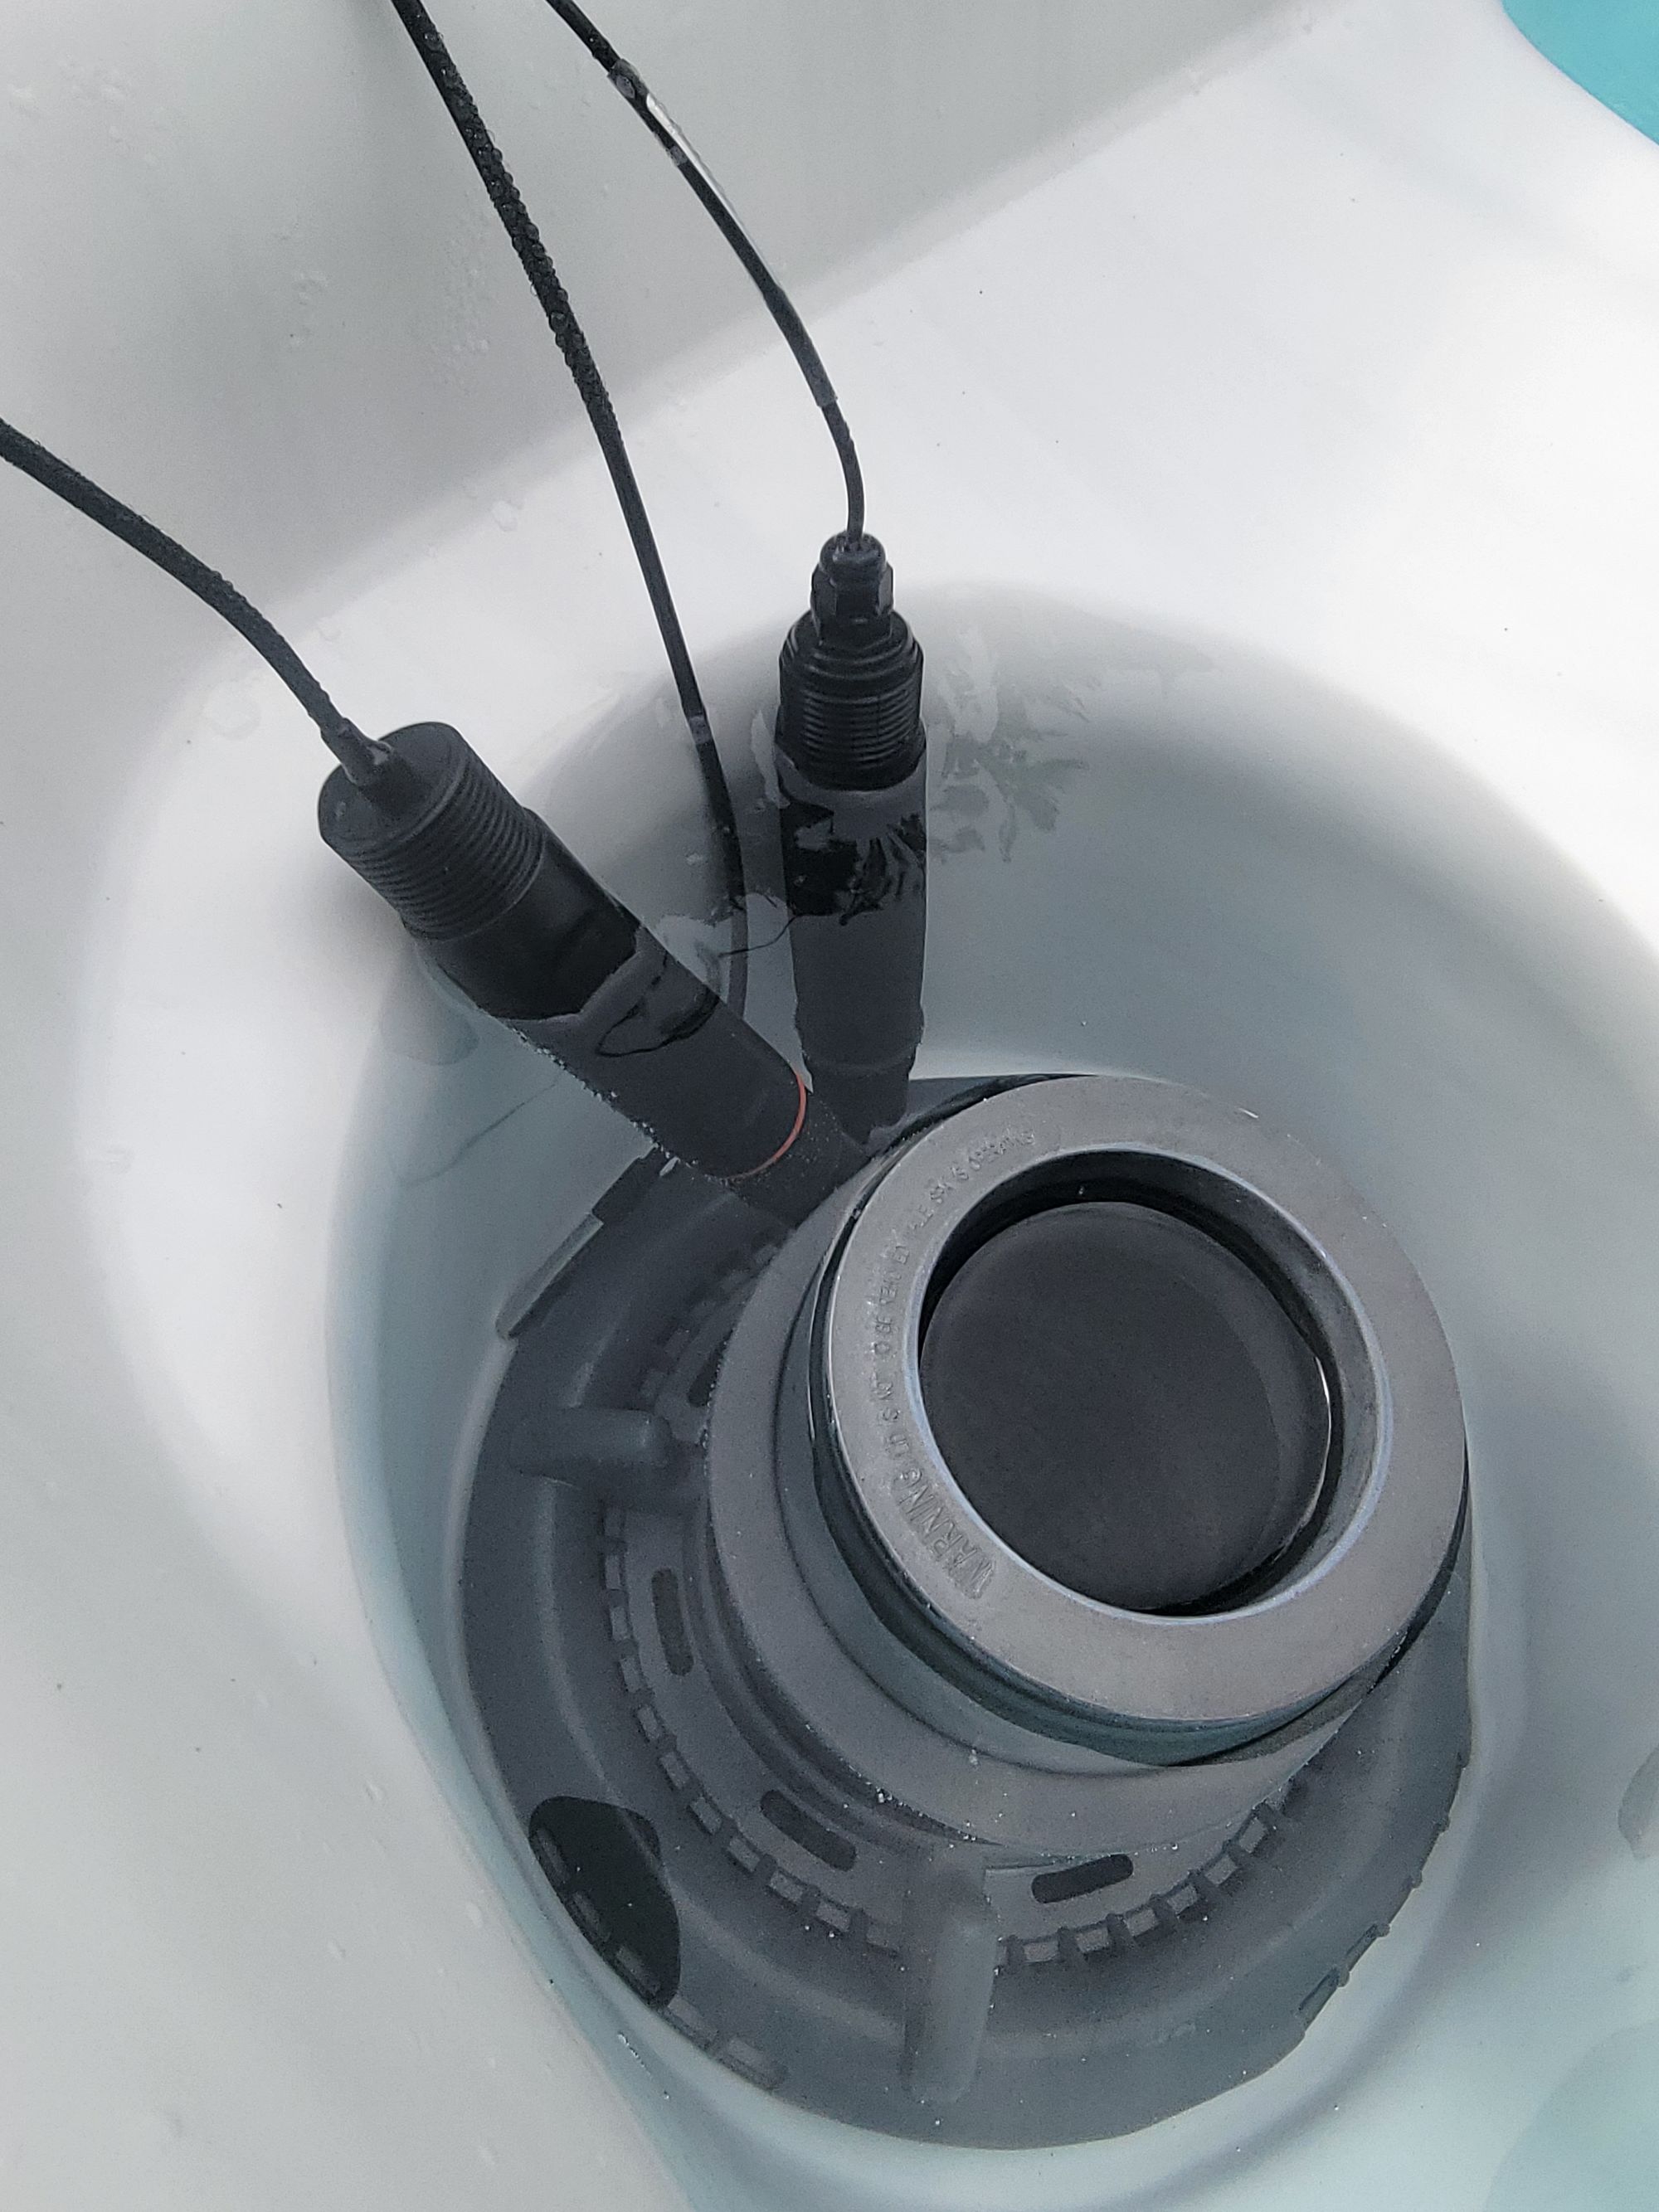
I mounted it under a shelf and run the probes into the tub near a filter.
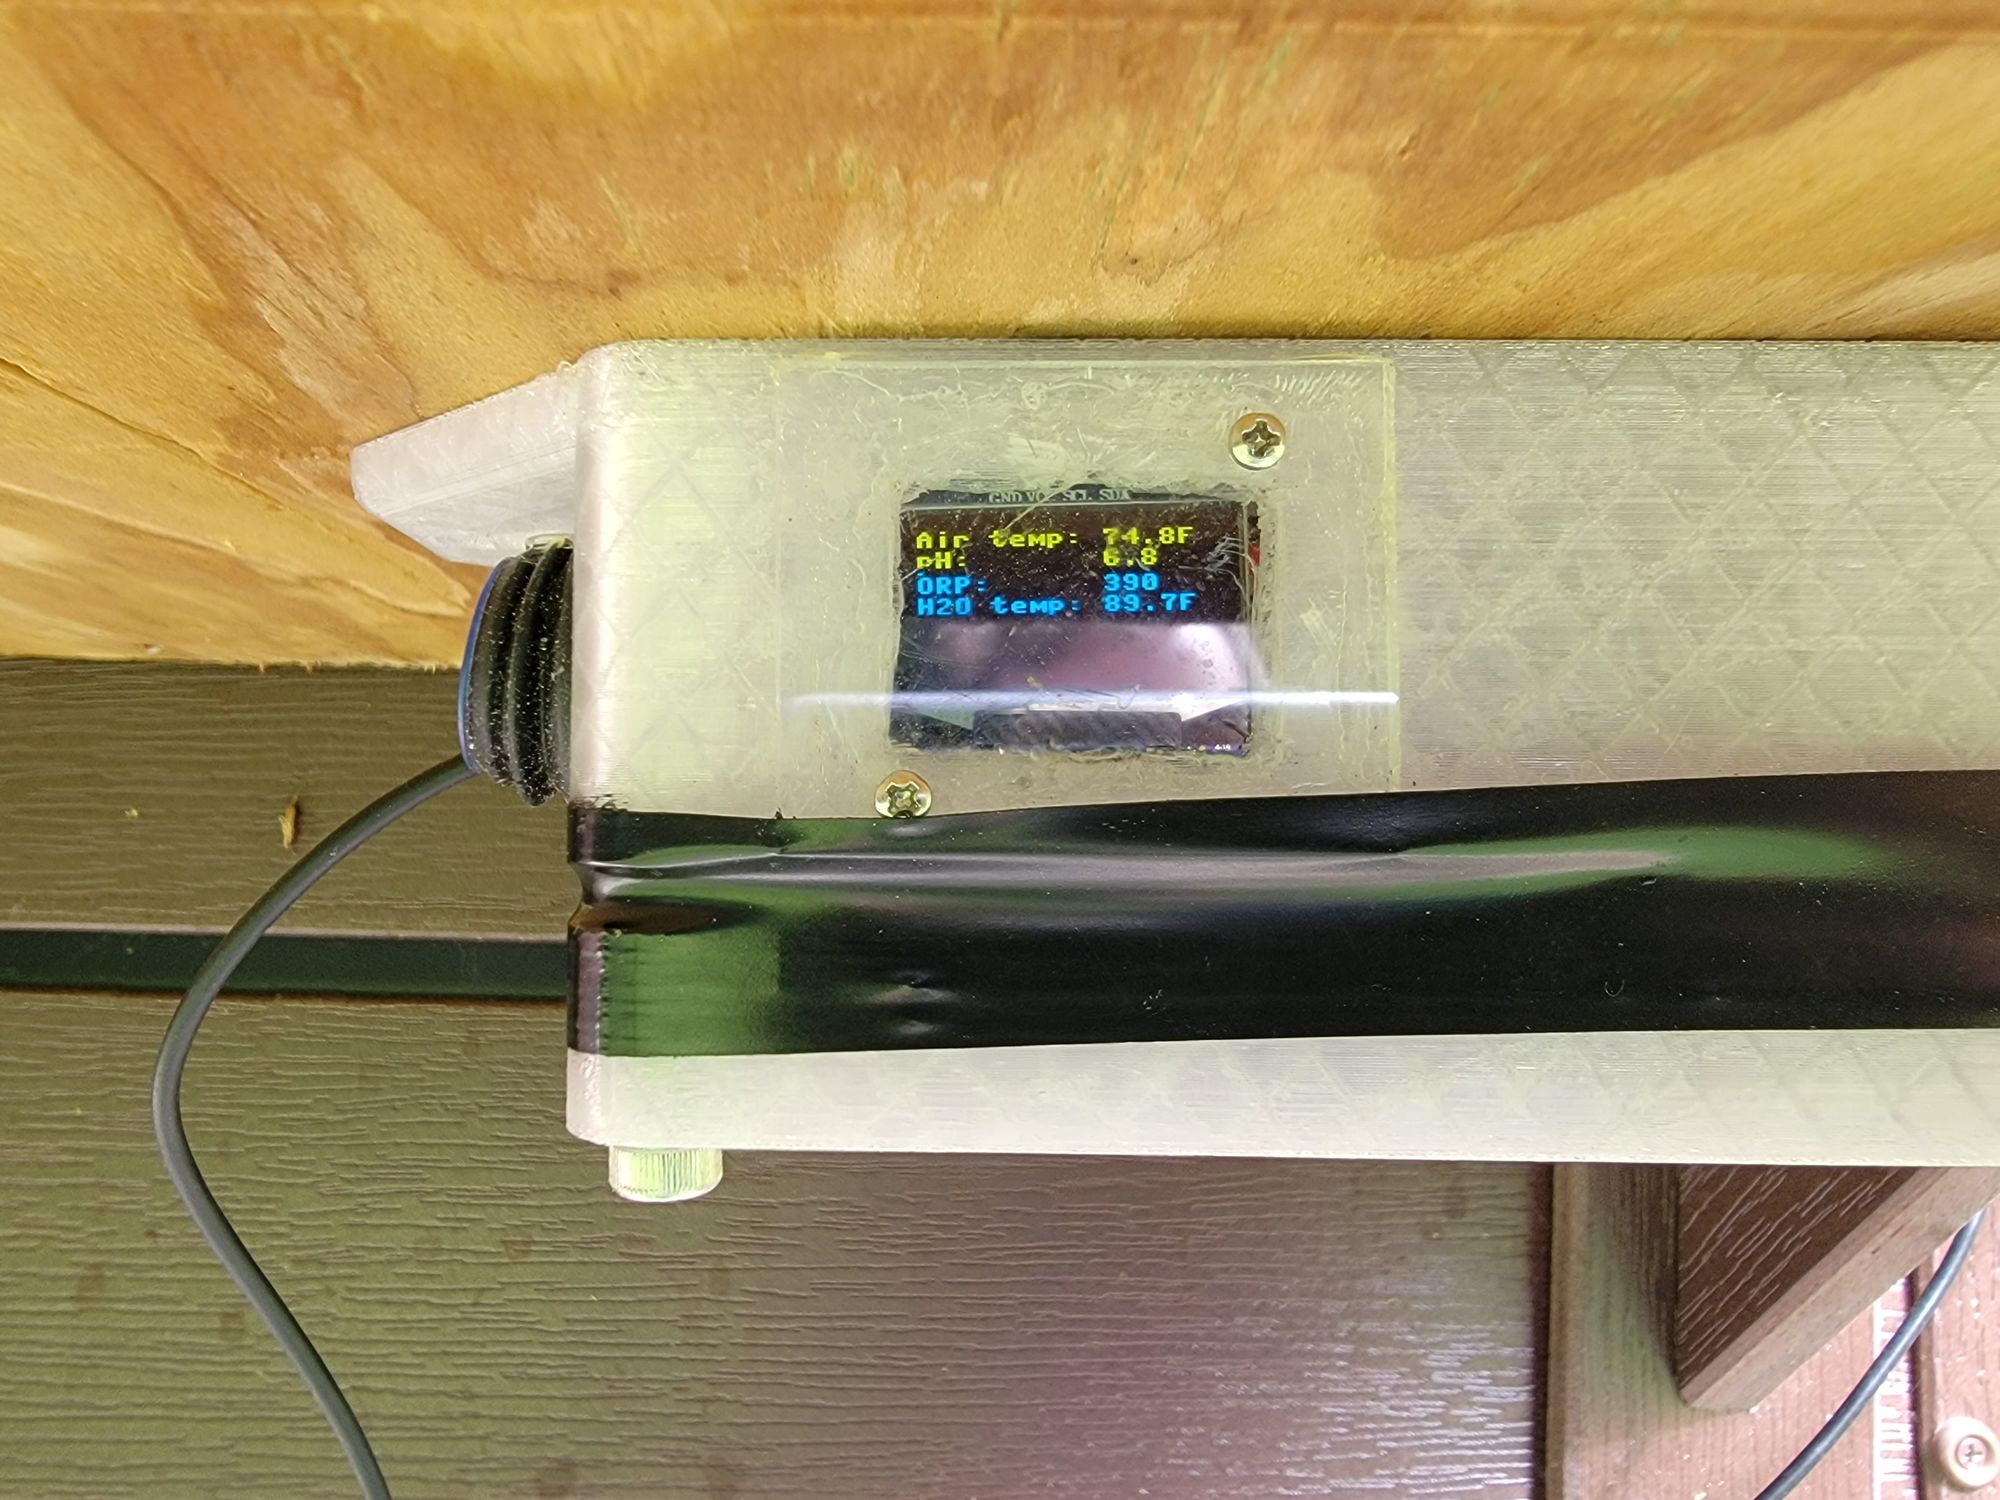
The guts, calibration mode, and sensor data display
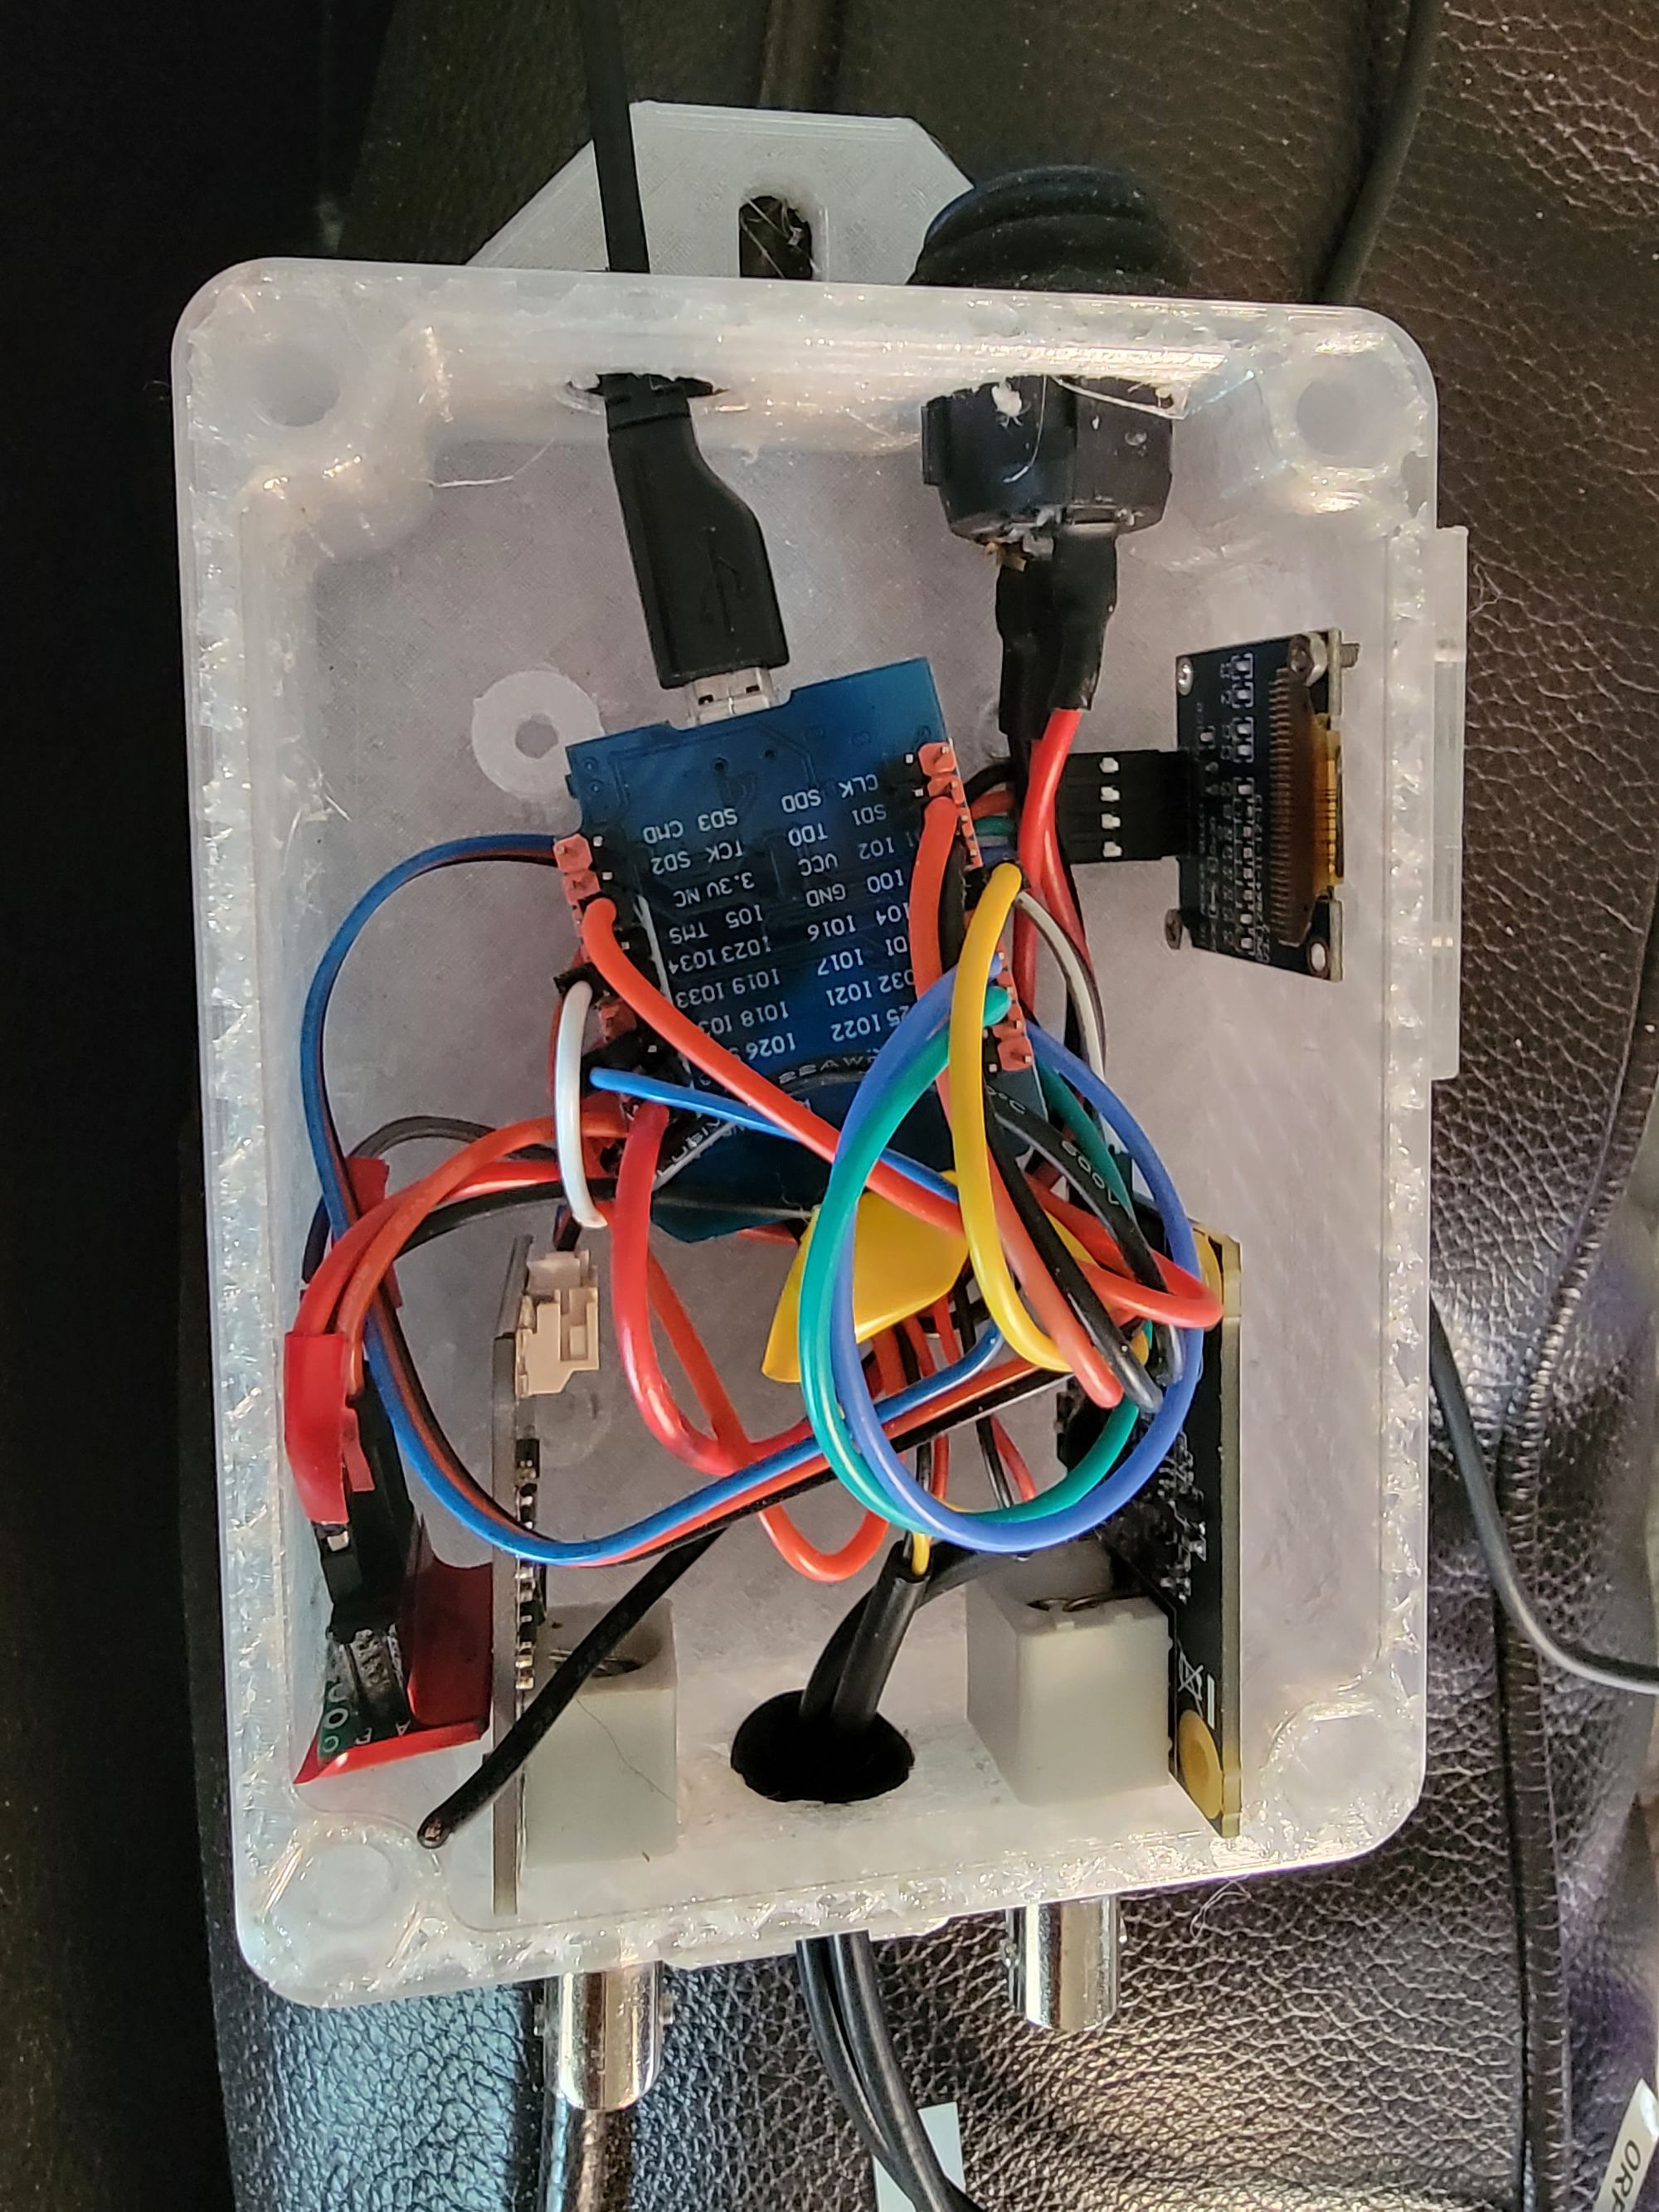
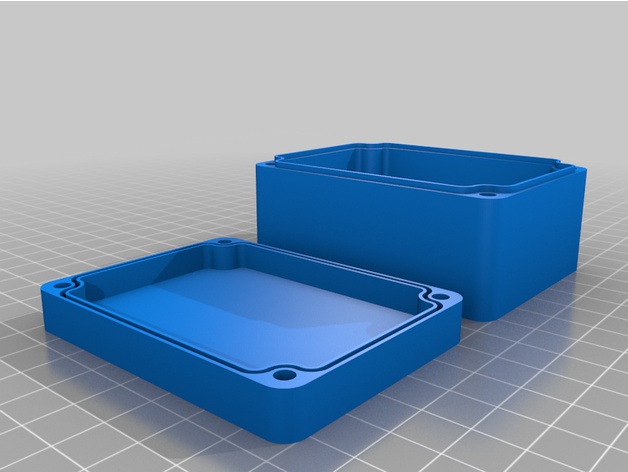
Project Box
It started life as this:

And I tweaked it in OpenSCAN and then ran out of filament during the print. I used some electrical tape to seal the gap. But you should make sure you have enough and pause the print around layer 187 and drop M4 nuts in each of the corners. Toss in a desiccant packet to help with moisture. I glued a clear piece of plastic to the box over the screen to hopefully keep the water out and the shelf provides some protection.
ORP Adapter
Ensure the dip switch is set for ORP.
Sensors
I just put the PH, ORP, and water temp sensors up and over the side and into the tub near a filter. The air temp sensor should be somewhere out of the sun and away from other objects. Mine's hanging over one of the shelf supports.
Cover opened/closed sensor
I haven't hooked this up on my setup yet but adding support for it in the code was simple enough. I figured I'd glue or maybe sew some magnets into the flap of the cover and try to line up a reed switch near where the magnets should end up. The cover state gets sent along with all the other data. Then it's easy to add some alerts like the cover has been open for a long time or is open at bedtime, etc.
Code
Getting Started With Micropython
micropython-mqtt
 peterhinch
Grab mqtt_as/mqtt_as.py and mqtt_as/mqtt_local.py and upload them to the root of the ESP32 without the subdirs. We'll need to tweak mqtt_local.py with your WiFi and MQTT broker settings.
Update 4/20/25: The latest version of micropython-mqtt has been restructured. Now grab mqtt_as/__init__.py and upload it to the same path on the ESP32. Tweak mqtt_local_example.py with your WiFi and MQTT broker settings and upload that as mqtt_local.py to the root of your ESP32.
ssd1306 driver
Grab that from here and upload to the root of the ESP32.
OTA library (optional)
scareyIf you want to be able to remotely update the code, grab ota.py and upload to the root of the ESP32. See this post for more details.
This project's code
scareyCopy *.py to the root of the ESP32. If you don't want the automatic Home Assistant device and entity creation you can get rid of ha.py.
Configuration
When you have multiple temperature sensors using the 1-Wire protocol you need to know the serial numbers of each sensor so you know if it's the air or water temp sensor. The first time you run the code it will output the serial numbers of the sensors it sees and you add those to the MQTT configuration in the 'esp32/hottub/config' topic (set retain for the config). It looks something like:
{
  "ph_acid_calibration": 2032.44,
  "water_rom_reg_num": "2863c65704e13c56",
  "ph_neutral_calibration": 1500.0,
  "air_rom_reg_num": "28c3005704e13cb4",
  "temp_unit": "F"
}
Sample esp32/hottub/config
The calibration values above are a good starting point so use those and just update the 'rom_reg_num' values with what was output during startup. If you find you mixed them up you can just swap them and publish (don't forget retain) the config again.
Calibration
The two-point PH calibration process involves using PH 4.0 and PH 7.0 standard buffer solutions. The usual suggestion is to do this monthly.
- Rinse the probe with distilled water, then absorb the residual water-drops with soft paper. Insert the pH probe into the standard buffer solution of 7.0 (we do the neutral readings first so the calibration process doesn't think the distilled water is the standard buffer solution)
- Press the calibrate button in Home Assistant or publish '{"command": "calibrate"}' to 'esp32/hottub/command' but don't set retain.
- The calibration process will begin within 1 minute and then you can see the progress on the display
- Stir gently until the final neutral reading is taken
- Rinse the probe again as in step 1 and insert into the 4.0 solution and stir gently until the final acid reading is taken
- The previous MQTT config gets backed up to 'esp32/hottub/configbak' and the updated calibration values and the timestamp of the calibration are stored in 'esp32/hottub/config'.
- Put the probe back in the hot tub and you're done.
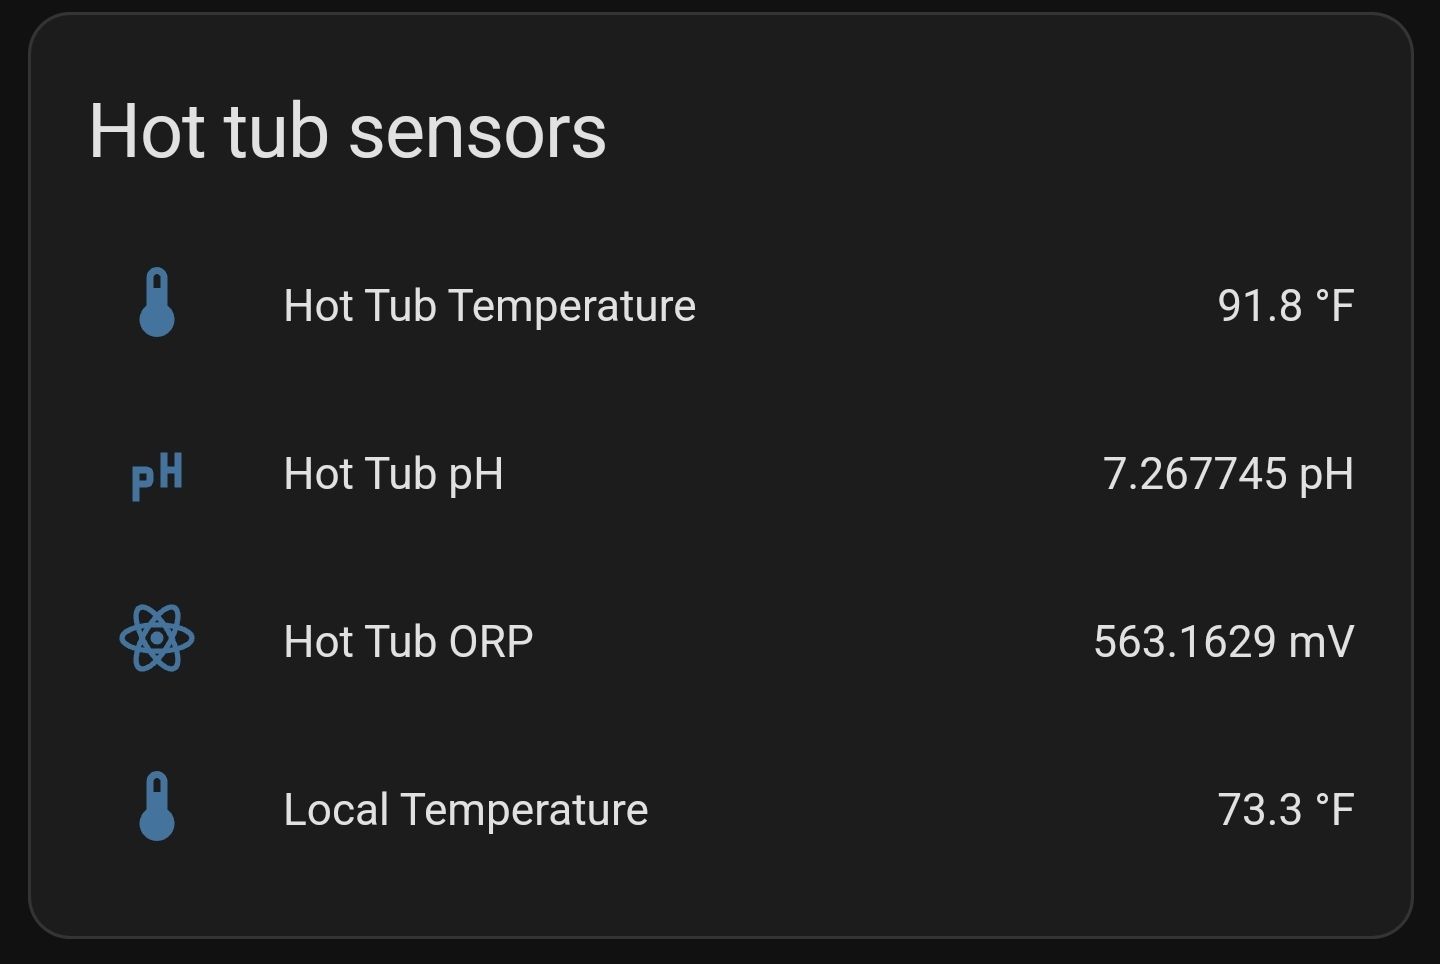
Home Assistant
If you uploaded ha.py to your ESP32 then the code will use MQTT Discovery to create a device and entities for the 4 sensors, and calibrate button.

Notifications
I haven't bothered setting up any alerts yet but off the top of my head:
- PH / ORP out of range
- Cover open too long or at an unlikely time
- Water temp too low or high
- Calibration reminder using "last_calibration" in the config
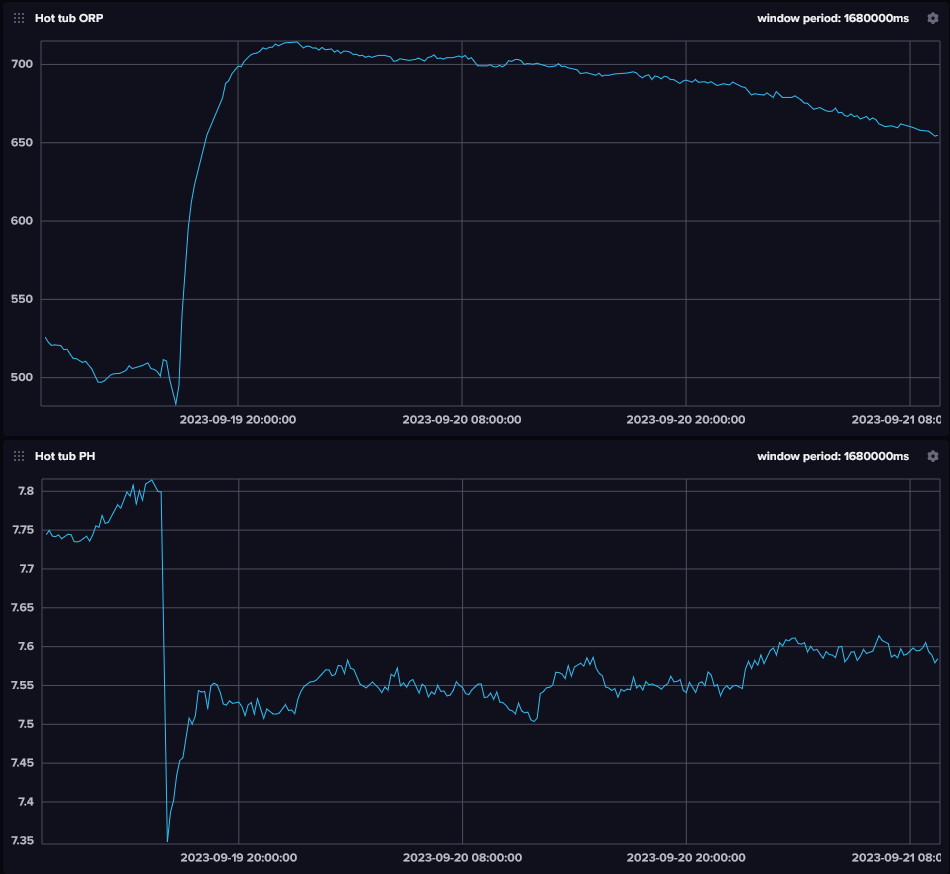
Historical Data
If you'd like historical temp, PH and/or ORP data here's some InfluxDB config that will let you make dashboards similar to this. The data is all in MQTT so you can grab the data however you like and use your own visualization tools.
[[outputs.influxdb_v2]]
  urls = ["http://<host>:8086"]
  token = "<your token>"
  organization = "<your org>"
  bucket = "iot"

[[inputs.mqtt_consumer]]
  servers = ["mqtts://<host>:<port>"]
  topics = [
    "esp32/hottub/readings",
  ]
  qos = 0
  username = "telegraf"
  password = "<mqtt password>"
  insecure_skip_verify = false
  data_format = "value"
  data_type = "string"
  topic_tag = ""
  [[inputs.mqtt_consumer.topic_parsing]]
    topic = "esp32/hottub/readings"
    tags = "source/_/_"
    measurement = "_/what/_"

  [[processors.starlark]]
     namepass = ["hottub"]
     script = "/scripts/hottub.star"
telegraf.conf example
You'll also need the Starlark processor script that parses the JSON payload. Save it to the "script" path in the telegraf config ("/scripts/hottub.star" for mine).
load("json.star", "json")

#{
#  "orp": 545.8052,
#  "air_temp": 64.3,
#  "cover_state": 1,
#  "ph": 6.931918,
#  "temp_error": "",
#  "water_temp": 90.80001
#}

def apply(metric):
   j = json.decode(metric.fields.get("value"))
   metrics = []

   stow_metric = Metric("stow")
   stow_metric.fields["temp"] = float(j["air_temp"])
   stow_metric.tags["source"] = "esp32"

   new_metric = Metric("hottub")
   new_metric.fields["orp"] = float(j["orp"])
   new_metric.fields["water_temp"] = float(j["water_temp"])
   new_metric.fields["ph"] = float(j["ph"])
   stow_metric.tags["source"] = "esp32"

   metrics.append(stow_metric)
   metrics.append(new_metric)

   return metrics
hottub.star
Notes
- Replacement probes from Aliexpress.com seem to work well and are pretty cheap (~$20 for PH, ~$40 for ORP). Make sure to choose the industrial probe with the BNC connector. They likely need to be replaced each year. My 14 month old ORP sensor is taking 2 days to settle its reading after a reboot though it's working well other than that. The PH sensor thought most everything was 6.9-7.0 after a year and needed replacement.
- I couldn't find any temperature correction data on the sensor page but at hot tub temps there seems to be minimal correction needed. We've got the water temp available so it should be easy to add if we can figure that out in the future.