Awning Control

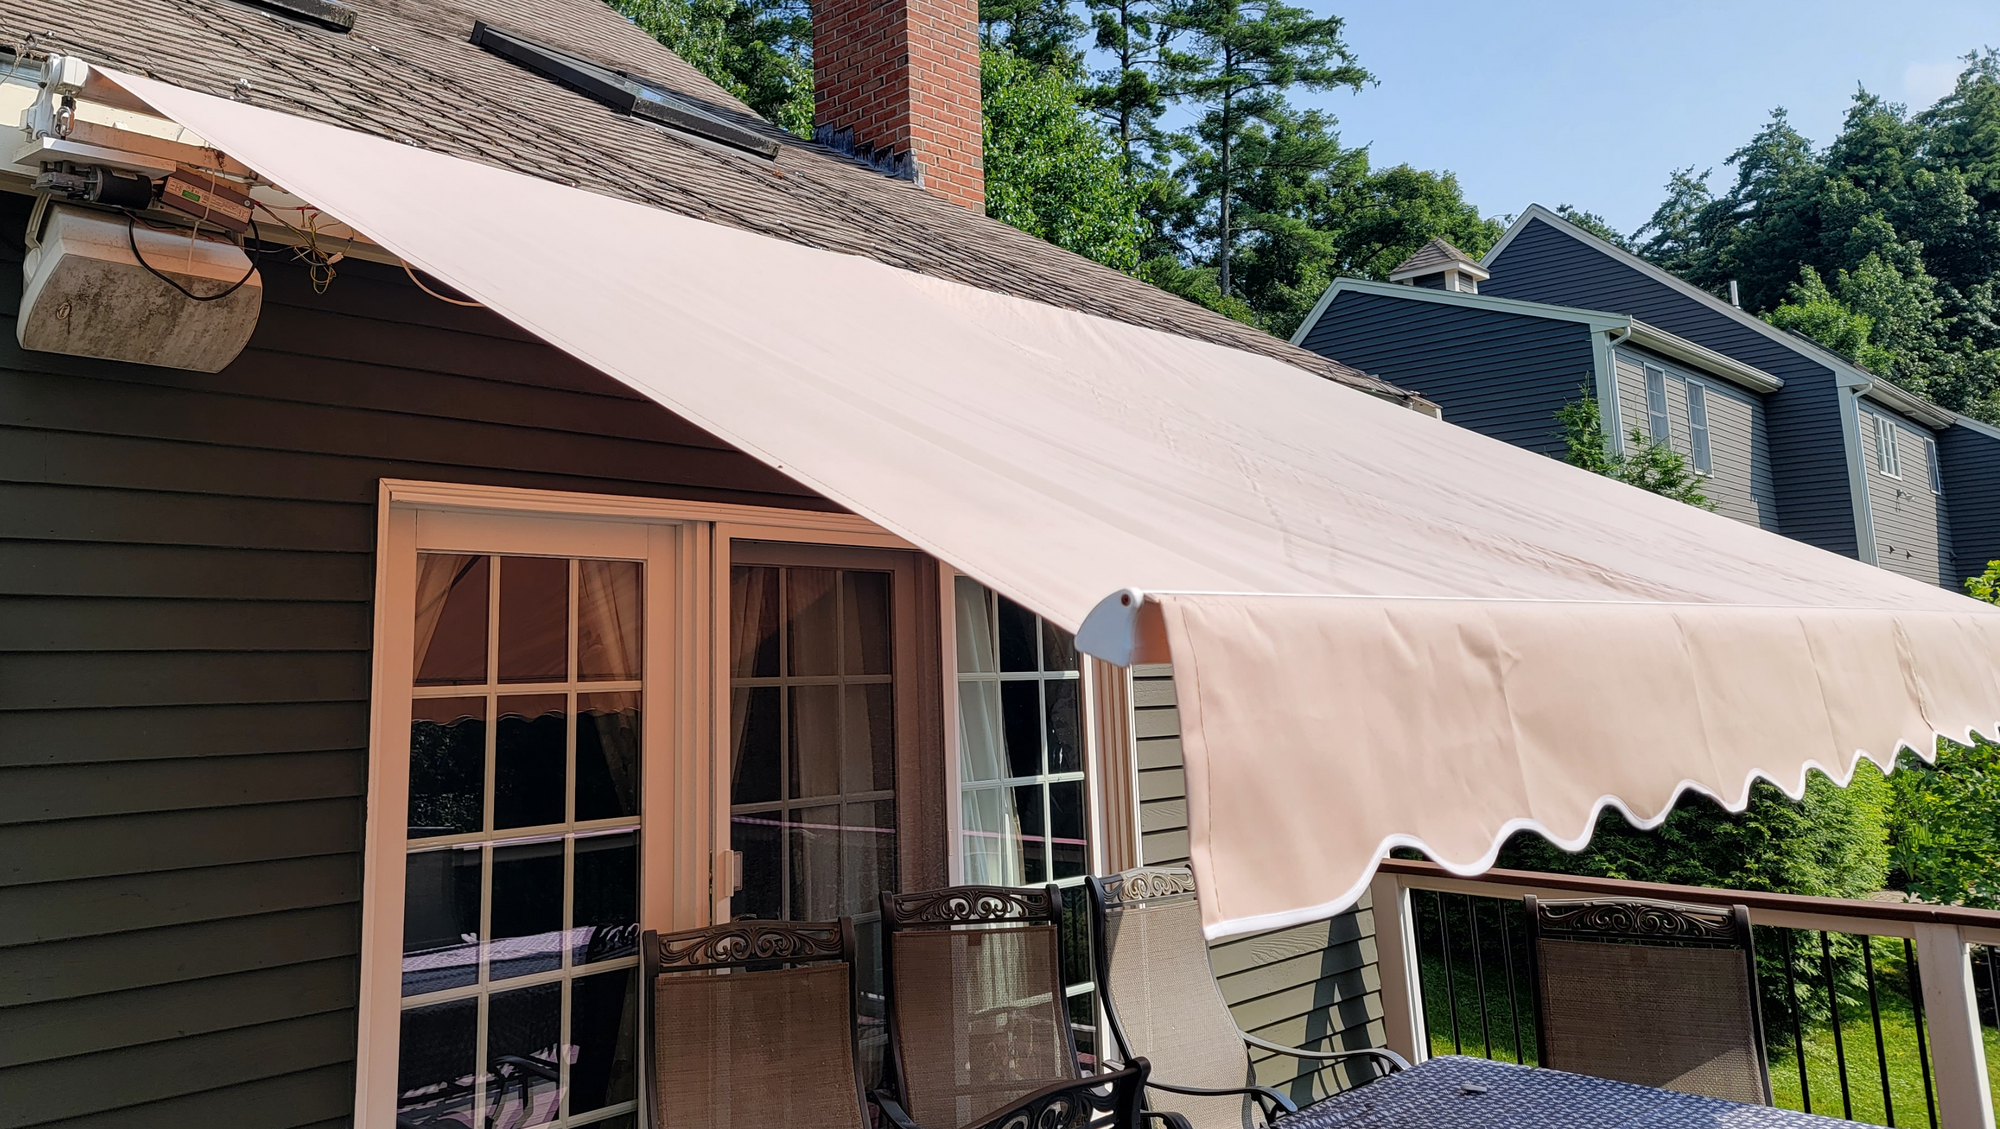
My deck gets a lot of sun so I figured an awning might help with the glare and keep it cool enough let me and the doggies walk around without getting 3rd degree burns. I ordered a highly rated one off Amazon, installed it, and quickly got to witness how the wind threatens to tear it right off the house. After that I was almost afraid to use it...maybe I'd forget to close it and later find it and my fascia board in my neighbor's yard. Time for some technological help. My main goal was to automatically close the awning if it got too windy and that of course meant motorizing it. Fun!
The main features are:
- Auto-close based on an accelerometer
- MQTT to allow integration with Home Assistant or other front ends and monitoring systems
- Automation (Node-RED) to automatically close it at night (maybe open in the morning if there's rain or sun in the forecast?).
- No permanent modifications to the awning
Supplies
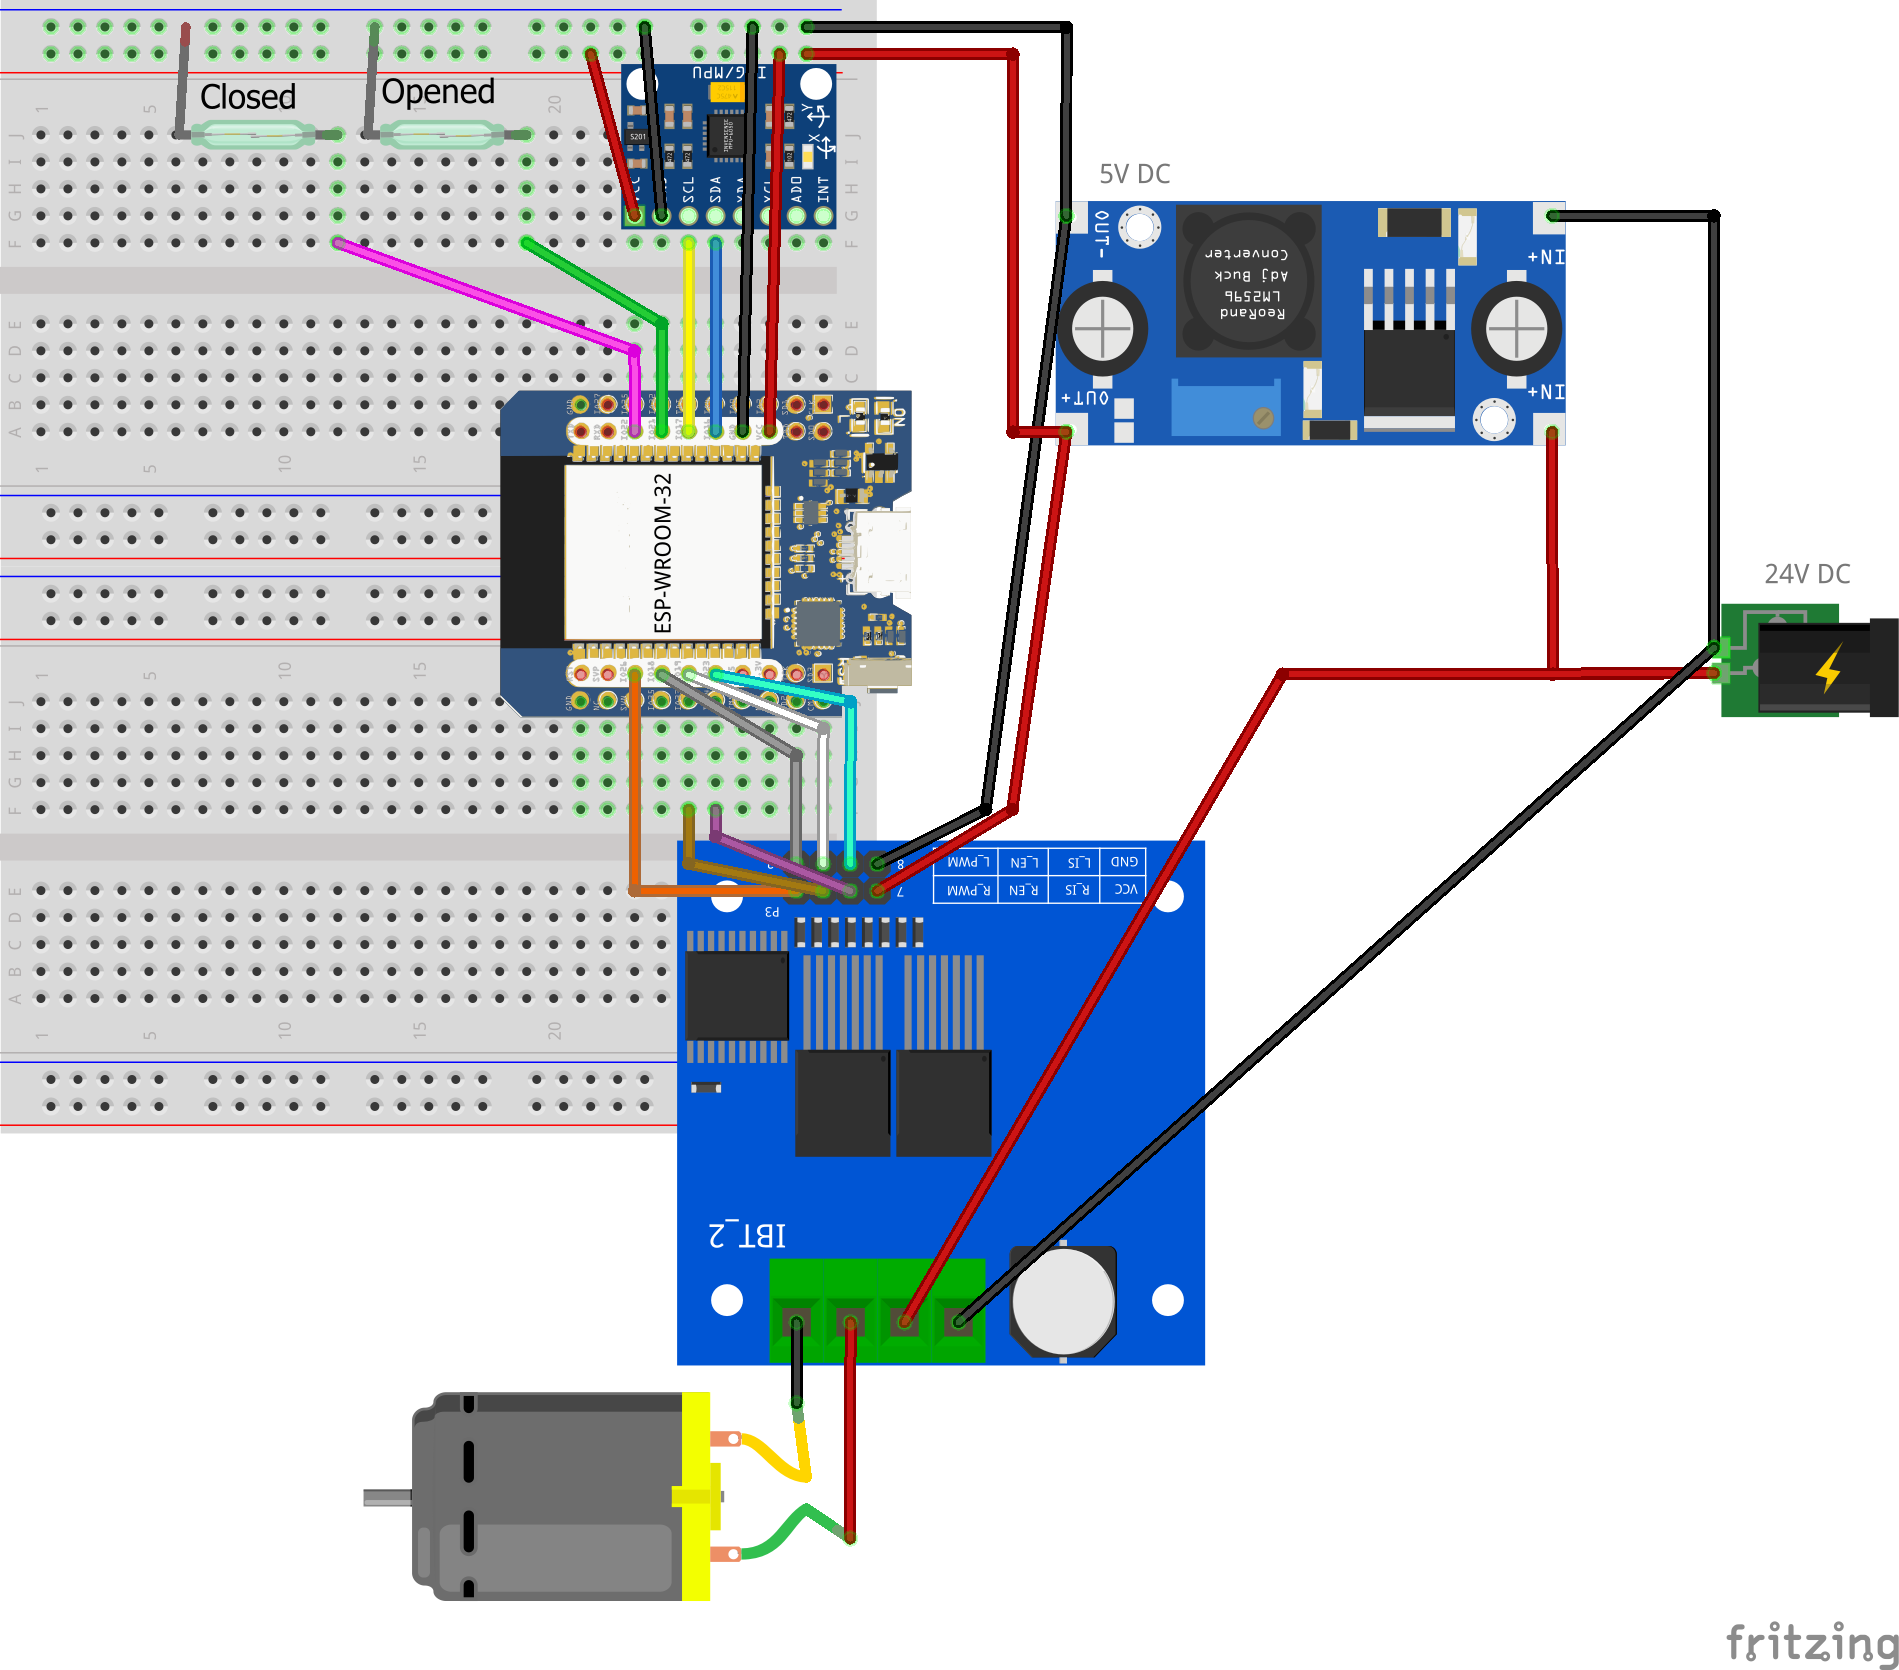
- ESP32 Mini, ESP32 development board, or whatever ESP32 you prefer
- 24V high torque motor
- BTS7960 high power motor driver
- GY-521 - Accelerometer/Gyroscope
- 2x reed switches
- 8mm to 10mm shaft coupler
- 5/16" stainless eye screw (~8mm) depending on your awning
- Awning - mine is 13'x8' though they also have 10'x8' and 12'x10' but you'd have to check if the opening mechanism is the same.
- 24V Waterproof power supply
- Buck converter
- Waterproof project box
- Dielectric grease - optional but will help protect the reed switch contacts
- Various wire - At least 15' of 4 conductor wire for the accelerometer, maybe 10' of 2 conductor wire for the reed switches, dupont wires for the motor controller, etc.
- Motor mount and various hardware - I used some PVC board I had lying around but PT or stained wood would work too
When you purchase through links on this site, I may earn an affiliate commission.
Wiring
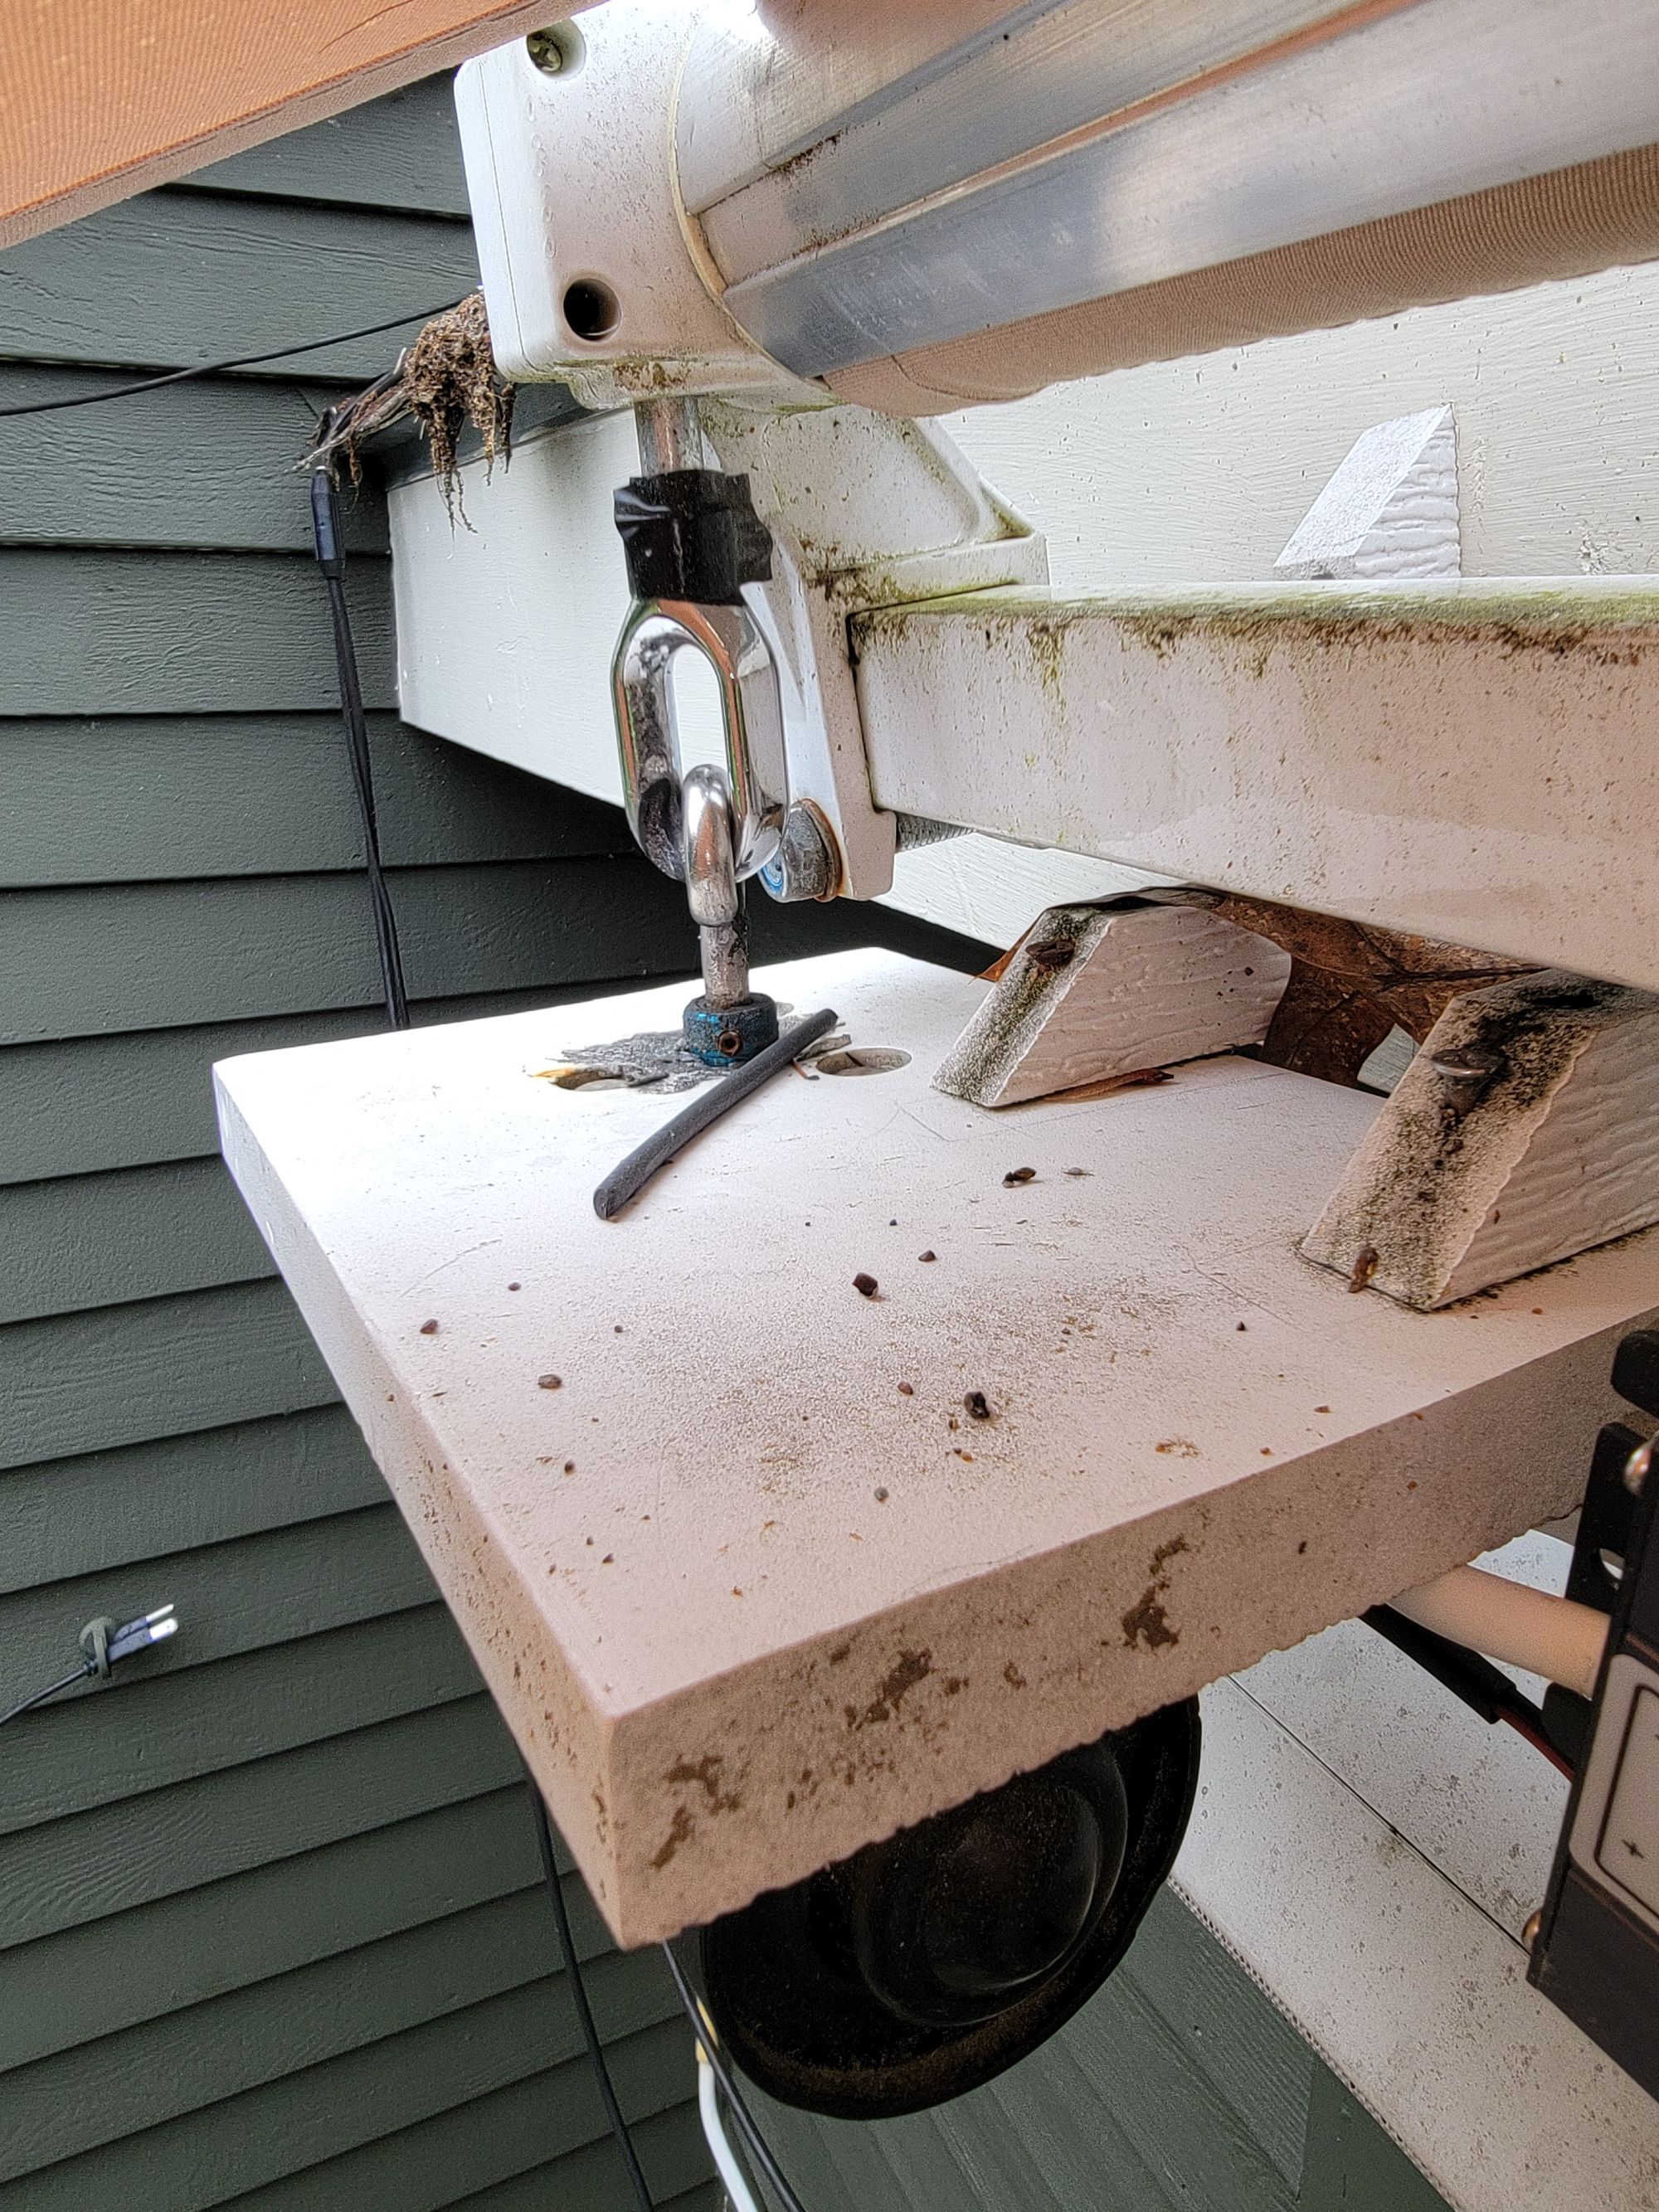
Assembly
I didn't want to permanently modify the awning so if I sell my house or something I can just revert things back to using the hooked rod. The eye the hooked rod goes through is riveted on so I needed to figure out a way for the motor to turn the eye. In the end I decided to make a hook that could be attached to the motor using a coupler. To make sure the grub screws in the coupler would hold I used some Loctite and also used my drill press and drilled dimples in the hook where the grub screws made contact. There is a good amount of pressure on the coupling especially when closing so drill in as far as you can and use longer screws to make the connection as solid as possible.
For the motor mount I used a scrap piece of PVC board I had laying around and drilled 3 holes for the bolts that secure the motor and one for the coupler.
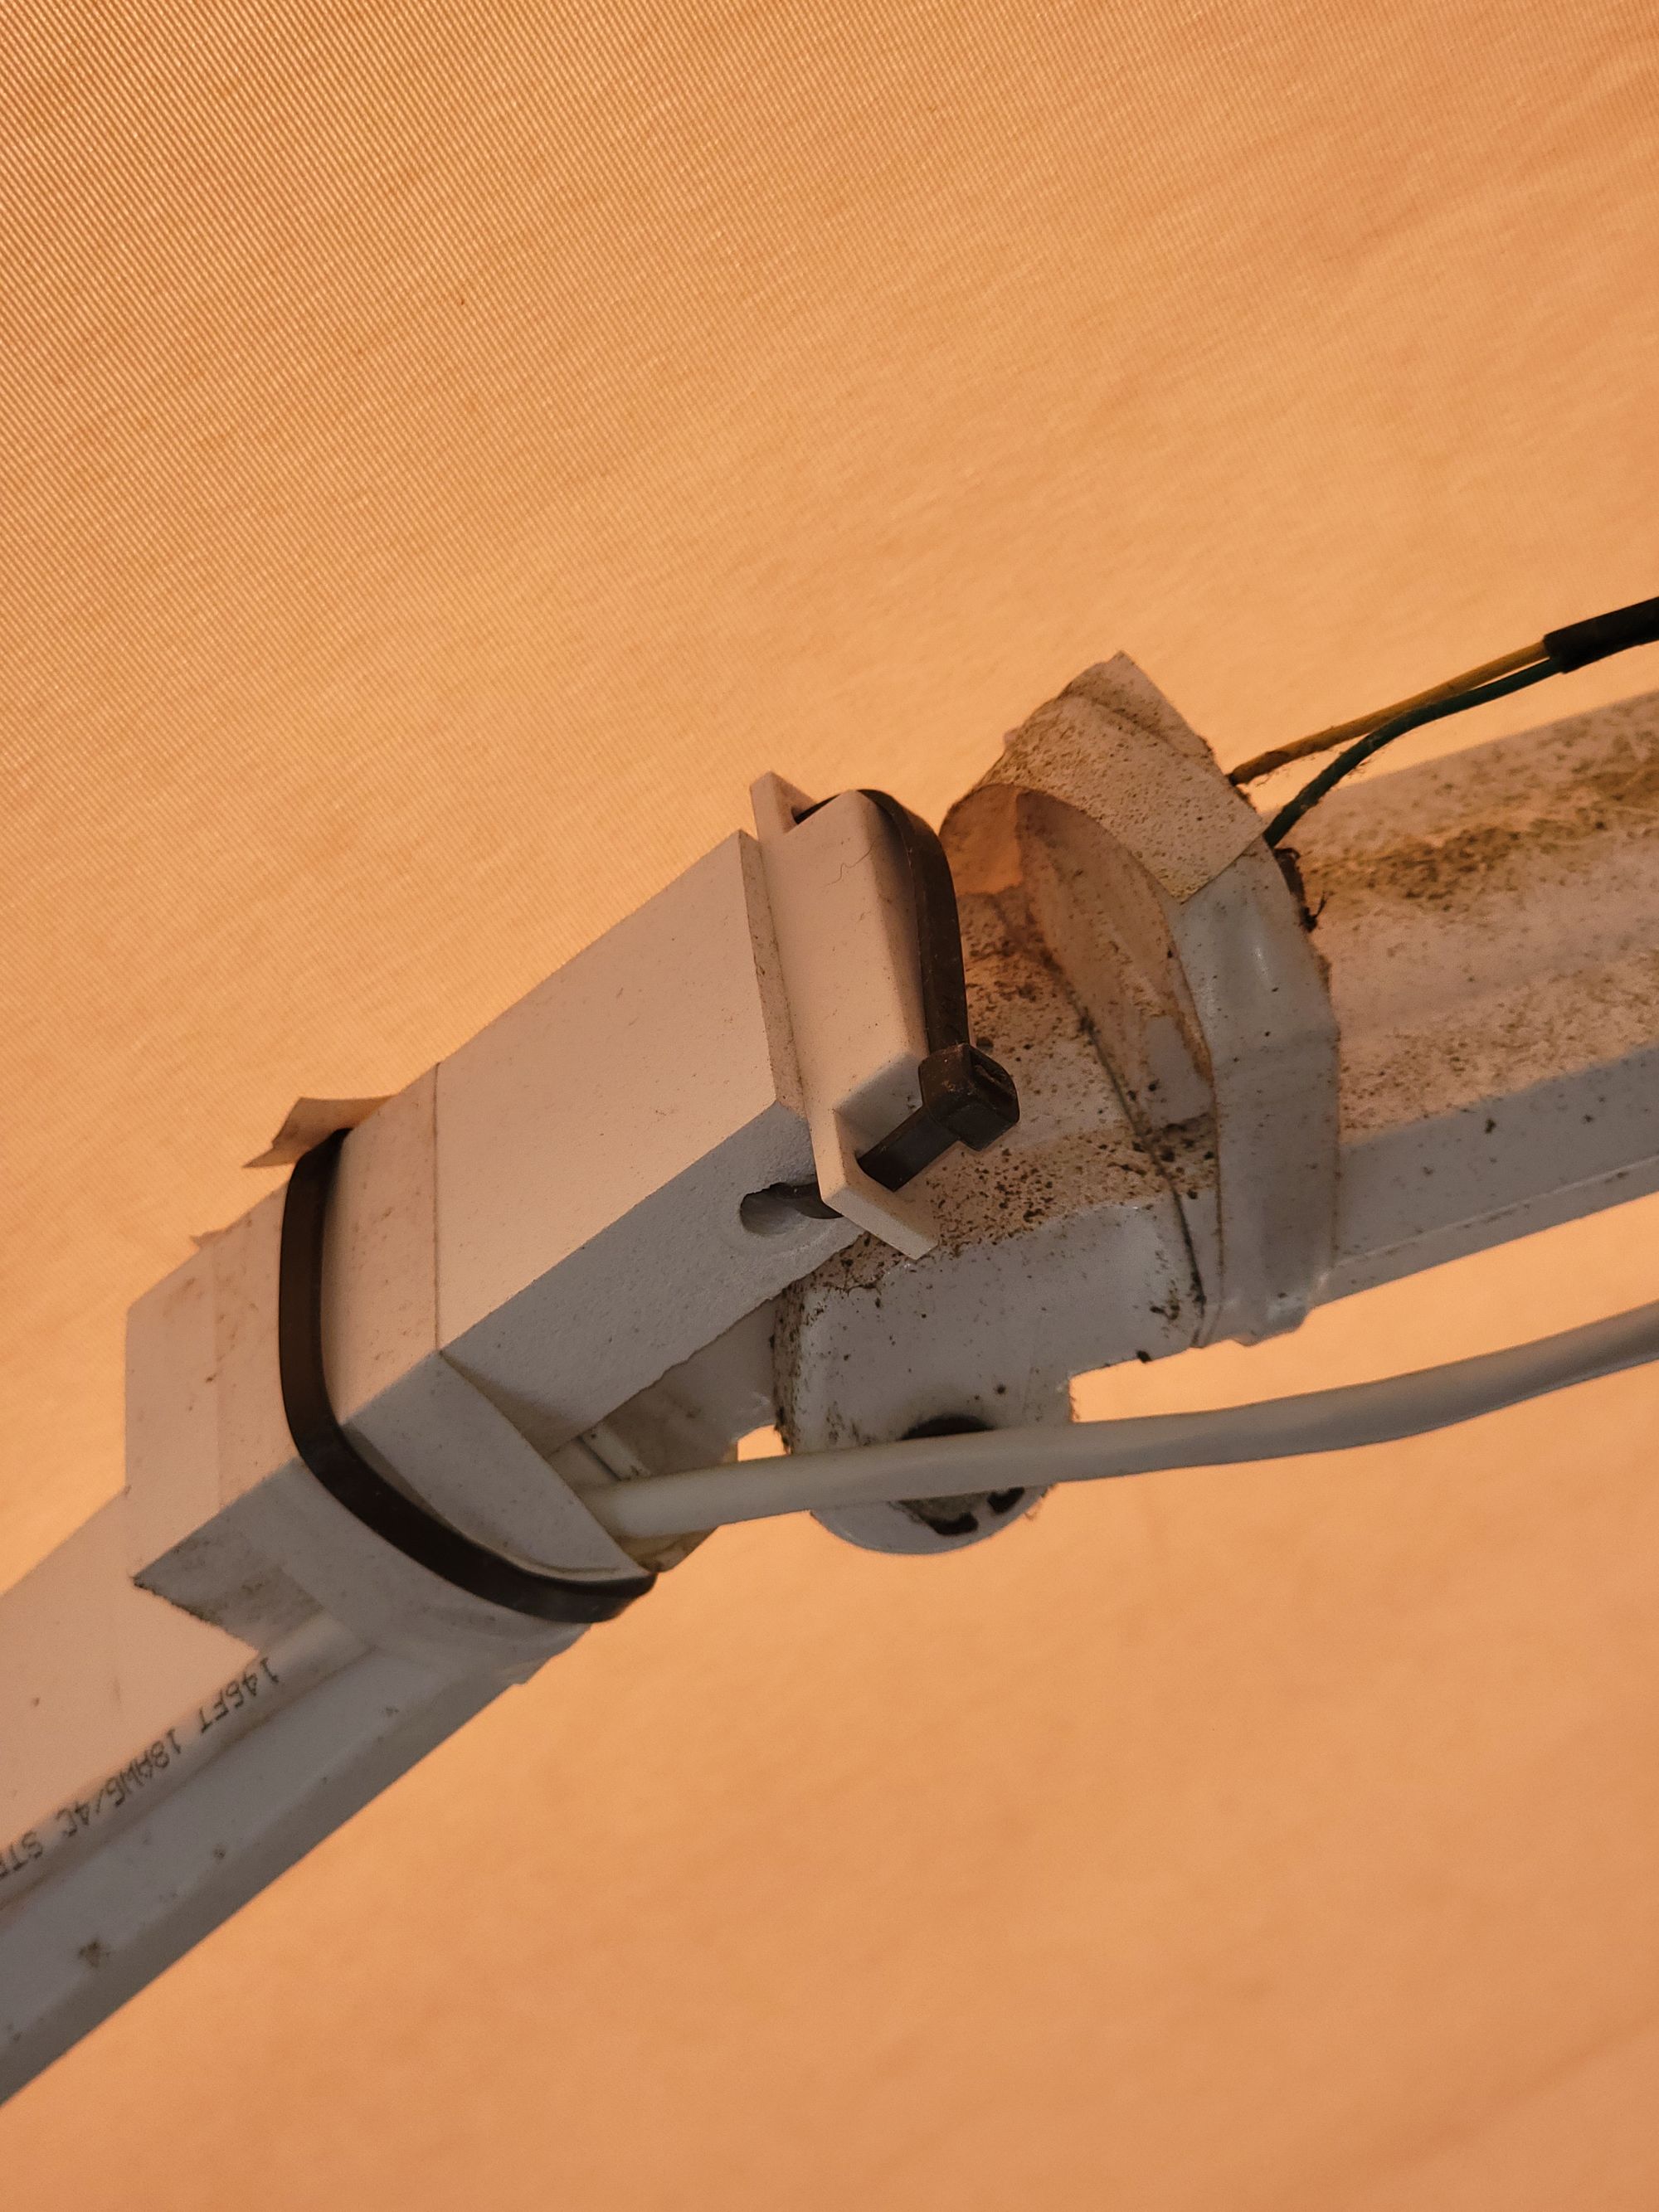
The close reed switch was easy with the switch on the awning frame near the house and the magnet zip tied to an arm. The open reed switch I put at the elbow of the arm with a short extension since the arms don't make a straight line when fully opened.
The accelerometer I placed at the end of an arm. The code just adds up the XYZ acceleration so you don't need to worry about orientation. I initially didn't weatherproof the accelerometer at all and it lasted about 2 years. I've current got a poor man's setup with a Ziploc bag and desiccant pack and I'm curious to see how long that will last. Once that dies I'll try some marine epoxy or maybe just print a small enclosure.
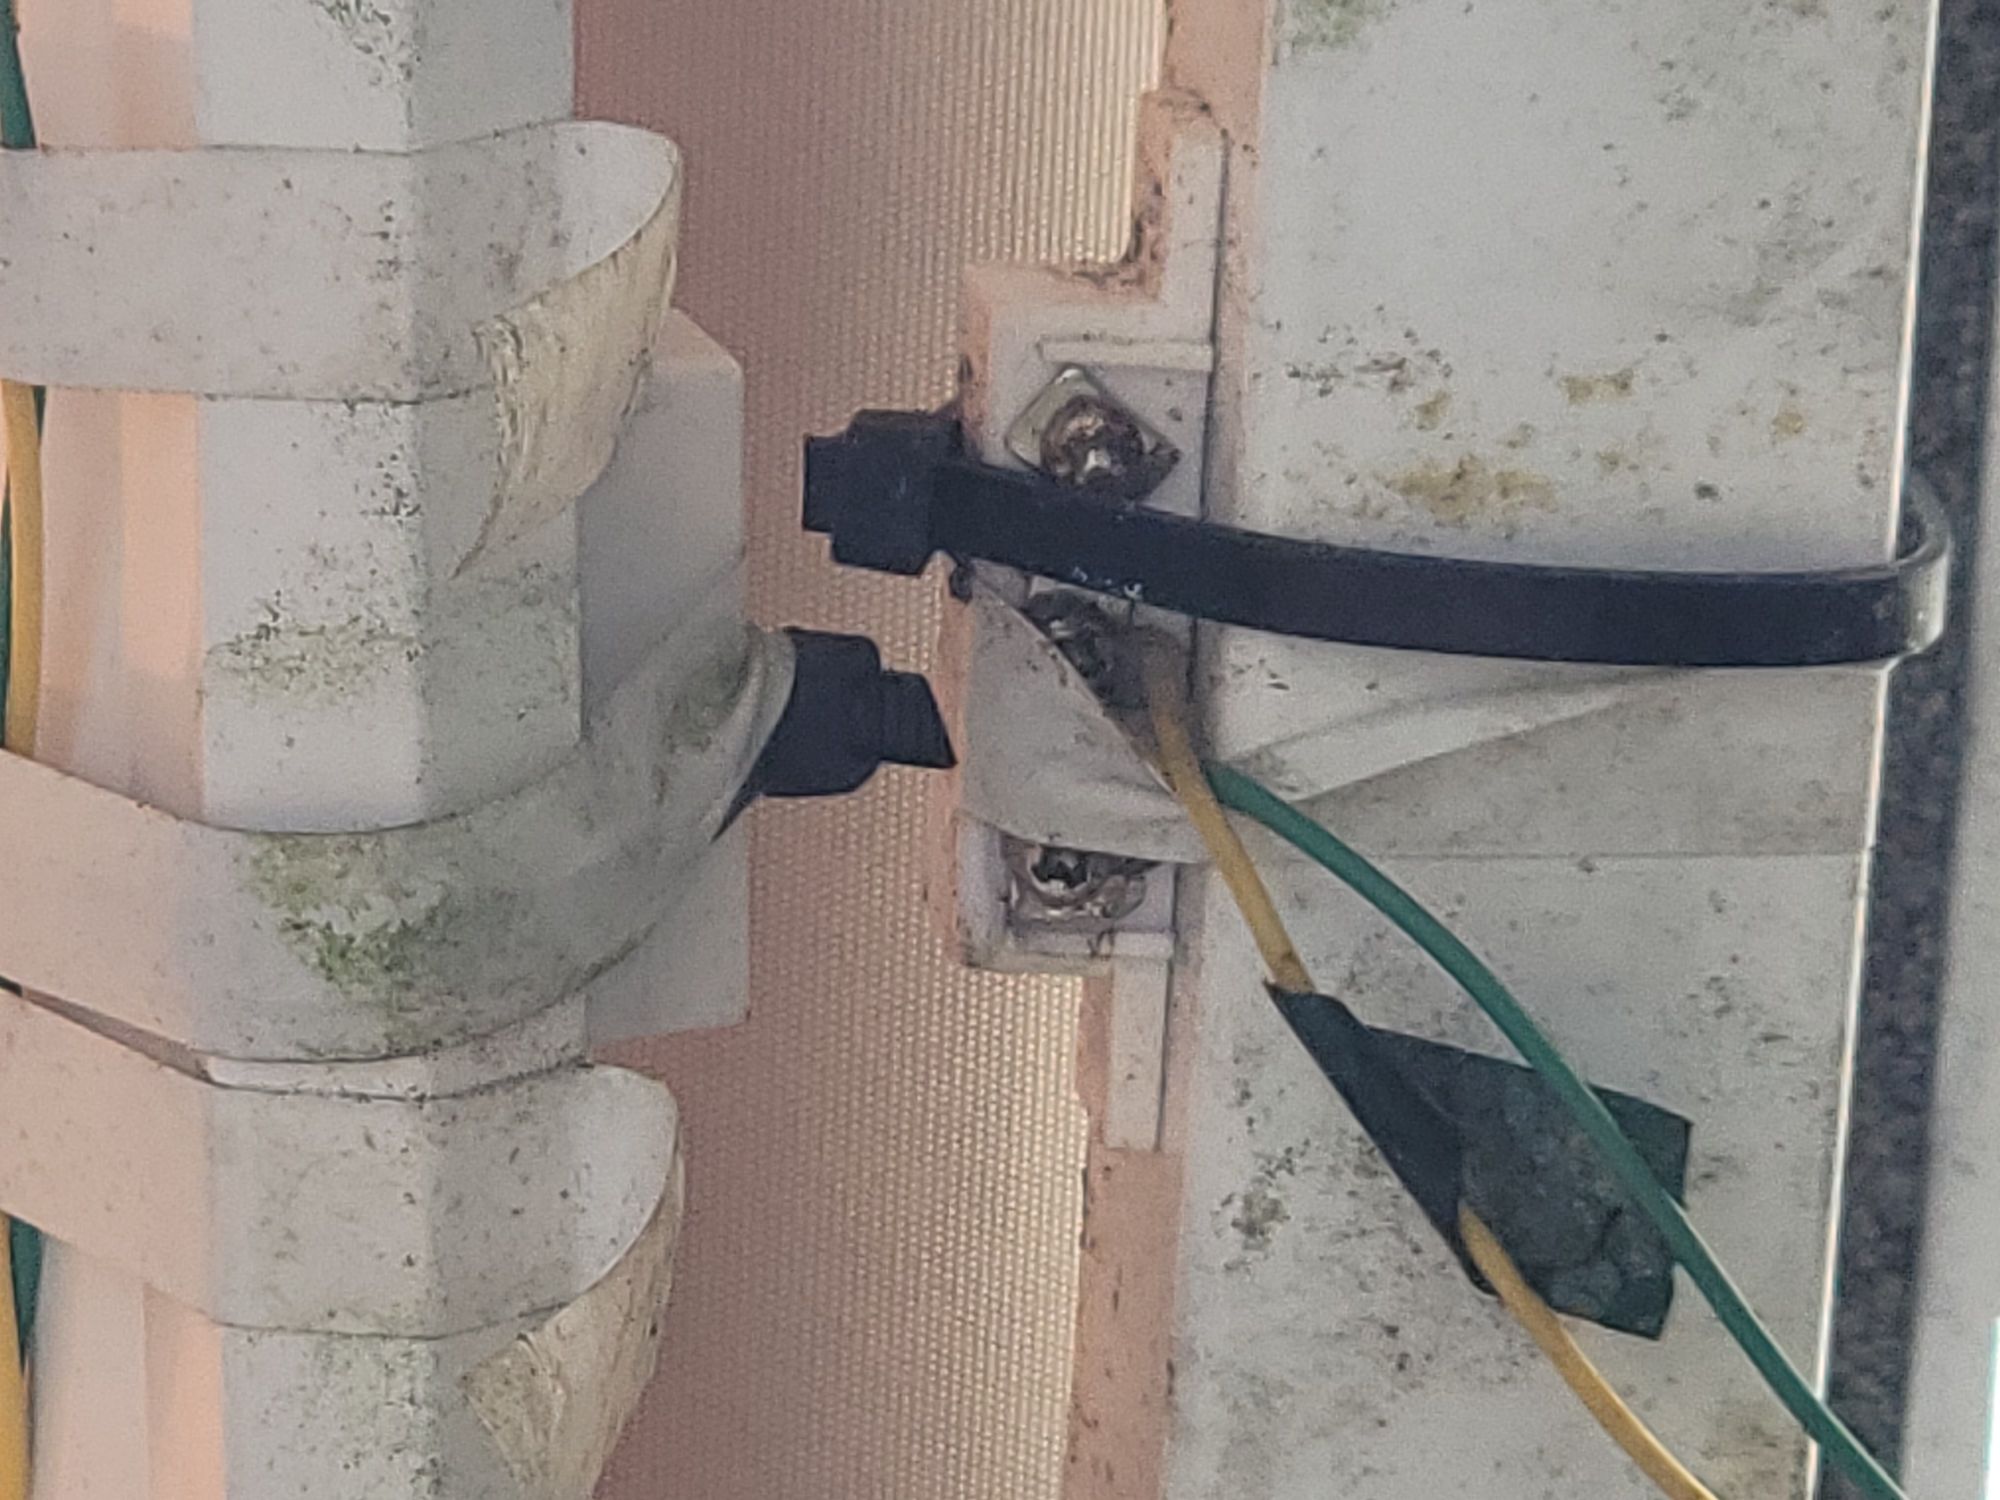
Neat wiring is not my strong suit
Code
Getting Started With Micropython
MPU6050-ESP8266-MicroPython
 adamjezek98
https://github.com/adamjezek98/MPU6050-ESP8266-MicroPython
Grab mpu6050.py and upload that to your ESP32.
micropython-mqtt
peterhinchGrab mqtt_as/mqtt_as.py and mqtt_as/mqtt_local.py and upload them to the root of the ESP32 without the subdirs. We'll need to tweak mqtt_local.py with your WiFi and MQTT broker settings.
Update 4/20/25: The latest version of micropython-mqtt has been restructured. Now grab mqtt_as/__init__.py and upload it to the same path on the ESP32. Tweak mqtt_local_example.py with your WiFi and MQTT broker settings and upload that as mqtt_local.py to the root of your ESP32.
This project's code
scareyCopy main.py and bts7960.py to the root of the ESP32.
Configuration
Publish your config (with retain) to the "esp32/awning/config" topic. "windThreshold" is the value the sum of the accelerometer changes needs to be above to trigger the close. Increase it if you think it's closing when it's not that windy or decrease it if it's getting blown around and not closing. You can check the value history in an MQTT client. The "sampleFrequency" is how ofter to check the wind readings. I've been using 3 seconds and it seems to work well.
{"windThreshold": 2400, "sampleFrequency": 3}Home Assistant
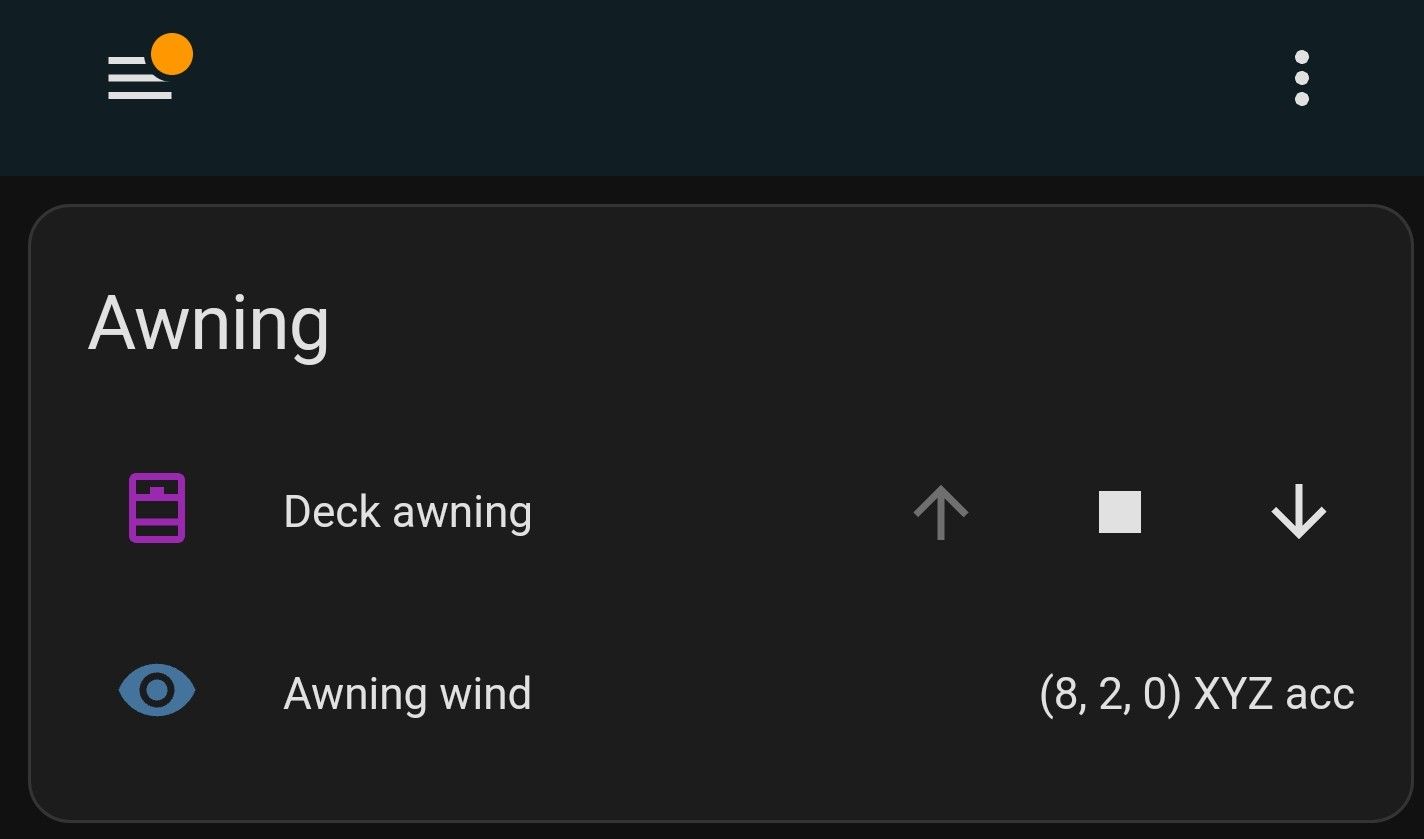
I'm just using the MQTT Cover and sensor interfaces and default widgets to control things and see what the wind readings look like.
mqtt:
  cover:
  - unique_id: 'awning'
    name: "Deck awning"
    command_topic: "esp32/awning/set"
    state_topic: "esp32/awning/state"
    availability:
      - topic: "esp32/awning/availability"
    payload_open: "open"
    payload_close: "close"
    payload_stop: "stop"
    optimistic: false
  sensor:
  - unique_id: awningvib
    name: "Awning wind"
    state_topic: "esp32/awning/readings"
    unit_of_measurement: "XYZ sum"
    value_template: >-
      {%- set parts = value[1:-1].split(",") -%}
      {{ int(parts[0]) + int(parts[1]) + int(parts[2]) }}
Alexa
If you managed to configure Alexa for your Home Assistant then congrats! It's kind of a pain as seen here:
 Home Assistant
But once you have completed said suffering controlling your awning with Alexa is as simple as:
alexa:
  smart_home:
    locale: en-US
    endpoint: https://api.amazonalexa.com/v3/events
    filter:
      include_entities:
        - cover.deck_awning
    entity_config:
      cover.deck_awning:
        name: "Awning"
Notes
- You need to be very careful while you're testing. If the close reed switch isn't working right the motor will keep trying to close and put a lot of strain on everything. If the open reed switch isn't working the spool will completely unwind and begin winding with the fabric on the underside of the spool which will stress the fabric against the middle roller. Be prepared to pull the plug while you're testing!
- I've had the awning motorized for 3 years now. I just needed to replace the fabric and you can contact the seller on Amazon and it cost $45 shipped. Not bad.
- The loop that the hooked pole goes through is riveted on but last year the rivet rusted off. If I had to do this again I'd probably try to couple the motor straight to the post where the loop was but I ended up just putting a nail through where the rivet was and keeping the loop. But it may be simplest to just remove the eye from the start.
- I could add a rotary encoder and then exact positioning could be used, e.g. open the awning to 75%. Maybe magnets and hall effect sensors like in the Ultimate Garage Door Control.
- 9/7/23 - I just updated to Home Assistant 2023.9.0 and it didn't like how I was separating the acceleration values so I updated the config above to combine XYZ into a single number.