Ultimate Garage Door Control

I've had an Insteon Garage Door Control and Status kit for over a decade and I have never trusted it. It consists of an Insteon controllable relay and a single reed switch that could tell you if the door was closed. It would occasionally stop opening after about a quarter of the way and with the single reed switch the interface indicated everything was great even though the neighbor you were trying to remotely let in had to do some crawling. Integration with Alexa is done via my ISY994 (just discontinued) and when Alexa recently decided to ignore one of my doors I thought I should waste spend some time looking for a new solution.
After motorizing the awing over my deck and integrating it with Home Assistant's MQTT Cover interface I noticed it supported positioning so it could tell you exactly what percent open it was if you could somehow supply that info. I knew then I wanted to track whether the garage is opening/closing, what percent opened/closed it is, if it got stuck in the middle, and whether it's definitely fully opened or closed. And with many other ways of controlling things (car clickers, wall controls, outdoor keypad, safety sensors, and previously mentioned ISY control) I didn't want the code to assume it knew what was going on, just accurately report the current state of things.
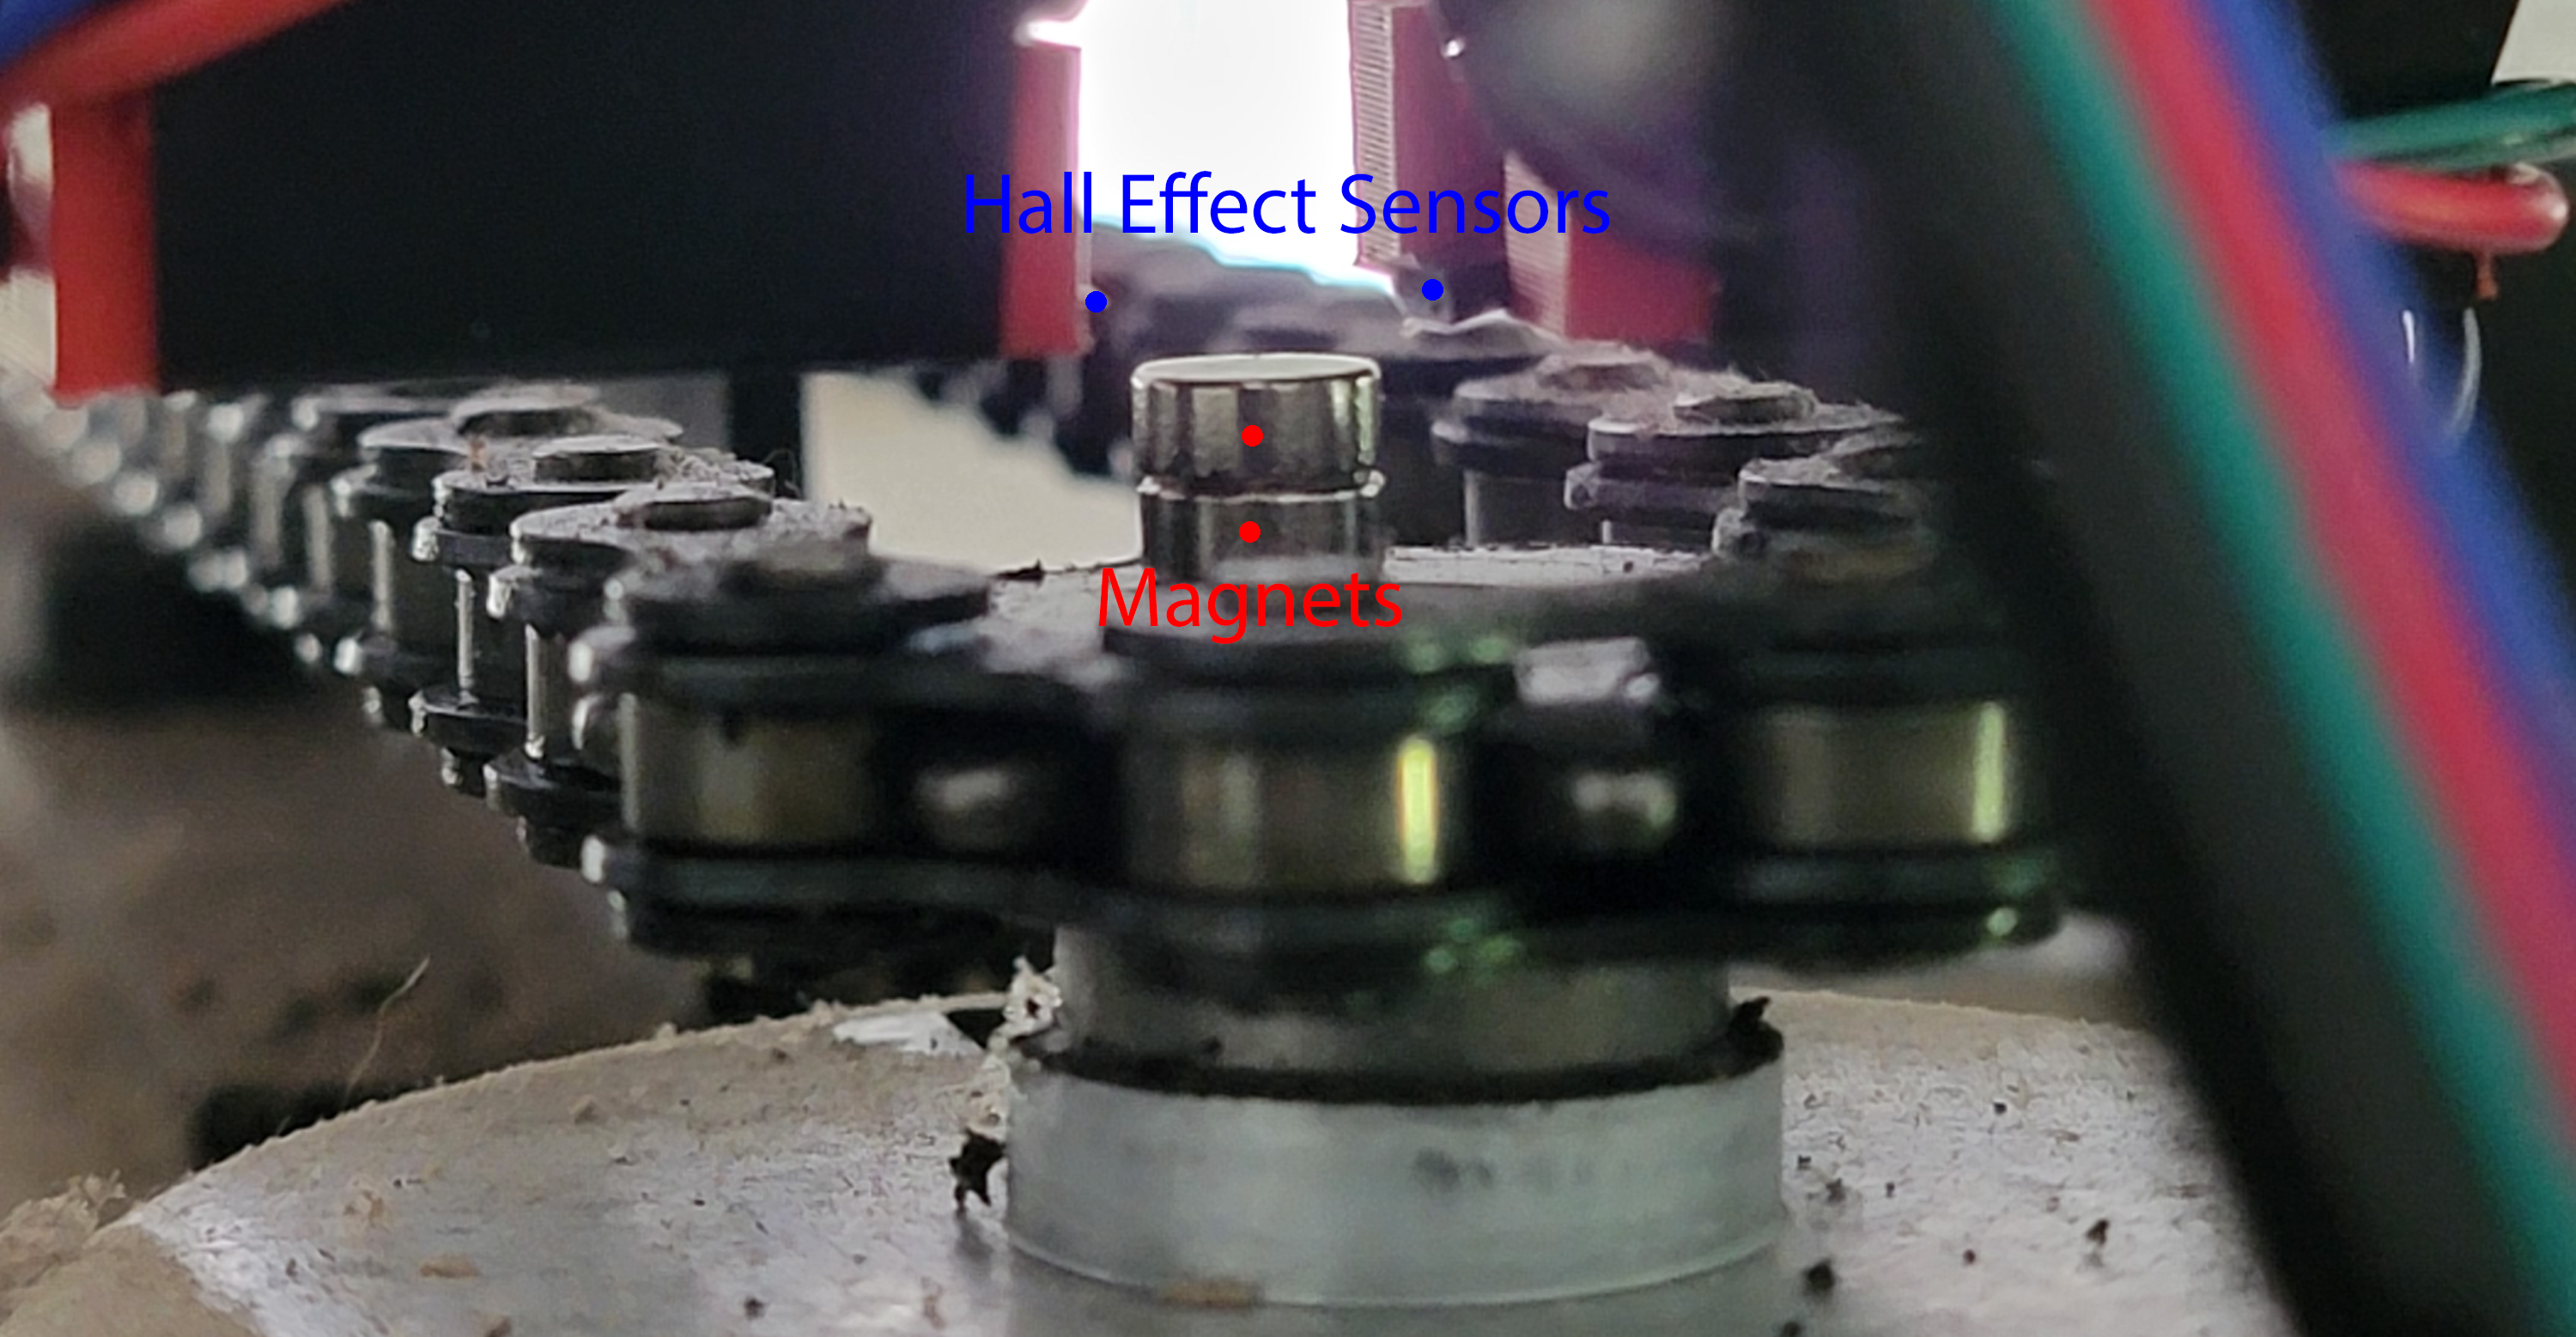
I decided on a couple reed switches so I could tell for certain when it was fully open or fully closed and planned to measure the rotation of the sprocket (mine's chain driven though should similar for belt and might need some creative magnet placement for screw) with some magnets and hall effect sensors. A DIY rotary encoder I guess. From the direction of rotation we can determine whether the door is opening or closing and its position based on the rotation count. Toss in a relay, ESP32 and some micropython code and the next stop should be the Ultimate Garage Door Control.
See it in action below. Obviously a run-away scooter is no match for the Ultimate Garage Door Control...
Home Assistant custom cards. No cats were harmed during the production of this video.
The rotation and position sensing could also be useful (perhaps more useful since you'd rarely want to open your garage 30%...) for control of other covers such as awnings, etc.
Supplies
- ESP32 development board, ESP32 Mini, or whatever ESP32 you prefer (can handle up to 3 garage doors)
- 2x Reed Switches per door
- 2x Hall Effect Sensors per door
- Small magnets - at least 2x per door depending on mounting (6x per door for me, 8x for quadrature encoding)
- Single channel relay or Mini Relay Shield - 1x per door, though a 2 channel relay simplifies things for a 2 door setup
- Extension wire - this is handy for the reed switches
- CAT6 cable - optional, handy for 8x 23 gauge wires to a second door
- Dupont wires
When you purchase through links on this site, I may earn an affiliate commission.
Which way is the door really moving?
Maybe new garage door controllers are smart let you know exactly what's going on but mine is dumb. Let's face it...with my only interface to the garage door being a button, all I can command it to do is "GO" and it decides based on its internal state what it should do. Here's what my Chamberlain Liftmaster Professional will do when you press the button:
- Open if fully closed, close if fully opened (perfect)
- Stop if it was opening, open if it was closing (interesting)
- Close if it was stopped (makes sense after the above bullet)
I figured if I could detect the direction it was moving and whether it was fully opened, or fully closed I'd be in great shape to build some smart controls. Fully opened or closed? Pretty simple. Moving and in what direction? Hmmm. After some googling I found posts 9 and 17 here:
 altha
altha
It was very helpful and offered 2 basic ways of figuring out direction of rotation. One way for each of my garage doors...lovely! Both ways involve 2 hall effect sensors with one way using timing and a single magnet, and the other using 2 magnets and precise positioning. If you think you can achieve the precise positioning for your setup then go with the quadrature encoding, otherwise the timing based method is perfectly good too. The config.json let's you specify which rotation algorithm you want per door.
There were some good comments on Hackaday about other ways to detect direction of movement using an Absolute Value Encoder or magnetic or inductive proximity switches though it's likely you'd have to update the rotation code.
Wiring
There's are good amount of wiring to be done...2 per reed switch, 3 per hall effect sensor, 5 per relay so 15 per door. 5 are ground, 3 are power, 5 are IO, and 2 for the garage opener relay.
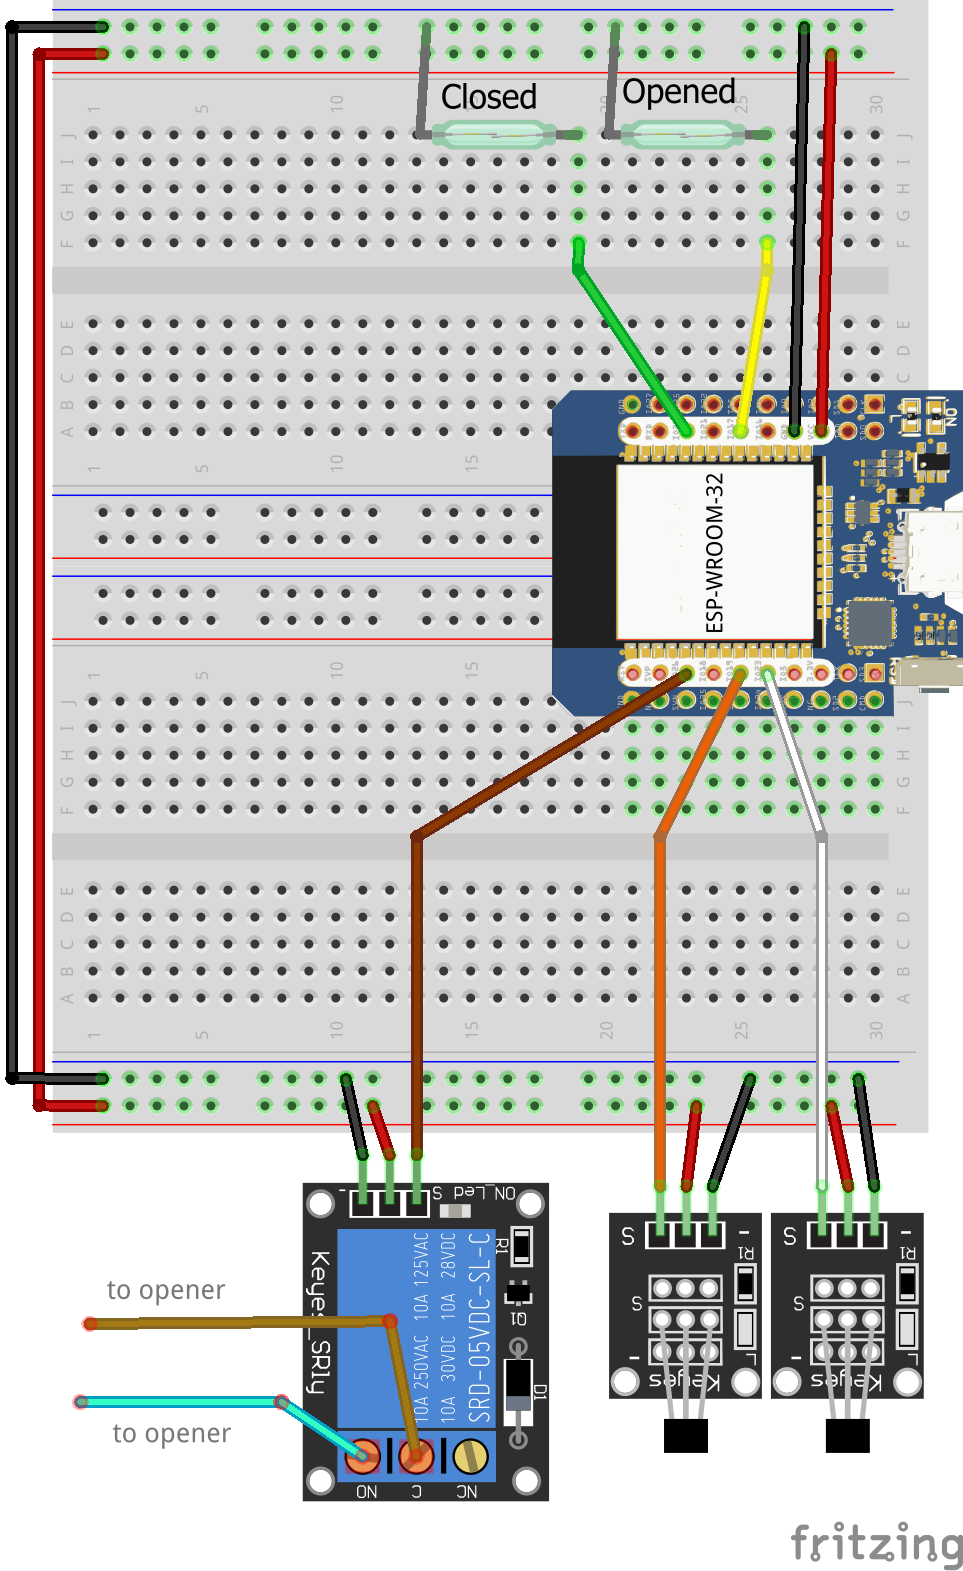
Relay Wiring
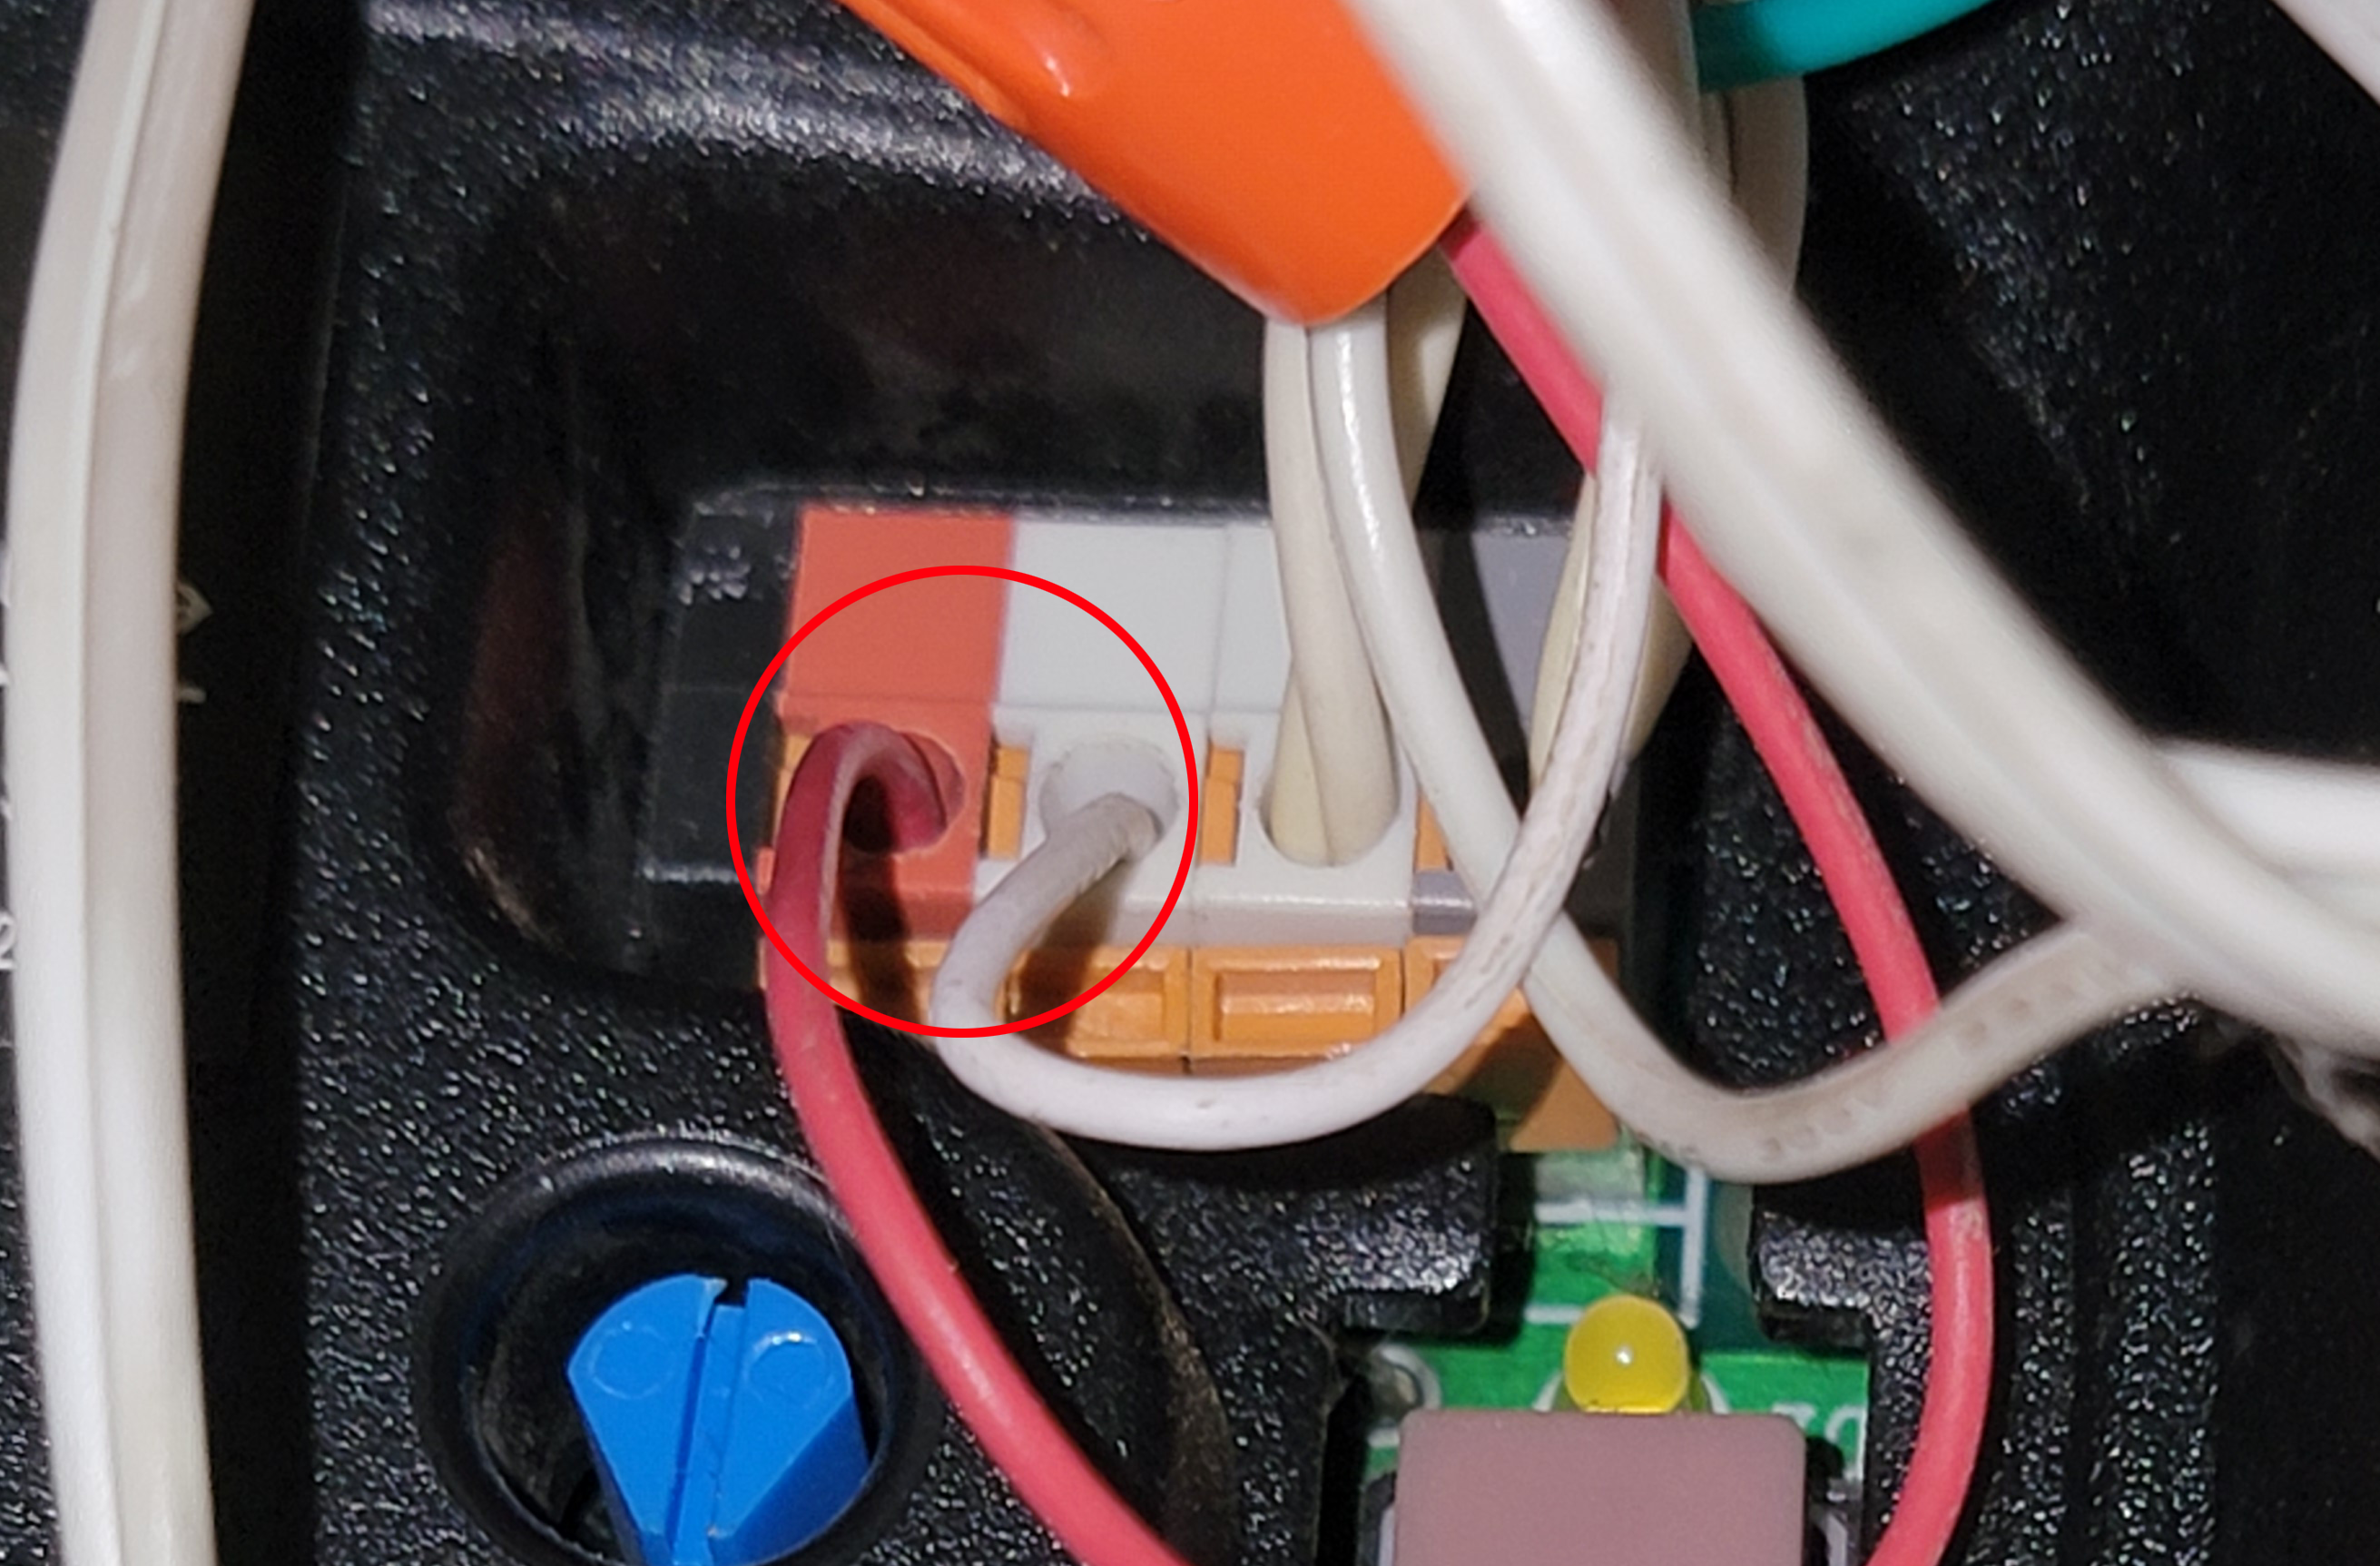
On the relay you need wires from NO (normally open) and C (common). You'll have to find the contacts on the opener that will trigger the door. See assembly pics below for what mine looked like. If you can follow a wire from the wall buttons wherever that wire goes would be the terminals you want. For a proper connection you should pigtail the new relay wires to whatever wires are currently connected. I didn't bother with a latching relay since I figured the opener itself would lose power along with the relay. If you are worried about the relay accidentally triggering when the ESP32 loses power then feel free to tweak the code and get a latching relay instead. I just noticed the single channel relays I link to above let you set whether to trigger high or low and default to high. The trigger high won't have the problem of triggering when the ESP32 loses power but you'll have to change the code to initialize to low and the trigger code to set high then low.
Additional doors
The ESP32 has enough IO to handle 3 doors though the farther away they are the more you'll need to worry about wire gauge. Power-wise you can add a 5v source closer to the other doors, just make sure to run that ground back to the ESP32 as well. You can also put an ESP32 at each door and would just need to adjust the base topic name.
Code
Getting Started With Micropython
micropython-mqtt
 peterhinch
Grab mqtt_as/mqtt_as.py and mqtt_as/mqtt_local.py and upload them to the root of the ESP32 without the subdirs. We'll need to tweak mqtt_local.py with your WiFi and MQTT broker settings.
Update 4/20/25: The latest version of micropython-mqtt has been restructured. Now grab mqtt_as/__init__.py and upload it to the same path on the ESP32. Tweak mqtt_local_example.py with your WiFi and MQTT broker settings and upload that as mqtt_local.py to the root of your ESP32.
This project's code
scareyGrab *.py and upload them to the root of the ESP32. Copy config.json.example to config.json and update the pin config if necessary and the "clockwiseOpen" and "quadrature" based on your installation. Upload the config.json to the root of the ESP32. To change the relay timing and the number of rotations it takes to fully open/close the door you publish a JSON document to the esp32/garage/config topic and code will reconfigure on the fly.
{
  "relay_ms": 500,
  "full_rotations": 21
}
Assembly
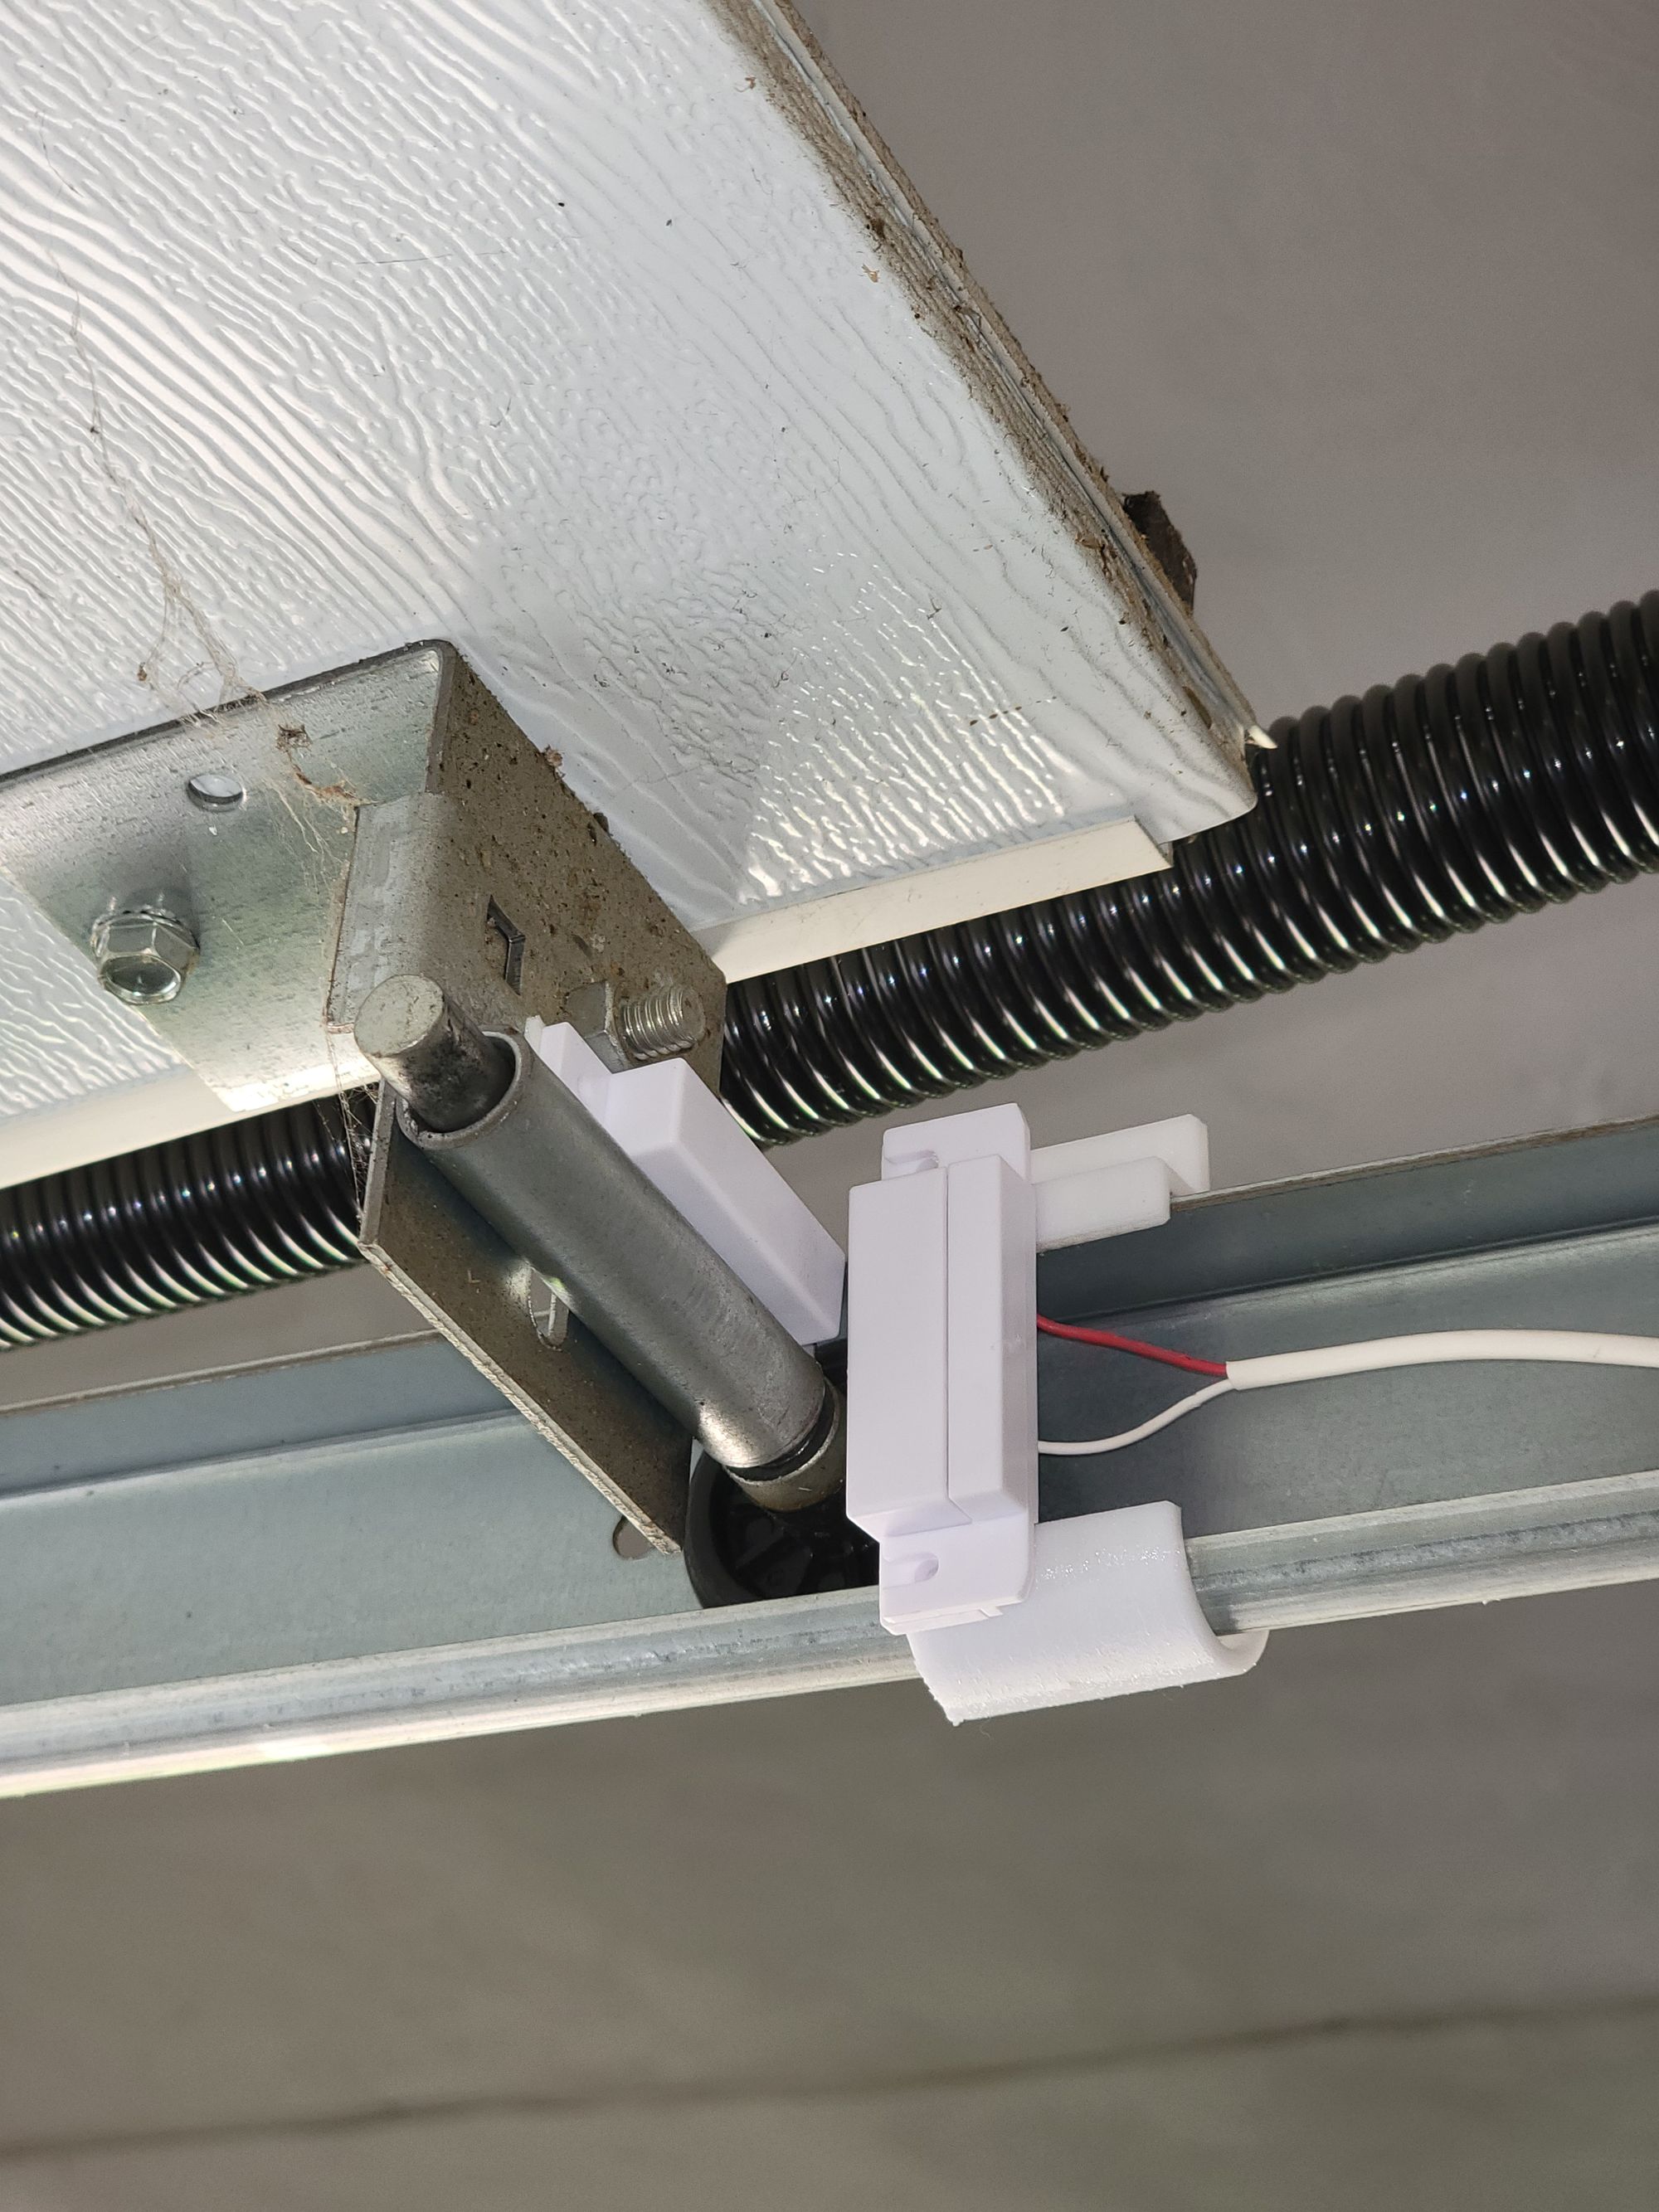
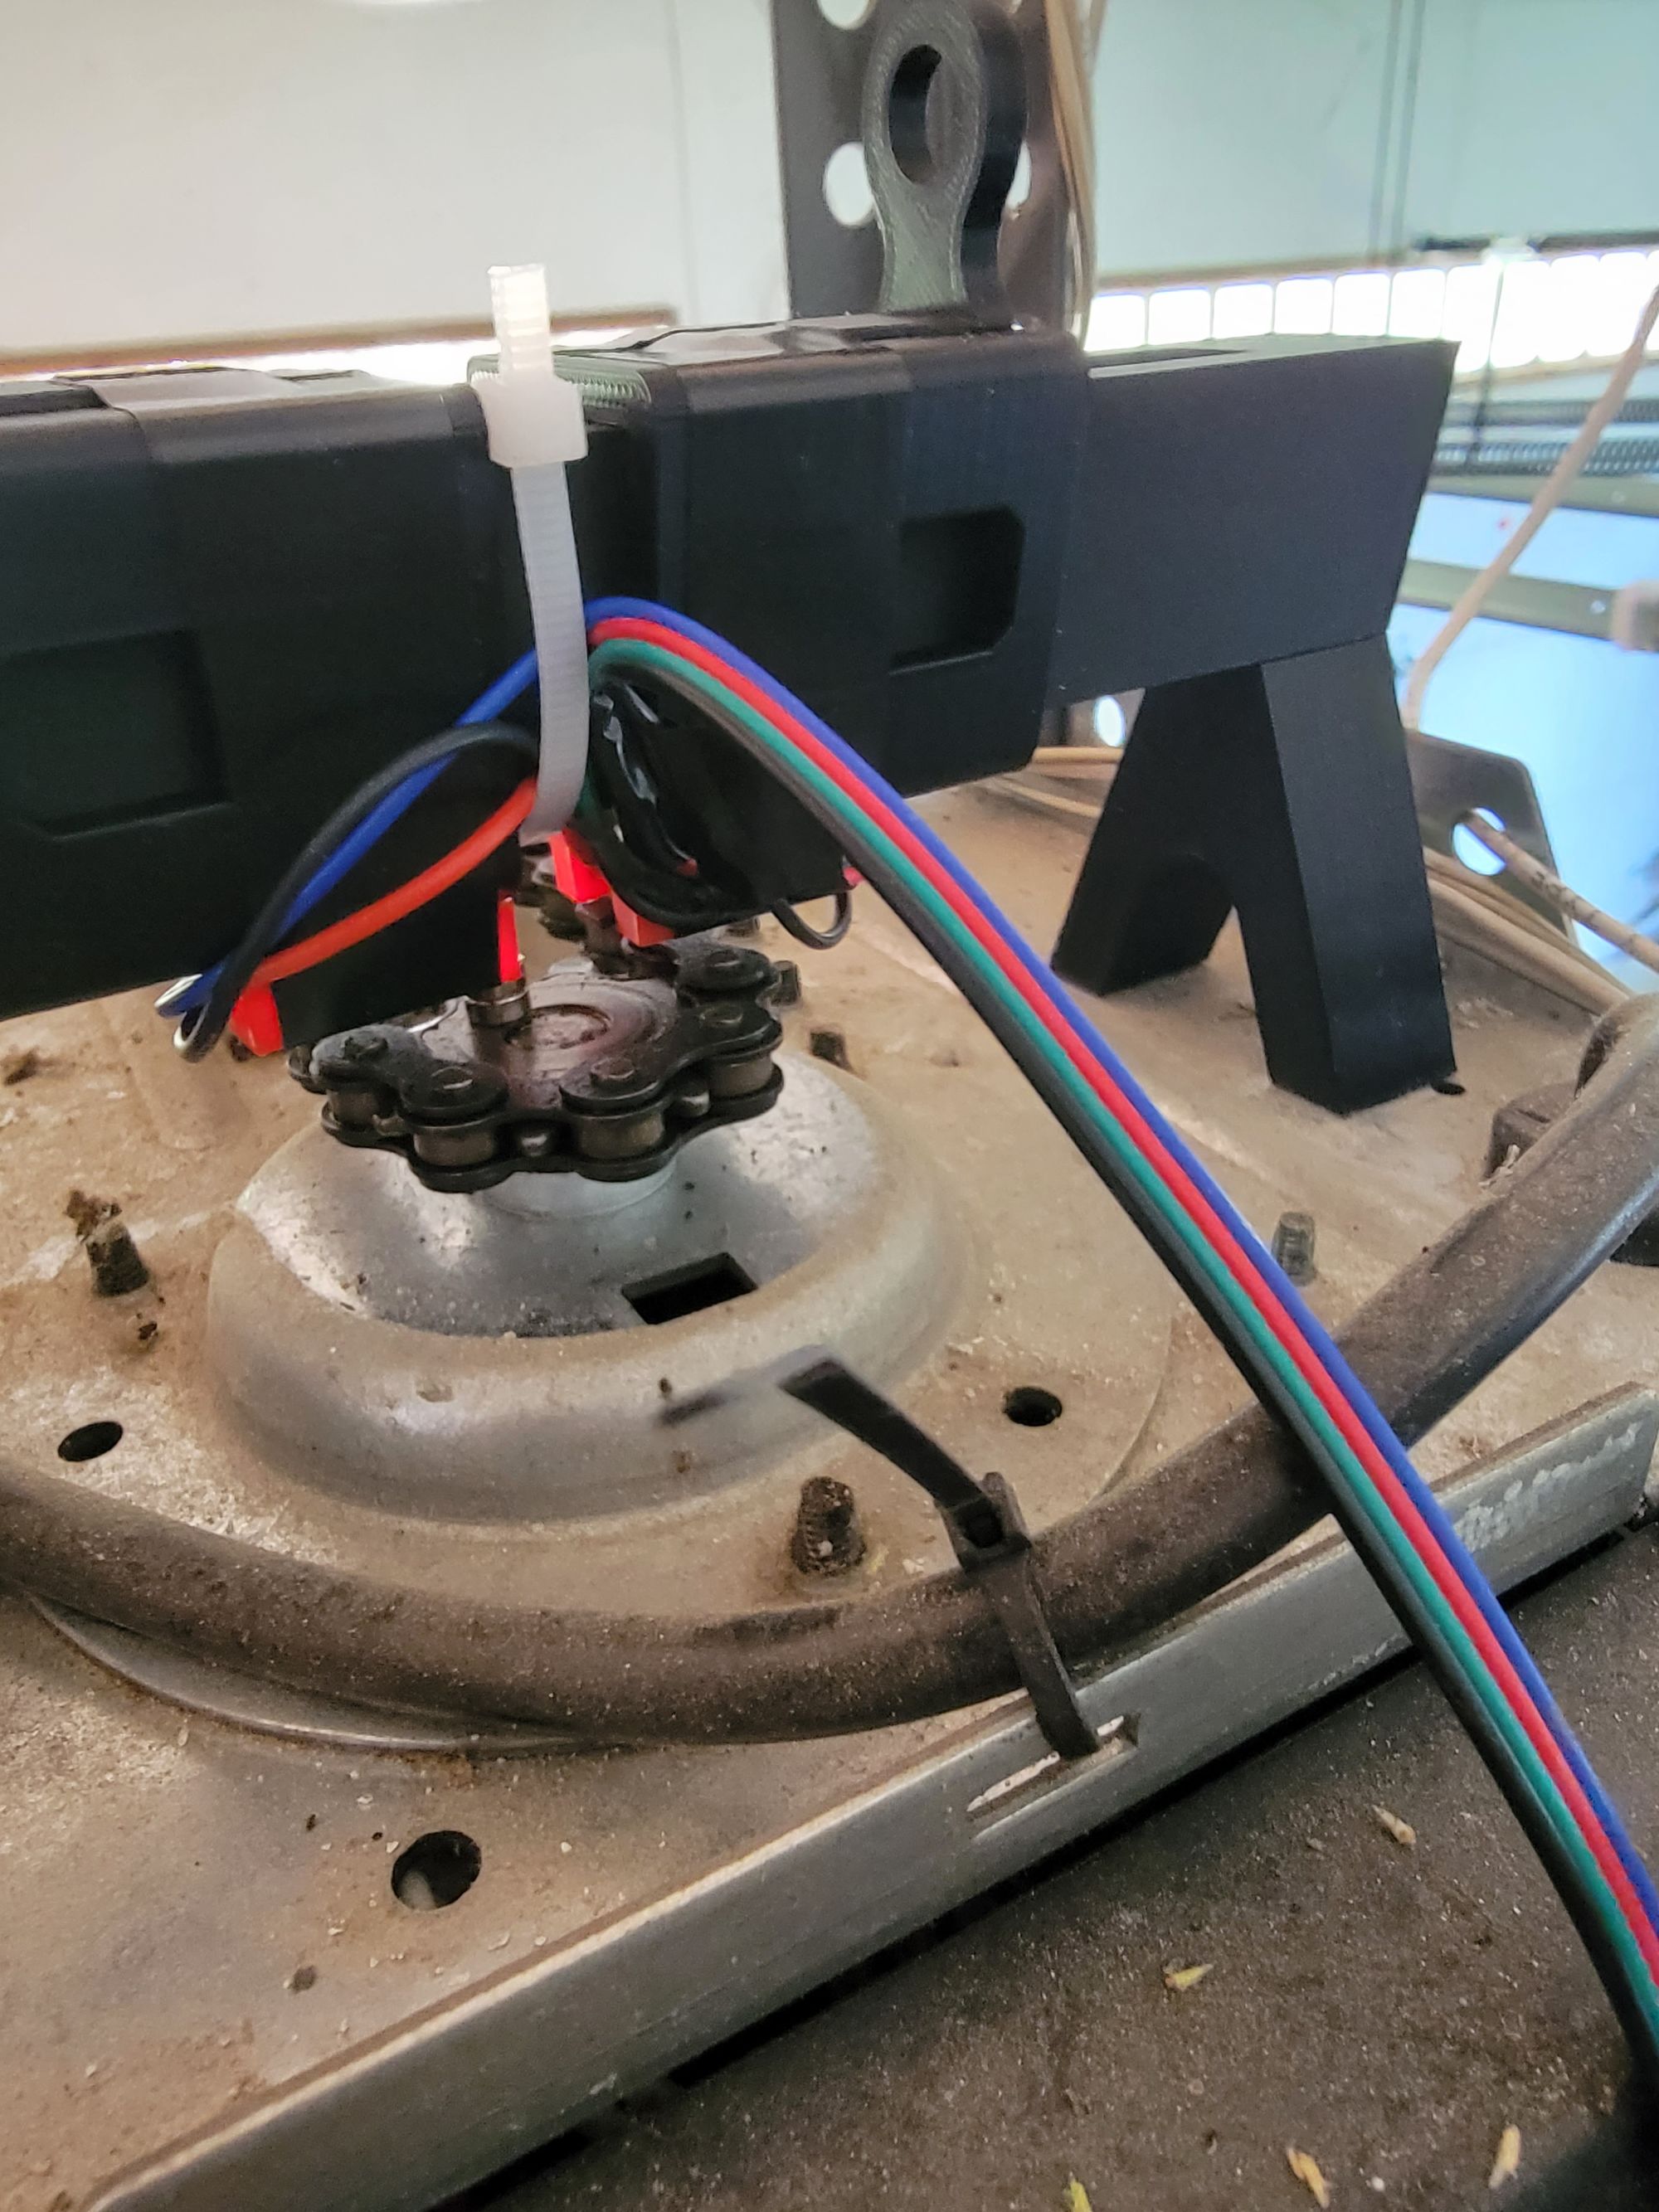
A lot of the assembly depends on your garage door setup. For the door reed switches I put the closed switch at the top center and the opened switch on the rail using a 3d printed rail bracket. You'll have to figure out what works best for your setup.

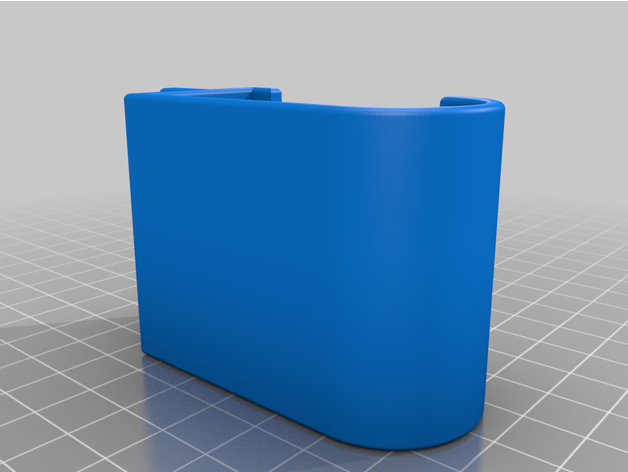
I was trying to figure out a good way of placing the hall effect sensors above the sprocket and my initial thought was something like helping hands. I don't remember how but I ended up finding this gantry crane for model trains and thought this could work!

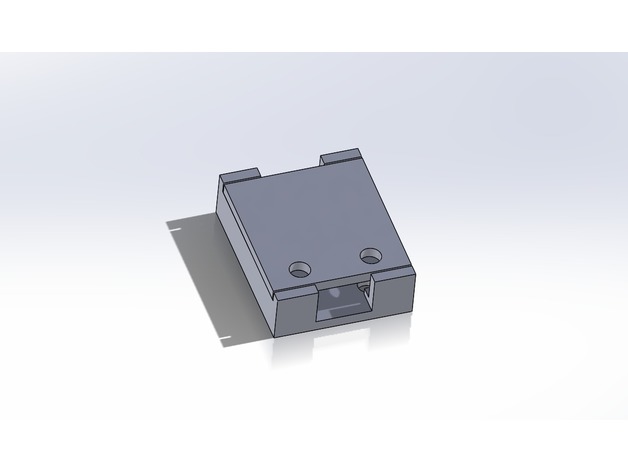
I modified the legs to be shorter and accept magnets to keep it solidly attached above the sprocket. I'll post that STL file below. I printed a carriage for each sensor and a small case to hold the sensor and taped that to the carriage.
A note of warning: It's a good idea to unplug the opener while working near the drive mechanism. My sprocket has a protective cover that I had to remove. You'll have to be extra careful now and in the future as the sprocket is more exposed than it would normally be.
Magnet positioning
Timing algorithm
With the timing based method you can place a single magnet (I double stack them for a stronger magnetic field and to allow the sensors to be farther from the sprocket) anywhere near the outer edge of the sprocket. You want to offset the hall effect sensors so they are closer to the edge of the sprocket. In general you want the magnet to trigger one sensor and then the second after about 90° rotation. The remaining 270° shouldn't trigger anything. Positioning isn't that important as long they don't trigger close to 180° apart.
Quadrature encoding algorithm
You need two magnets on opposite edges of the sprocket. Try to arrange them in a perfect line across the center of the sprocket. Place the hall effect sensors above them then push one magnet a little to one side. The goal is to make sure the sensors are triggering in the proper pattern A on, B on, A off, B off. You may need to adjust the magnets a little more until it works. And if you don't want to bother with such precision the Timing algorithm works just fine.
Home Assistant
MQTT Cover config
mqtt:
  cover:
  - unique_id: 'garage0'
    name: "Dads Garage"
    command_topic: "esp32/garage/0/set"
    position_topic: "esp32/garage/0/position"
    state_topic: "esp32/garage/0/state"
    availability:
      - topic: "esp32/garage/availability"
    payload_open: "open"
    payload_close: "close"
    payload_stop: "stop"
    optimistic: false
Custom Cover module
 marcelhoogantink
The default cover card should work fine but this module is much cooler than that since we have exact position information and it can show exactly how much the door is open in real time. The card config looks something like this. You would need to tweak the state settings if your garage doesn't behave like mine.
type: custom:enhanced-shutter-card
entities:
  - entity: cover.dads_garage
    name: Dad's Garage
    buttons_position: left
    title_position: top
    stop_disabled_states:
      - open
      - closed
      - closing
    up_disabled_states:
      - open
      - opening
    down_disabled_states:
      - closed
      - closing
      - opening
Stopped state
The Home Assistant cover interface doesn't support the stopped state as an end state. It assumes stopped means that it finished whatever the last action was. For my garage door's behavior it would make more sense to have stopped as a real end state so I could disable up and stop actions when the door is stopped. As it is, it will show the stop and close buttons when it's stopped and pressing either will make the door close. Oh well, maybe I need to put in a request for a new Home Assistant cover feature.
Notification options
MQTT makes it easy to setup notification for whatever you want.
- I've got some Node-RED automation that texts me if the garage doors are open at midnight. I should probably just change that to send a closed to the doors at midnight. The safety sensors should prevent squashing anyone.
- You could also set up a rule to let you know if the door is open for more than a certain amount of time.
- Simple opened/closed notifications if you are interested knowing every time there's a state change
Alexa
I guess I'd have to recommend the Home Assistant Cloud even though it's $65 a year. The DIY part of me is unhappy but the manual integration is not for the faint of heart. I did get things working and it helped that I have already developed some simple Alexa Skills. Here's the guide showing both options. If you're using something other than Home Assistant there might be simpler/cheaper integration.
 Home Assistant
alexa:
  smart_home:
    locale: en-US
    endpoint: https://api.amazonalexa.com/v3/events
    filter:
      include_entities:
        - cover.dads_garage
        - cover.moms_garage
    entity_config:
      cover.dads_garage:
        name: "Dads Garage"
      cover.moms_garage:
        name: "Moms Garage"
Notes
- A LoRa based clicker for the car would be cool. The range on my normal car clicker is pretty poor.
- I should integrate the rotation stuff with my awning controller.
- Now that I'm exhausted from pressing garage buttons and telling Alexa to open and close the garage I'm thinking it would be cool if the door would auto-close once it detects the car left. And I guess auto-open when it gets back home. Some kind of proximity sensor in the car...how does the Bat Cave work anyway?