Time-lapse - Intervalometer
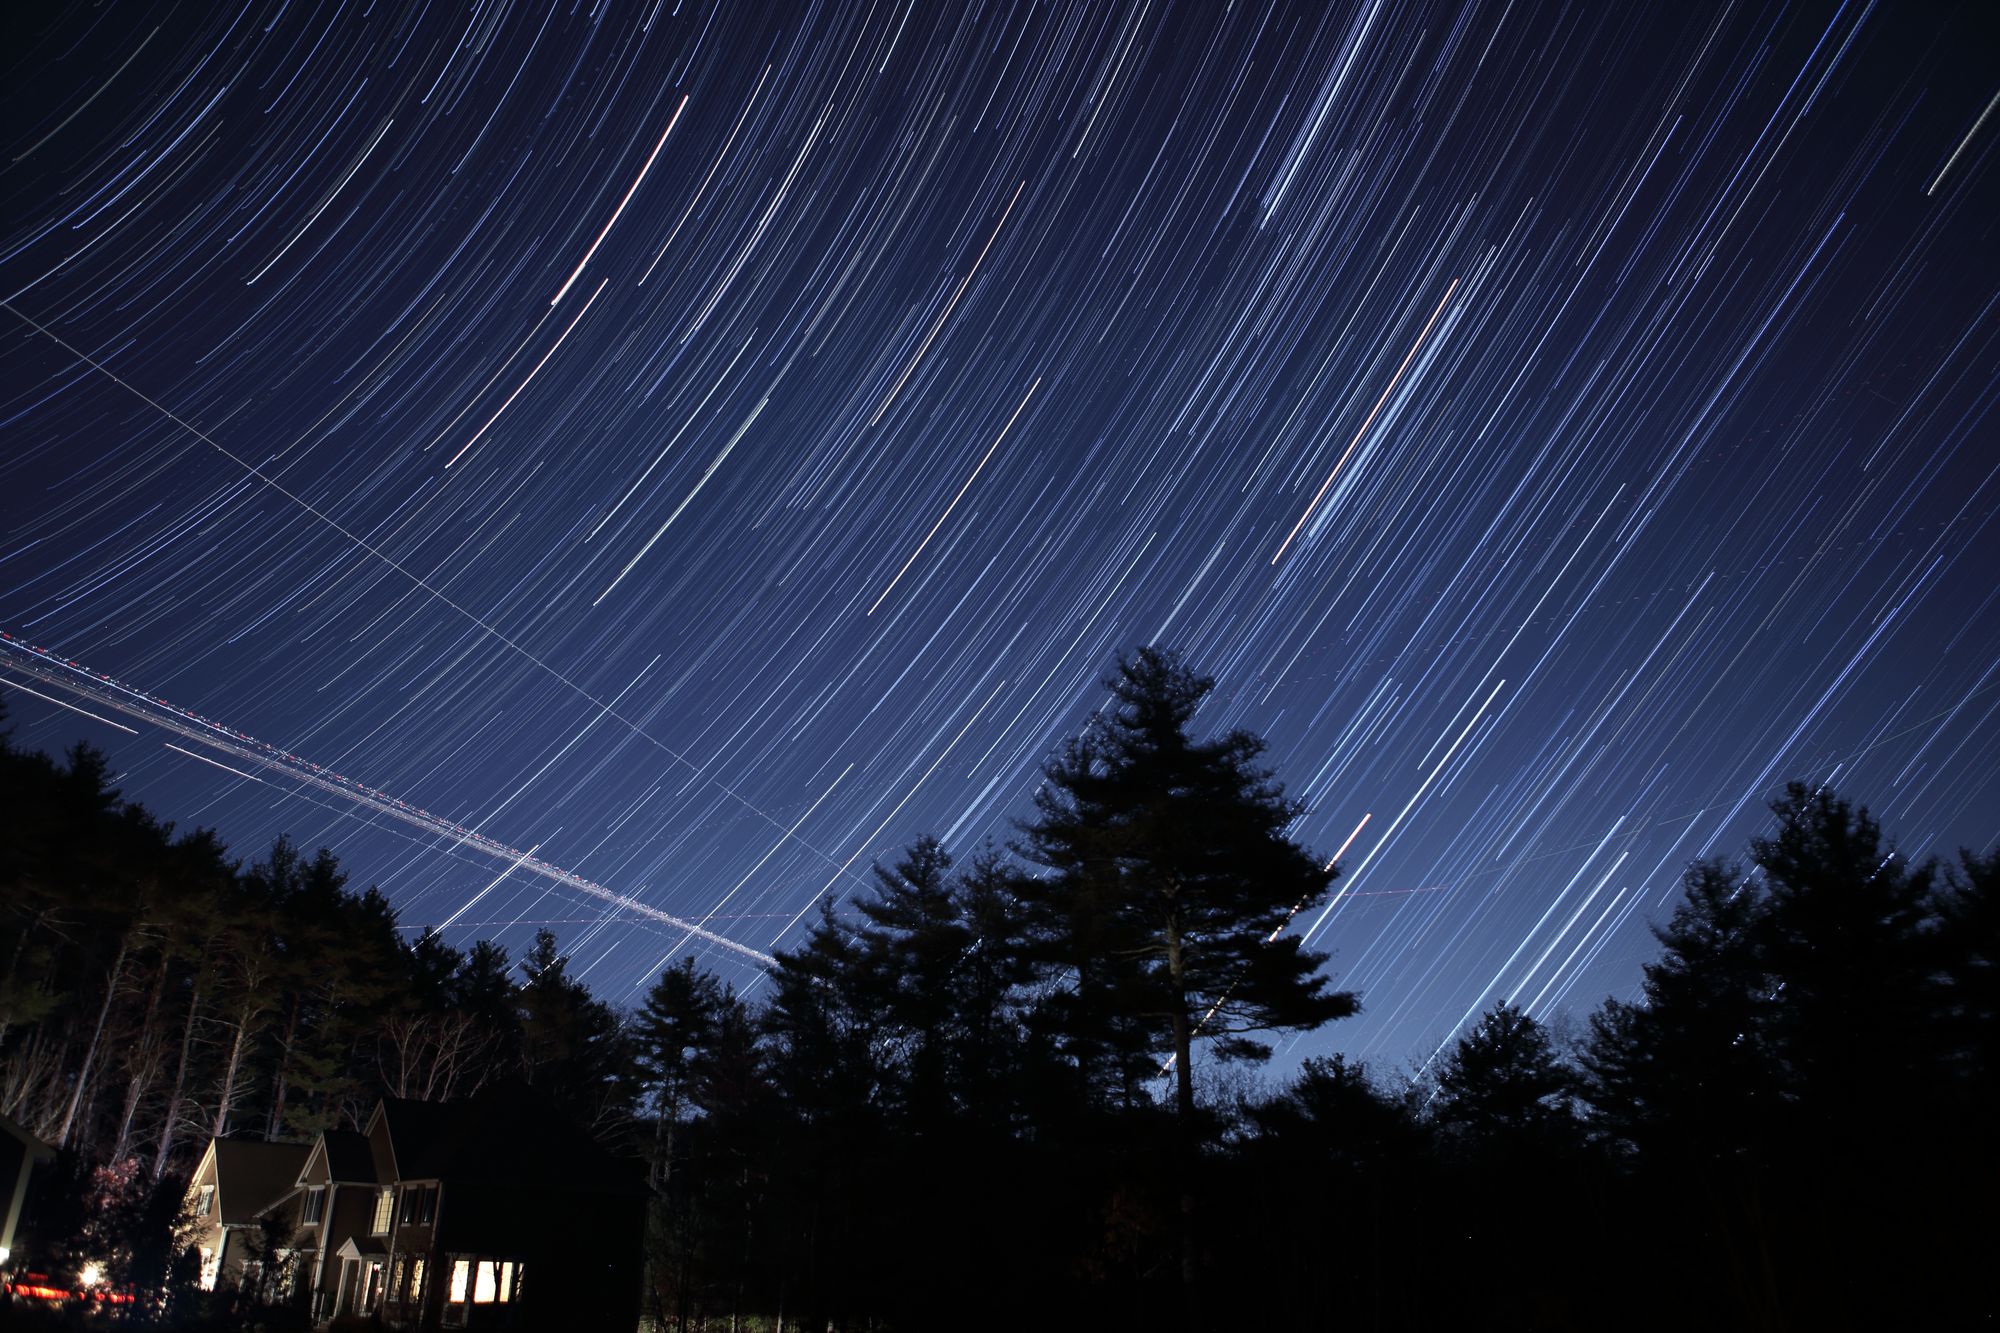
I guess one of the few good things about COVID is you find new stuff to do while you're stuck at home. I had previously taken some decent pics of a blood moon and while I was googling the best camera settings to use for that I came across stuff about star trail photography. It turns out the best way to get a good one is to take a lot of pics over time and stitch them all together. It's like time lapse photography except you take all the photos and combine them into one instead of making a movie or something out of all the individual pics.
And the best way to do that is with an intervalometer, which is basically an automated shutter release. Tell it to press the shutter button for 30 seconds and release...and repeat that 100 more times please. A little bit more googling and it turns out I just need to complete the circuit to the shutter release pin on my Canon DSLR camera...sounds like a piece of cake!
The tricky part is mainly what kind of interface you want to dial in your settings. How long to hold the shutter open, how much of a delay between pics, and how many pics to take? Battery life could be a concern depending on how long of a time lapse you have in mind. I just needed something that could last an hour or so to get star movement like you see above.
I'd guess the camera built into your phone wouldn't do a great job with these dark, long exposure pics. What we'll be building here is for SLR cameras with a manual shutter release option.
Disclaimer: I've tested this with my Canon 6D but you need to verify the pinouts for the camera you have!

There's a cool looking dilapidated house from the 1800's(?) a little right of center at the bottom but it came out completely black. I think I'll try it again and shine a flashlight on it in a frame at the beginning of the time-lapse.
Supplies
I'm tempted to suggest some ESP32 dev board with a built in display but I'm just going to describe what I've already got working.
- FireBeetle ESP32 - very good for low power consumption
- KY-040 Rotary Encoder - For selection of config options
- OLED Display - 0.96" 128x64 - Display config menu and status
- Battery with JST connector - or something similar (the FireBeetle has built-in charging circuitry for a solar panel, etc.) You also need to be careful as sometimes the +/- the FireBeetle wants are swapped on the battery.
- Optional - JST wires - I used these to make an adapter to switch the battery +/- instead of permanently rewiring the battery
- Optional - LiPo battery charger - you can plug a USB cable into the FireBeetle and it will charge the attached battery. This will work if you want an external charger for whatever reason.
- Optional - Solar panel - this is an option for a long timelapse session during the day
- Shutter release - get a cheap one since we just want the camera connector. This works for my Canon camera. I would assume other camera manufacturers are similar but you'll need to figure out what pinouts are right for your brand/model.
- Optocoupler - this provides a small measure of isolation between the ESP32 and the camera and could protect the camera in case of a short circuit.
- Dupont wires
- Multimeter - helpful for finding the correct shutter release wires
- Soldering iron
When you purchase through links on this site, I may earn an affiliate commission.
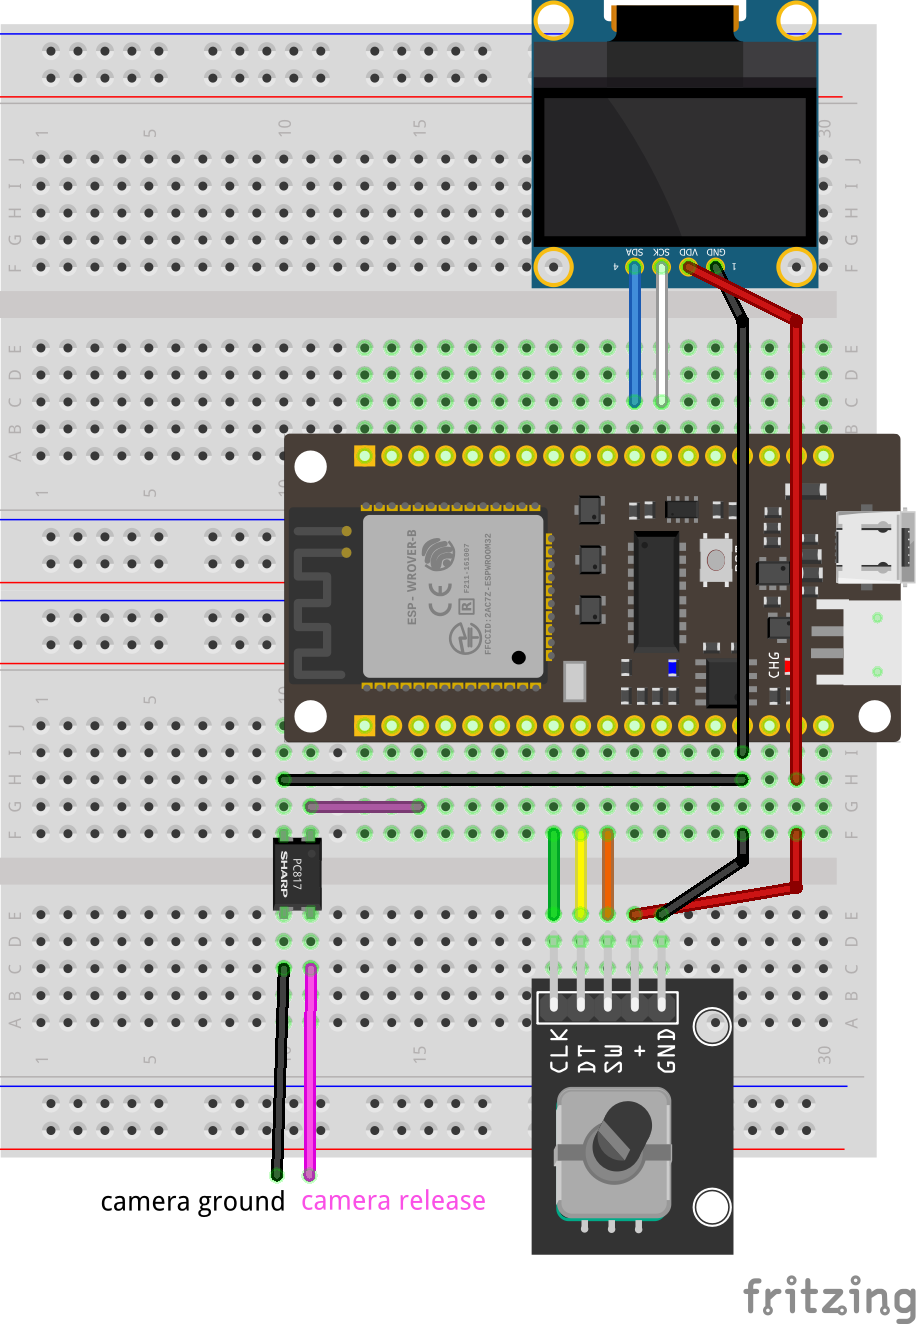
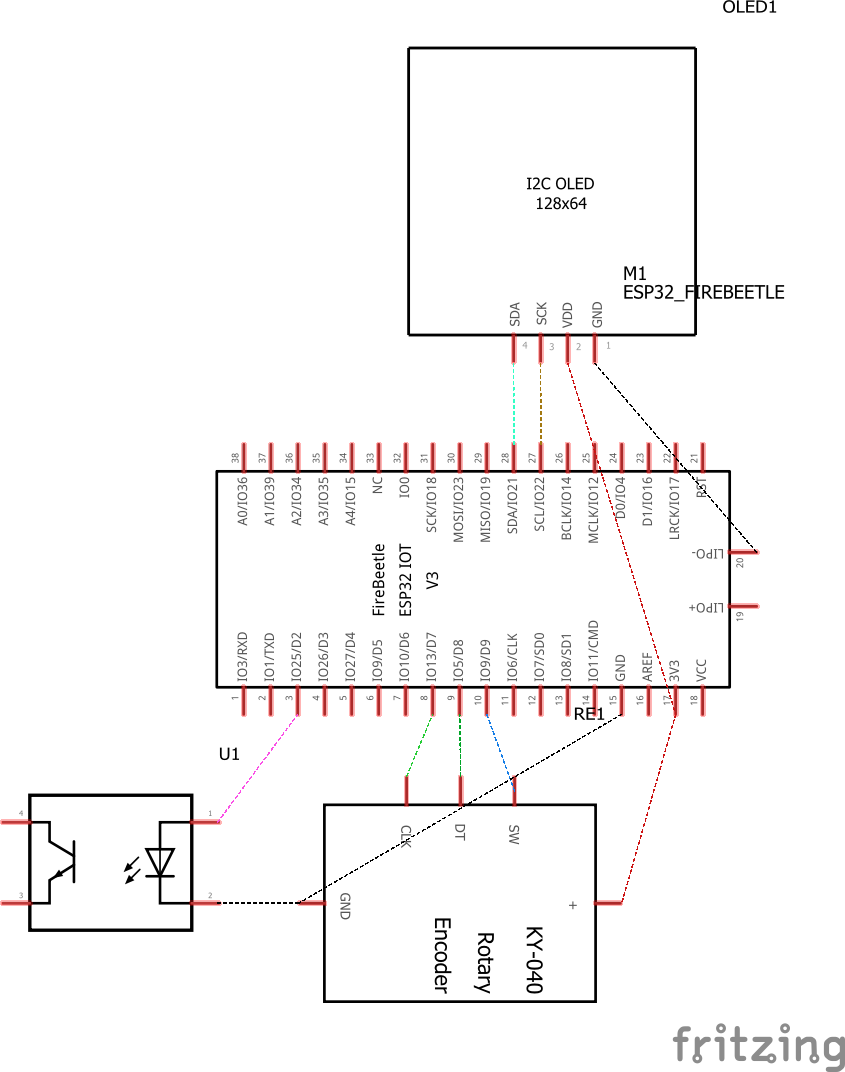
Wiring
Code
Getting Started With Micropython
ssd1306 driver
Grab that from here and upload to the root of the ESP32.
micropython-rotary
 miketeachman
Grab rotary.py and rotary_irq_esp.py and upload them to the ESP32.
Micropython encoder based menu
sgall17aFor reference only. The configuration isn't well decoupled so I've included a modified copy in my repo below.
This project's code
scareyGrab main.py and encoder_menu.py and upload them to the root of the ESP32.
Assembly
- Cut the shutter release cable a few inches below the controls. I figured having that few inches would make it easier to re-use the controls for some other project.
- Find your camera's shutter release pinouts. You need to determine the ground and shutter pins. A lot of info can be found here: https://web.archive.org/web/20250216001855/http://doc-diy.net/photo/eos_wired_remote/
- Figure out which wires are shutter and ground in the shutter release cable you cut. The multimeter comes in handy here along with a staple or some other thin piece of metal to poke into the small holes in the shutter release connector.
- Solder the optocoupler (orient so the small dot in the corner is at the top left) :
- pin 1 (top left) - to IO25 on the FireBeetle.
- pin 2 (bottom left) - to ground on the FireBeetle.
- pin 3 (bottom right) - to ground wire of shutter release cable
- pin 4 (top right) - to shutter release wire of shutter release cable
- Connect the OLED display and rotary encoder as shown in the wiring diagram.
Camera Settings
A great reference is:

The intervalometer settings I use are 100 pictures, 30 second exposure, 1 second delay in between and the camera set to:
- Shutter speed: Manual/Bulb
- Aperture: 2.8 if no moonlight, 5.6 if some moonlight
- ISO: 300
- Manual focus - infinity works well for me though there are devices like this to help with accurate focus. See below.

Software
I liked this free software that can stitch the individual photos together. I used Blending Mode -> Gap Filling but feel free to play around with the settings.
